Discover various methods for extracting honey without an extractor, including crush and strain, cut comb, and gravity separation. Learn about the necessary equipment, step-by-step guides, and tips for successful extraction and proper storage.
Methods for Extracting Honey without an Extractor
When it comes to extracting honey from the comb without using an extractor, there are a few methods that beekeepers can employ. Each method offers its own unique advantages and can be chosen based on personal preference or the available equipment. In this section, we will explore three popular methods: the Crush and Strain Method, the Cut Comb Method, and the Gravity Separation Method.
Crush and Strain Method
The Crush and Strain Method is a simple yet effective way to extract honey without the need for an extractor. This method involves crushing the honeycomb to release the honey and then straining it to separate the wax and other debris. Here’s a step-by-step guide on how to use this method:
- Step 1: Prepare the Equipment
To start, gather the necessary equipment, including a large bowl or bucket, a fine mesh strainer, and a spoon or spatula for crushing the honeycomb. - Step 2: Uncap the Honeycomb
Using an uncapping knife or fork, remove the wax caps from the honeycomb cells. This will expose the honey for extraction. - Step 3: Crush the Honeycomb
Place the uncapped honeycomb into the bowl or bucket and use the spoon or spatula to crush it. The goal is to break open the cells and release the honey. - Step 4: Strain the Crushed Honeycomb
Once the honeycomb is crushed, pour the mixture through the fine mesh strainer. This will separate the honey from the wax and any other impurities. Allow the honey to strain completely, and then transfer it to a clean container for storage.
Cut Comb Method
The Cut Comb Method is another popular way to extract honey without an extractor. This method involves cutting the honeycomb into small pieces and packaging them along with the honey. Here’s how you can extract honey using the Cut Comb Method:
- Step 1: Prepare the Equipment
Gather the necessary equipment for this method, including a sharp knife, containers for packaging the cut comb honey, and a clean work surface. - Step 2: Uncap the Honeycomb
Using an uncapping knife or fork, remove the wax caps from the honeycomb cells. This will expose the honey for extraction. - Step 3: Cut the Honeycomb
Carefully cut the honeycomb into small, bite-sized pieces. These pieces will become the comb honey that you will package along with the extracted honey. - Step 4: Package the Cut Comb Honey
Place the cut comb honey into containers, ensuring that each container has a good balance of honey and comb. Seal the containers properly to prevent any leakage. The cut comb honey is now ready for consumption or sale.
Gravity Separation Method
The Gravity Separation Method is a unique approach to extracting honey without the use of an extractor. This method takes advantage of the natural force of gravity to separate the honey from the comb. Let’s take a look at the step-by-step process for using this method:

- Step 1: Prepare the Equipment
Gather the necessary equipment, including a container with a tight-fitting lid, a fine mesh strainer, and a clean work area. - Step 2: Uncap the Honeycomb
Using an uncapping knife or fork, remove the wax caps from the honeycomb cells. This will expose the honey for extraction. - Step 3: Place Honeycomb in a Container
Carefully place the uncapped honeycomb into the container. Make sure that the container has a tight-fitting lid to prevent any spills or leaks. - Step 4: Let Gravity Separate the Honey
Allow the container to sit undisturbed for a period of time, typically 24 to 48 hours. During this time, the honey will naturally separate from the comb and settle at the bottom of the container. Once the separation is complete, carefully pour off the honey, leaving behind the wax and other debris.
Equipment Needed for Extracting Honey without an Extractor
Extracting honey without an extractor is a simple and cost-effective method that can be done with just a few essential tools. In this section, we will discuss the equipment needed for this process.
Hive Tool
One of the most important tools for extracting honey without an extractor is a hive tool. This versatile tool is commonly used by beekeepers for various tasks, including prying open hive boxes, scraping off propolis, and loosening frames. When it comes to honey extraction, the hive tool is used to carefully remove the frames from the beehive. Its flat, thin blade easily slips between the frames and the hive body, allowing you to lift them out without causing any damage to the comb.
Uncapping Knife or Fork
To access the honey inside the comb, you will need an uncapping knife or fork. This tool is specifically designed to remove the protective wax cappings that cover the cells of the honeycomb. There are two main types of uncapping tools: knives and forks.
- Uncapping Knife: An uncapping knife is a heated knife that glides smoothly over the comb, melting away the wax cappings. It is important to heat the knife before each pass to ensure clean and efficient uncapping. The heat from the knife helps the wax melt and prevents it from sticking to the knife, making the uncapping process much easier.
- Uncapping Fork: An uncapping fork, on the other hand, is a handheld tool with multiple sharp tines. It is used to scrape off the wax cappings from the comb manually. This method requires a bit more effort and time compared to using a knife, but it is equally effective for uncapping the honeycomb.
Both the uncapping knife and fork are readily available at beekeeping supply stores and online. It’s a good idea to have both options on hand so you can choose the method that suits your preference or the condition of the honeycomb.
Fine Mesh Strainer
Once the honeycomb is uncapped, the next step is to separate the honey from the wax and other impurities. This is where a fine mesh strainer comes into play. A fine mesh strainer, also known as a honey filter or sieve, is a crucial tool for achieving a smooth and clean end product.
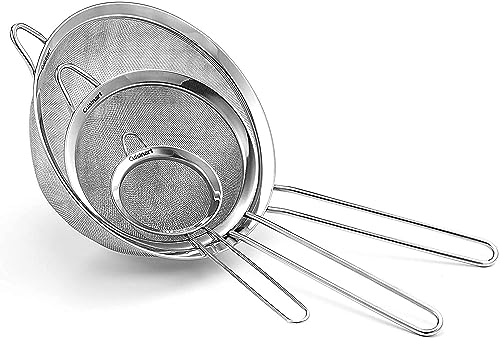
The purpose of the fine mesh strainer is to remove any leftover wax, bee parts, or other debris that may be present in the honey. The mesh is designed to catch these unwanted particles while allowing the honey to pass through freely. The resulting honey is clear, pure, and ready for consumption or further processing.
When choosing a fine mesh strainer, opt for one with a mesh size of around 400 to 600 microns. This ensures that even the smallest impurities are captured, leaving you with a high-quality honey. You can find fine mesh strainers specifically made for honey extraction at beekeeping supply stores or online.
Preparing the Hive for Honey Extraction without an Extractor
When it comes to extracting honey without an extractor, proper preparation of the hive is essential. This involves a few key steps to ensure a smooth and successful extraction process. Let’s take a closer look at each of these steps:
Removing Bees from the Super
Before you can begin extracting honey from the hive, it’s important to remove the bees from the super. The super is the box where the bees store their honey, and it needs to be separated from the rest of the hive to avoid disturbing the bees during the extraction process.
To remove the bees, you can use a bee escape board. This device allows the bees to exit the super but prevents them from re-entering. Simply place the bee escape board between the super and the rest of the hive, and the bees will gradually leave the super and move to other parts of the hive.

Uncapping the Honeycomb
Once the bees have been successfully removed from the super, the next step is to uncapp the honeycomb. Uncapping refers to the process of removing the thin layer of beeswax that seals the honey cells. This allows the honey to be released during the extraction process.
To uncapp the honeycomb, you will need an uncapping knife or fork. These tools have a serrated edge that easily cuts through the beeswax. Gently run the knife or fork along the surface of the honeycomb, removing the wax and exposing the honey-filled cells beneath.
Transferring Honeycomb to Extraction Container
After uncapping the honeycomb, it’s time to transfer it to an extraction container. This container will collect the honey as it is released from the comb. There are various types of extraction containers available, including buckets, pans, or even large jars.
Carefully lift the uncapped honeycomb from the super and place it in the extraction container. Be sure to handle the comb with care to avoid damaging it and releasing excess beeswax into the honey. It’s important to note that gravity separation is often used as a method to separate the honey from the comb in this process.

To facilitate gravity separation, consider using a fine mesh strainer to filter out any impurities or beeswax particles that may have fallen into the extraction container. This will ensure that you end up with a clean and pure honey product.
In summary, preparing the hive for honey extraction without an extractor involves removing the bees from the super, uncapping the honeycomb, and transferring it to an extraction container. These steps are crucial for a successful extraction process and will help you obtain high-quality honey without the need for specialized equipment. By following these guidelines, you can enjoy the fruits of your bees’ labor and savor the sweet taste of homemade honey.
Preparing the Hive for Honey Extraction without an Extractor
Crush and Strain Method Step-by-Step Guide
The crush and strain method is a simple and effective way to extract honey without the need for an extractor. This method involves crushing the honeycomb and then straining out the honey, leaving behind any wax or debris. In this step-by-step guide, we will walk you through the process of using the crush and strain method to extract honey from your hive.
Step 1: Prepare the Equipment
Before you begin the honey extraction process, it is important to gather all the necessary equipment. Here are the items you will need:
- A bucket or container for collecting the honey
- A honeycomb frame or comb
- A knife or uncapping fork
- A mesh strainer or cheesecloth
- A spatula or spoon for crushing the honeycomb
Make sure that all your equipment is clean and in good condition. This will help ensure that your honey extraction process goes smoothly and that your honey remains pure and uncontaminated.

Step 2: Uncap the Honeycomb
To begin the extraction process, you will need to uncap the honeycomb. Using a knife or uncapping fork, gently remove the wax cappings from the cells of the honeycomb. This will expose the honey and allow it to be released during the crushing and straining process.
Step 3: Crush the Honeycomb
Once the honeycomb is uncapped, it is time to crush it to release the honey. Using a spatula or spoon, carefully crush the honeycomb cells. This will break open the cells and allow the honey to flow out.
It is important to note that the honeycomb should be crushed gently to avoid damaging the wax or introducing any impurities into the honey. Take your time and crush the honeycomb in small batches to ensure thorough extraction.
Step 4: Strain the Crushed Honeycomb
After crushing the honeycomb, it is time to strain out the honey from the crushed cells. Place a mesh strainer or cheesecloth over your collection container, ensuring that it is secured and stable.
Carefully pour the crushed honeycomb onto the strainer, allowing the honey to flow through while trapping any wax or debris. Use a spoon or spatula to press down on the crushed honeycomb, helping to extract every last drop of honey.
Once the honey has been strained, you can discard the remaining wax and debris. The strained honey can now be transferred to storage containers for future use or consumption.
Using the crush and strain method may require a bit more effort compared to using an extractor, but it is a cost-effective and accessible option for small-scale beekeepers or those who do not have access to an extractor. Plus, it allows you to appreciate the process of honey extraction and savor the unique flavors of your homemade honey.
(Note: Please refer to the “
Equipment Needed for Extracting Honey without an Extractor” section for information on the necessary equipment for the crush and strain method.)
Cut Comb Method Step-by-Step Guide
Are you interested in extracting honey without the need for an extractor? The cut comb method is a simple and effective way to enjoy the purest form of honey straight from the hive. In this step-by-step guide, we will walk you through the process of preparing the equipment, uncapping the honeycomb, cutting the honeycomb, and packaging the cut comb honey. Let’s get started!
Step 1: Prepare the Equipment
Before you begin the cut comb method, it’s essential to gather the necessary equipment. Here’s what you’ll need:
- Hive Tool: A hive tool is a versatile tool used by beekeepers to pry open beehives, remove frames, and scrape away excess wax and propolis. It will come in handy when handling the honeycomb.
- Uncapping Knife or Fork: An uncapping knife or fork is used to remove the thin layer of beeswax that seals the honey in the comb. This step allows the honey to be easily accessible for cutting.
- Fine Mesh Strainer: A fine mesh strainer is used to filter out any wax particles or impurities from the honey during the packaging process. It ensures that the final product is smooth and free of debris.
Step 2: Uncap the Honeycomb
Once you have gathered the necessary equipment, it’s time to uncapped the honeycomb. This step involves removing the beeswax seal that covers the honey within the comb. Follow these simple steps:
- Place the honeycomb on a stable surface, such as a cutting board or a clean table.
- Using the uncapping knife or fork, gently scrape off the beeswax from the surface of the honeycomb. Be careful not to damage the delicate comb structure or disturb the honey within.
- Continue uncapping the entire surface of the honeycomb until all the cells are exposed. This will allow the honey to flow freely when it comes time to cut the comb.
Step 3: Cut the Honeycomb
With the honeycomb uncapped, it’s time to cut it into desired portions. Here’s how you can do it:
- Using a sharp knife or a serrated honey knife, carefully cut the honeycomb into individual sections. You can choose to cut it into squares, rectangles, or any shape that suits your preference.
- While cutting, make sure to keep the comb intact and avoid crushing the cells as much as possible. The goal is to maintain the beautiful structure of the comb while separating it into manageable pieces.
- As you cut the honeycomb, you will notice the golden honey oozing out from the cells. This is the purest form of honey, filled with all the natural flavors and aromas that make it so special.
Step 4: Package the Cut Comb Honey
Once the honeycomb is cut into individual portions, it’s time to package and present the cut comb honey. Follow these final steps:
- Place the cut comb honey into clean glass jars or containers. Make sure the containers are food-grade and have tight-fitting lids to preserve the freshness of the honey.
- If desired, you can add a label or a tag to the container, indicating the type of honey and the date of extraction. This will help you keep track of the honey’s age and flavor profile.
- Store the packaged cut comb honey in a cool and dark place to maintain its quality. Avoid exposing it to direct sunlight or extreme temperatures, as this can affect the taste and texture of the honey.
Congratulations! You have successfully extracted honey using the cut comb method. Now you can enjoy the sweet rewards of your hard work and savor the natural goodness of honey straight from the hive.
Remember, the cut comb method allows you to experience honey in its purest form, with the comb adding a delightful texture and a unique taste. Whether you spread it on toast, drizzle it over desserts, or enjoy it right off the spoon, cut comb honey is a delicious treat that showcases the wonders of beekeeping.
So why wait? Grab your hive tool, uncapping knife or fork, and get ready to embark on a honey extraction journey like no other. The cut comb method is not only a fantastic way to enjoy honey, but it also allows you to connect with nature and appreciate the hard work of honeybees. Happy extracting!
Gravity Separation Method Step-by-Step Guide
The gravity separation method is a simple and effective way to extract honey without the need for an extractor. This method utilizes the natural force of gravity to separate the honey from the honeycomb. With just a few steps, you can successfully extract honey using this method. Let’s dive into the step-by-step guide:
Step 1: Prepare the Equipment
Before you begin the honey extraction process, it’s important to gather all the necessary equipment. Here’s what you’ll need:
- A shallow container or bucket: This will be used to hold the honeycomb during the extraction process.
- Honey uncapping tool: This tool is essential for removing the wax cappings from the honeycomb cells.
- Honey strainer or cheesecloth: To filter out any impurities or debris from the extracted honey.
- A clean and dry extraction container: This will be used to collect the honey as it separates from the honeycomb.
Make sure that all your equipment is clean and free from any contaminants before starting the extraction process. This will help maintain the quality and purity of your honey.
Step 2: Uncap the Honeycomb
Once you have gathered all the necessary equipment, it’s time to uncap the honeycomb. Using a honey uncapping tool, gently remove the wax cappings from the cells of the honeycomb. This will expose the honey stored inside the comb and allow it to flow freely during the gravity separation process.
Step 3: Place Honeycomb in a Container
After uncapping the honeycomb, carefully place it in a shallow container or bucket. Ensure that the container is clean and properly sanitized to prevent any contamination of the honey. Make sure to handle the honeycomb with care to avoid damaging the delicate cells.
Step 4: Let Gravity Separate the Honey
Now comes the crucial step of allowing gravity to do its work. Place the container with the honeycomb in a location where it can rest undisturbed for a period of time. This will allow the honey to naturally separate from the honeycomb and collect at the bottom of the container.
Gravity separation works by the principle that honey is denser than air or wax, causing it to settle at the bottom while the lighter substances float to the top. The process may take several hours or even a few days, depending on the temperature and humidity conditions. Patience is key during this step.
As the honey slowly separates, you will notice a layer of wax and other impurities floating on the surface. To ensure a clean and pure extraction, gently skim off this layer using a clean spoon or a honey strainer. This will help remove any debris and impurities that may have settled on top of the honey.
Once the gravity separation process is complete and the honey has settled at the bottom of the container, carefully pour the honey into a clean and dry extraction container. You can use a honey strainer or cheesecloth to filter out any remaining impurities or wax particles.
Congratulations! You have successfully extracted honey using the gravity separation method. Remember to store your extracted honey in a cool and dark place to maintain its quality and prevent spoilage.
Tips for Successful Honey Extraction without an Extractor
Use Ripe Honeycomb
When it comes to extracting honey without an extractor, using ripe honeycomb is crucial for a successful process. Ripe honeycomb refers to the honeycomb that is fully capped and ready for extraction. This means that the bees have sealed the honey inside the cells with a layer of beeswax, indicating that the honey has reached the desired moisture content.
Using ripe honeycomb ensures that the honey is fully matured and has developed its distinct flavor and aroma. It also makes the extraction process much easier as the beeswax cappings can be easily removed, allowing the honey to be released from the cells.
To determine if the honeycomb is ripe, gently tap on the cells. If you hear a dull thud instead of a sloshing sound, it means that the honey is properly capped and ready for extraction. Avoid using honeycomb that is not fully capped as it may contain high moisture content, which can lead to fermentation and spoilage of the honey.
Keep the Honeycomb at Optimal Temperature
Maintaining the honeycomb at an optimal temperature is essential for successful honey extraction without an extractor. The ideal temperature for honey extraction is around 95°F (35°C). At this temperature, the honey flows more easily, making it easier to separate from the honeycomb.
To achieve the optimal temperature, you can place the honeycomb in a warm room or use a heating pad set at a low temperature. It’s important to avoid overheating the honeycomb as excessive heat can degrade the quality of the honey and affect its flavor and nutritional properties.
It’s also worth noting that the temperature of the room or environment where the honey extraction takes place can also impact the viscosity of the honey. Cooler temperatures may cause the honey to thicken, while warmer temperatures may make it runnier. Finding the right balance is key to obtaining honey with the desired consistency.
Work in a Clean Environment
Creating a clean working environment is essential for successful honey extraction without an extractor. The cleanliness of your tools, workspace, and containers can greatly impact the quality and purity of the extracted honey.
Before starting the extraction process, ensure that all the equipment you’ll be using, such as knives, strainers, and containers, are thoroughly cleaned and sanitized. This helps prevent any contamination or introduction of foreign substances into the honey.
Additionally, it’s important to work in a clean and organized space. Remove any clutter or debris that could potentially come into contact with the honey. Use clean and dedicated surfaces for each step of the extraction process to avoid cross-contamination.
Maintaining a clean environment also extends to personal hygiene. It’s important to wash your hands thoroughly before handling the honeycomb or extracting the honey. This minimizes the risk of introducing bacteria or other contaminants into the honey.
By following these tips and ensuring the use of ripe honeycomb, maintaining optimal temperature, and working in a clean environment, you can successfully extract honey without the need for an extractor. Remember, the quality of the honey greatly depends on the care and attention given during the extraction process. So, take your time, enjoy the process, and savor the sweet rewards of your efforts.
Storing and Preserving Honey Extracted without an Extractor
Honey is a precious and delicious natural product that can be enjoyed in various ways. Once you have successfully extracted honey from your beehives without using an extractor, it is important to ensure that you store and preserve it properly to maintain its quality and freshness. In this section, we will discuss some key steps to follow for storing and preserving honey extracted without an extractor.
Properly Packaging the Honey
Proper packaging is essential to keep your honey safe and maintain its flavor. When packaging honey extracted without an extractor, it is crucial to use clean and sterile containers. Glass jars with tight-fitting lids are a popular choice for packaging honey as they are non-reactive and do not affect the taste or quality of the honey.
To start, ensure that the jars you are using are thoroughly cleaned and dry. Any residue or moisture in the jars can lead to fermentation or spoilage of the honey. Once the jars are clean, carefully pour the honey into them, leaving some headspace at the top. This headspace allows for expansion if the honey crystallizes over time.
Seal the jars tightly to prevent any air or moisture from entering. This will help maintain the freshness and quality of the honey for a longer period. Label each jar with the date of extraction and any other relevant information, such as the type of honey or the specific hive it came from.
Storing Honey in a Cool and Dark Place
After properly packaging the honey, it is important to store it in an appropriate environment to preserve its flavor and texture. Honey should be stored in a cool and dark place away from direct sunlight and heat sources. Excessive exposure to light and heat can cause the honey to degrade and lose its nutritional value.
Ideally, find a pantry or cupboard that maintains a consistent temperature between 50-70°F (10-21°C). Fluctuations in temperature can cause the honey to crystallize or ferment. Avoid storing honey in the refrigerator, as the cold temperature can accelerate crystallization.
Additionally, make sure that the storage area is dry and free from any strong odors. Honey has the ability to absorb odors from its surroundings, which can affect its taste. Keeping the honey in airtight containers will also help prevent moisture absorption and maintain its quality.
Monitoring Honey for Signs of Spoilage
Even with proper packaging and storage, it is important to periodically check your stored honey for any signs of spoilage. While honey has a long shelf life, it can still spoil under certain conditions. Regular monitoring will ensure that you catch any potential issues early on.
Inspect the jars of honey for any signs of mold, fermentation, or off-putting odors. If you notice any discoloration, bubbling, or a sour smell, it is an indication that the honey may have spoiled and should not be consumed.
Another important aspect of monitoring honey is checking for crystallization. Crystallization is a natural process in which the sugars in honey form crystals, causing the honey to become thick and grainy. This does not indicate spoilage, but rather a change in texture. To liquefy crystallized honey, simply place the jar in a warm water bath and gently stir until the crystals dissolve.
By properly packaging, storing, and monitoring your honey, you can ensure that it remains fresh and delicious for an extended period. Enjoy the fruits of your labor and savor the sweetness of your homemade honey in various culinary creations or simply drizzled over your favorite treats.
Remember, honey is a natural product and its quality can vary depending on factors such as floral sources, climate, and beekeeping practices. Embrace the uniqueness of your homemade honey and share its wonderful flavors with family and friends.