Explore the benefits of top bar hive plans for sustainable and cost-effective beekeeping. Follow step-by-step instructions, learn maintenance techniques, and troubleshoot common challenges with these natural beekeeping practices. Find resources and further reading to enhance your beekeeping journey.
Benefits of Using Top Bar Hive Plans
Natural Comb Building
Natural comb building is one of the key benefits of using top bar hive plans. Unlike traditional hive designs that use pre-made frames with wax foundation, top bar hives allow bees to build their own comb in a more natural and organic way. This is important because it encourages bees to create comb that is better suited to their needs and instincts. The bees are able to build the comb in a manner that allows for optimal brood rearing and honey storage. The natural comb also provides a more authentic and unprocessed honey, as it is free from any chemicals or artificial additives.
Sustainable Beekeeping Practices
Top bar hives promote sustainable beekeeping practices. The design of these hives focuses on providing a more natural and holistic environment for the bees. The use of natural comb building, as mentioned earlier, is just one aspect of this sustainability. Additionally, top bar hives are often made from sustainable materials such as untreated wood, which helps to reduce the environmental impact of beekeeping. The design of the hive also allows for easier management and inspection, reducing stress on the bees and minimizing disturbance to the colony. Overall, using top bar hive plans is a step towards more sustainable and eco-friendly beekeeping practices.
Cost-Effectiveness
Another advantage of using top bar hive plans is the cost-effectiveness they offer. Compared to traditional hive designs, top bar hives can be more affordable to build and maintain. The materials required for construction, such as wood and hardware, are often readily available and less expensive than the specialized equipment needed for other hive types. Additionally, the simplicity of the design means that fewer tools are required, further reducing costs. Top bar hives also tend to require less maintenance and replacement of equipment, resulting in long-term savings. This makes them an attractive option for beekeepers on a budget or those looking to minimize expenses while still enjoying the benefits of beekeeping.
In summary, using top bar hive plans offers several benefits for beekeepers. Natural comb building allows bees to create comb that suits their needs and produces authentic, unprocessed honey. Sustainable beekeeping practices are promoted through the use of natural materials and hive designs that prioritize the well-being of the bees. Lastly, top bar hive plans are cost-effective, making them a practical choice for beekeepers looking to minimize expenses while still enjoying the rewards of beekeeping. By embracing these benefits, beekeepers can create a harmonious and fulfilling relationship with their bees while contributing to a healthier and more sustainable environment.

Materials and Tools Required for Top Bar Hive Plans
When it comes to building your own top bar hive, there are several materials and tools that you will need. In this section, we will discuss the necessary wood and hardware, protective gear, and essential tools that you should have on hand before you start constructing your hive.
Wood and Hardware
The first thing you will need is the right type of wood for your top bar hive. Cedar is a popular choice due to its durability and resistance to rot. It is important to choose untreated wood, as chemicals used in pressure-treated wood can be harmful to bees. You will need enough wood to construct the hive body, bars, and frames.
In addition to wood, you will also need various hardware items such as screws, nails, and hinges. These will be used to secure the different components of the hive together. It is important to choose hardware that is sturdy and rust-resistant, as the hive will be exposed to the elements.
Protective Gear
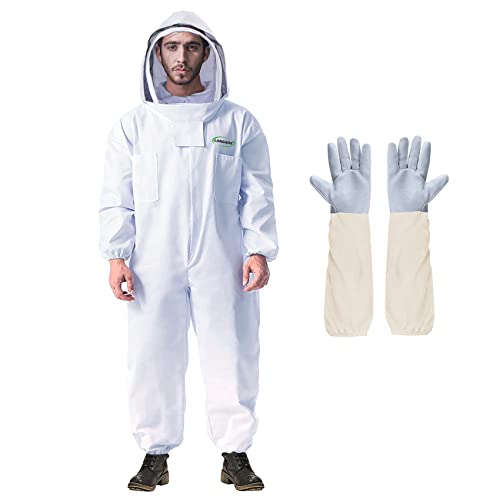
Beekeeping can be a rewarding hobby, but it is important to prioritize safety. Protective gear is essential when working with bees, as it helps to prevent stings and other potential injuries. The following items are recommended for beekeepers:
- Beekeeping suit or jacket: This is a full-body suit or jacket that provides protection from head to toe. It is typically made of a lightweight and breathable material, with a veil to protect the face.
- Gloves: Beekeeping gloves are made of a thick material, such as leather or canvas, to protect your hands from stings. It is important to choose gloves that fit well and allow for dexterity.
- Beekeeping veil: A veil is an essential part of protective gear, as it protects your face and neck from bee stings. It is usually made of a fine mesh material that allows for good visibility.
- Beekeeping boots: Boots that cover your ankles and provide good traction are recommended to protect your feet and lower legs from bee stings.
Remember, wearing protective gear is not only for your safety but also for the well-being of the bees. When you feel confident and protected, you can focus more on the task at hand and ensure a successful hive construction.

Essential Tools
To build your top bar hive, you will need a few essential tools. These tools will help you measure, cut, and assemble the different components of the hive. Here are some tools that you should have in your toolkit:
- Tape measure: This will be used to measure the dimensions of the hive components accurately.
- Saw: A good quality saw is necessary for cutting the wood to the desired lengths. A hand saw or a circular saw can be used depending on your preference and skill level.
- Drill: A drill with various drill bits is essential for making pilot holes and screwing the hardware into place.
- Hammer: A hammer will be used for driving nails into the wood and securing the hive components.
- Screwdriver: A screwdriver is necessary for tightening screws and attaching hardware.
- Level: A level will help ensure that your hive is straight and level when assembled.
- Clamps: Clamps are useful for holding pieces of wood together while you work on assembling the hive.
Having these essential tools on hand will make the construction process much smoother and more efficient. Remember to wear protective gear and take your time to ensure the hive is built correctly.
Step-by-Step Instructions for Building a Top Bar Hive
Building a top bar hive is a rewarding and fulfilling project for beekeepers who are looking for an alternative to traditional Langstroth hives. In this section, we will guide you through the step-by-step process of constructing your very own top bar hive. From designing and measuring the hive to constructing the hive body and adding bars and frames, we will cover everything you need to know to get started.
Hive Design and Measurements
Before you begin building your top bar hive, it is important to have a clear understanding of the hive design and the measurements involved. The design of a top bar hive typically consists of a long, rectangular-shaped box with bars placed across the top. These bars serve as a guide for the bees to build their comb.
To determine the measurements for your hive, you will need to consider the size of your bee colony and the space required for their growth and development. The length of the hive body can vary, but a common measurement is around 48 inches. The width of the hive body is typically between 14 to 16 inches, providing ample space for the bees to build their comb.

To ensure a comfortable and suitable environment for your bees, it is essential to provide proper ventilation. This can be achieved by incorporating ventilation holes or screens on the sides or back of the hive. Additionally, consider adding an entrance reducer to control the airflow and prevent unwanted pests from entering the hive.
Constructing the Hive Body
Once you have determined the design and measurements for your top bar hive, it’s time to start constructing the hive body. The hive body, also known as the box, is where the bees will build their comb and store honey and brood.
To construct the hive body, you will need the following materials and tools:
- Wood: Choose a durable and weather-resistant wood, such as cedar or pine, for your hive body. Ensure that the wood is untreated to avoid any potential harm to the bees.
- Hardware: Use stainless steel screws or nails to assemble the hive body. Avoid using glue, as it may release harmful fumes that can be detrimental to the bees.
- Protective Gear: Wear appropriate protective gear, such as gloves and safety goggles, when working with power tools or handling wood to prevent any accidents or injuries.
- Essential Tools: You will need a saw, drill, measuring tape, and a level to accurately cut and assemble the hive body. A carpenter’s square will also come in handy for ensuring precise angles and corners.
To construct the hive body, follow these steps:
- Cut the wood according to your measurements for the hive body sides, front, back, and bottom. Ensure that the pieces are all the same length and width to create a uniform box.
- Use the carpenter’s square to ensure that the corners are square and even. This will help the hive body to be stable and properly aligned.
- Assemble the hive body by attaching the sides, front, back, and bottom using screws or nails. Make sure the pieces are securely fastened to ensure the hive’s structural integrity.
- Once the hive body is assembled, check for any gaps or openings. Seal any gaps with beeswax or propolis to prevent drafts and ensure a tight seal.
- Lastly, drill small ventilation holes or attach screens on the sides or back of the hive body to provide adequate airflow for the bees.
Adding Bars and Frames
After constructing the hive body, the next step is to add the bars and frames to provide support for the bees to build their comb. The bars are placed across the top of the hive body, creating a guide for the bees to attach their comb.
To add the bars, follow these steps:
- Cut the bars to the appropriate length, ensuring they fit snugly across the width of the hive body. A common measurement for the bar length is around 19 inches.
- Space the bars evenly, leaving approximately 1.25 inches between each bar. This spacing allows the bees to build their comb without it becoming too crowded or difficult to manage.
- Secure the bars in place by attaching them to the sidewalls of the hive body. You can use small nails or screws to ensure they are firmly in place.
- Optionally, you can add frames to your top bar hive. Frames provide additional support for the comb and make it easier to handle and inspect. Attach the frames to the bars using wire or string, ensuring they are securely fastened.
By following these step-by-step instructions, you will be well on your way to building your own top bar hive. Remember to take your time, work carefully, and pay attention to detail. Building a top bar hive is a labor of love, and the end result will provide a sustainable and natural environment for your bees to thrive.
Maintaining and Managing a Top Bar Hive
Hive Inspection Techniques
Inspecting a top bar hive is an essential practice for beekeepers to ensure the health and productivity of the colony. Regular hive inspections allow you to monitor the overall condition of the hive, evaluate the population, and detect any potential issues or diseases early on. Here are some helpful techniques for conducting thorough hive inspections:
- Frequency: It is recommended to inspect your top bar hive every 7-10 days during the active season. This allows you to stay on top of any changes or developments within the hive.
- Time of Day: Conduct hive inspections during a warm, sunny day when the bees are most active and foraging. Bees are less likely to become defensive or agitated during these times.
- Preparation: Before starting the inspection, ensure you have the necessary protective gear, including a beekeeping suit, gloves, and a veil. It’s also advisable to have a smoker handy to calm the bees if needed.
- Approach: Approach the hive calmly and avoid sudden movements that may startle the bees. Gently use the smoker to create a light smoke, which helps to pacify the bees and make them more manageable during the inspection.
- Opening the Hive: Carefully remove the top bars to access the comb. Start from the outermost bars and work your way towards the center. This allows you to disturb the bees as little as possible and maintain their overall hive structure.
- Observation: While inspecting the hive, observe the bees’ behavior, looking for signs of aggression, abnormal buzzing sounds, or unusual activity. Pay attention to any dead bees or pests that may be present.
- Comb Inspection: Examine the comb for signs of brood health, including the presence of eggs, larvae, and capped cells. Look for any signs of disease or pests, such as deformed wing virus or varroa mites. If you notice any issues, take appropriate action to address them.
- Queen Status: During the inspection, locate the queen if possible. Look for her on the comb, as her presence indicates a healthy and productive hive. If you cannot find the queen, it may be necessary to conduct a more thorough search or seek assistance from an experienced beekeeper.
Controlling Pests and Diseases
Keeping pests and diseases under control is crucial for maintaining the health and vitality of your top bar hive. Here are some effective strategies for pest and disease management:
- Varroa Mite Control: Varroa mites are a common and destructive pest that can weaken and kill bee colonies. Use integrated pest management techniques, such as screened bottom boards, drone brood removal, and natural miticides, to control varroa mite infestations.
- Small Hive Beetle Management: Small hive beetles can cause significant damage to the hive, including spoiling honey and comb. Monitor the hive for beetle activity by using beetle traps and maintaining proper hive ventilation. You can also use diatomaceous earth or food-grade mineral oil to control beetle populations.
- Disease Prevention: Promote disease prevention by practicing good beekeeping hygiene. This includes regularly cleaning and sterilizing beekeeping equipment, avoiding the exchange of equipment between hives, and providing a clean and hygienic environment for the bees.
- Hygienic Breeding: Consider introducing hygienic bee breeds that exhibit natural resistance to diseases. These bees are known for their ability to detect and remove diseased brood, reducing the spread of diseases within the colony.
- Regular Monitoring: Monitor the hive regularly for signs of diseases, such as foulbrood or chalkbrood. If you suspect the presence of a disease, consult a beekeeping expert or local beekeeping association for appropriate diagnosis and treatment options.
Harvesting Honey and Comb
One of the most rewarding aspects of beekeeping is harvesting the golden nectar produced by your bees. Here are some steps to ensure a successful honey harvest from your top bar hive:

- Timing: Harvest honey when the majority of the cells in the comb are capped. This indicates that the honey is fully ripened and ready for extraction. Avoid harvesting during periods of nectar dearth, as it may lead to insufficient honey reserves for the bees.
- Preparation: Before starting the harvest, gather the necessary equipment, including a bee brush, a hive tool, honey jars or containers, and a bee escape or fume board. Ensure you have a clean and sterile environment to prevent contamination.
- Removing Comb: Gently remove the top bars containing the capped honeycomb. Shake off any bees or brush them away with a bee brush. Avoid damaging the comb or crushing the bees during this process.
- Extracting Honey: There are various methods for extracting honey from top bar hives. You can crush and strain the comb using a honey press or use a honey extractor specifically designed for top bar hives. Choose a method that suits your preference and the quantity of honey you are harvesting.
- Filtering and Bottling: After extracting the honey, filter it to remove any impurities or wax particles. Use a fine mesh or cheesecloth to achieve a smooth consistency. Once filtered, transfer the honey into clean and sterilized jars or containers, ensuring they are properly sealed.
- Feeding the Bees: After the honey harvest, it’s important to provide the bees with sufficient food for the winter months. Leave some honeycomb in the hive to serve as their winter food source. If necessary, supplement their diet with sugar syrup or fondant.
Remember, harvesting honey and comb should be done with care and consideration for the bees’ well-being. Always prioritize the health and survival of the colony when conducting any beekeeping activities.
By implementing these hive inspection techniques, managing pests and diseases effectively, and conducting a successful honey harvest, you can ensure the longevity and prosperity of your top bar hive. Happy beekeeping!
Table: Common Pests and Diseases in Top Bar Hives
| Pest/Disease | Description | Prevention and Control |
|---|---|---|
| Varroa Mites | Small parasitic mites that feed on bee larvae and weaken the colony | Integrated pest management, natural miticides, drone brood removal |
| Small Hive Beetles | Beetles that infest hives, causing damage to honey and comb | Beetle traps, proper ventilation, diatomaceous earth |
| Foulbrood | Bacterial disease affecting brood, leading to larvae death | Hygienic breeding, regular monitoring, disease diagnosis and treatment |
| Chalkbrood | Fungal disease causing larvae to turn into chalk-like mummies | Good hygiene practices, proper ventilation, disease diagnosis and treatment |
| Deformed Wing Virus | Virus causing deformed wings in bees, leading to reduced lifespan | Varroa mite control, hygienic breeding, regular monitoring |
Common Challenges and Troubleshooting with Top Bar Hives
Hive Overpopulation
One of the common challenges beekeepers may face when using top bar hives is hive overpopulation. As the colony grows and the number of bees increases, it can lead to overcrowding within the hive. This can have various negative effects on the hive’s health and productivity.
To address hive overpopulation, there are a few strategies that can be employed:
Regular Hive Inspections
Regular hive inspections are essential for monitoring the population growth within the hive. By inspecting the hive at regular intervals, beekeepers can identify signs of overpopulation, such as excessive bees clustering on the combs or a lack of space for the bees to move freely.
Adding Extra Space
If the hive is becoming overcrowded, one solution is to provide additional space for the bees. This can be done by adding extra bars or frames to the hive body. By increasing the available space, beekeepers can alleviate overcrowding and prevent the bees from feeling cramped.
Swarm Prevention Techniques
Overpopulation can sometimes lead to swarming, where a portion of the bees leave the hive to form a new colony. To prevent swarming, beekeepers can employ various techniques, such as:
- Splitting the Colony: This involves dividing the hive into two separate hives, each with its own queen. By creating two smaller colonies, the beekeeper reduces the population density in each hive, preventing overcrowding.
- Queen Suppression: Another method is to suppress the queen’s egg-laying activity temporarily. This can be done by removing the queen from the hive for a short period or using specific techniques to restrict her egg-laying. By reducing the number of new bees being born, the population growth can be controlled.
- Providing Swarm Traps: Beekeepers can also set up swarm traps near the hive to capture swarming bees. These traps can be baited with pheromones or other attractants to lure the bees into the trap instead of leaving the hive. This helps prevent the loss of bees and the subsequent decrease in population.
By implementing these strategies, beekeepers can effectively manage hive overpopulation and maintain a healthy and balanced colony within their top bar hives.
Queen Issues
Queen issues can occur in top bar hives and can significantly impact the overall health and productivity of the colony. Problems with the queen can range from her absence to her inability to lay enough eggs or produce viable offspring.
To address queen issues, beekeepers can take several steps:
Regular Queen Checks
Regularly inspecting the hive for the presence and performance of the queen is crucial. Beekeepers should look for signs of a healthy queen, such as seeing her laying eggs in a consistent and patterned manner. If the queen is absent or not performing adequately, intervention may be necessary.
Queen Replacement
If the queen is found to be missing or underperforming, beekeepers may need to consider replacing her. This can be done by introducing a new queen to the hive, which can be obtained from a reputable breeder or purchased from a trusted source. The new queen should be introduced gradually to allow the bees to accept her presence.
Queen Cell Removal
In some cases, the queen may be present, but the hive is producing multiple queen cells. This can lead to a swarm or a potential fight for dominance among the queens. Beekeepers can address this issue by removing excessive queen cells, leaving only one or two cells for the hive to develop a new queen.
It’s important to note that queen issues can have various underlying causes, such as genetics, age, or disease. Identifying and addressing the root cause is essential for resolving queen-related problems effectively.
Comb Attachments
Another challenge that beekeepers may encounter with top bar hives is comb attachments. Comb attachments occur when the bees build comb in unintended locations, such as between bars or against the hive walls, making it difficult to manage the hive properly.
To address comb attachments, beekeepers can follow these steps:
Regular Hive Inspections
Regularly inspecting the hive is crucial for identifying early signs of comb attachments. By checking the comb’s growth and positioning, beekeepers can address any potential attachment issues before they become more severe.
Proper Hive Design
Ensuring the top bar hive is designed correctly can help minimize comb attachments. The spacing between the bars should be appropriate to prevent bees from building comb where it is not intended. Additionally, providing guides or starter strips on the bars can help direct the bees’ comb-building activity in the desired direction.
Gently Separating Attached Comb
If comb attachments have already occurred, beekeepers should gently separate the attached comb from the hive’s walls or neighboring bars. This should be done carefully to avoid damaging the comb or injuring the bees. Using a hive tool or a thin knife, the beekeeper can gently pry the comb away from the attachment point.
Providing Adequate Space
Providing sufficient space between the bars can also help prevent comb attachments. When the bees have enough room to build their comb within the designated bars, they are less likely to attach it elsewhere.
By addressing comb attachments promptly and implementing preventive measures, beekeepers can maintain well-organized and manageable top bar hives, ensuring the bees’ well-being and the ease of hive management.
Note: The information provided in this section is for reference purposes only. Always consult reliable sources and seek advice from experienced beekeepers for specific and problem-solving guidance.
Resources and Further Reading on Top Bar Hive Plans
Are you eager to dive deeper into the world of top bar hive beekeeping? If so, you’re in luck! There are a multitude of resources available to help you expand your knowledge and become a top bar hive expert. From books and websites to beekeeping communities and local associations, let’s explore the wealth of information that awaits you.
Recommended Books and Websites
When it comes to finding trustworthy and informative resources on top bar hive plans, there are several books and websites that come highly recommended by experienced beekeepers. These invaluable sources of knowledge will guide you through every step of your top bar hive journey.
One book that consistently receives praise from beekeepers is “The Barefoot Beekeeper” by Phil Chandler. This book not only provides detailed instructions on constructing a top bar hive, but also delves into the philosophy and principles behind sustainable and natural beekeeping. Chandler’s conversational writing style makes it an enjoyable and engaging read for beginners and seasoned beekeepers alike.
Another must-read book is “Top-Bar Beekeeping: Organic Practices for Honeybee Health” by Les Crowder and Heather Harrell. This comprehensive guide covers everything from hive design and management to pest control and honey harvesting. With its emphasis on organic practices, this book is a valuable resource for those seeking to prioritize the well-being of their bees and the environment.
In addition to books, there are several websites that offer a wealth of information on top bar hive plans. One such website is www.horizontalhive.com, which provides detailed plans, step-by-step instructions, and informative articles on all aspects of top bar hive beekeeping. The website also features a forum where beekeepers can connect, share advice, and ask questions.
Beekeeping Communities and Forums
Joining a beekeeping community or forum can be incredibly beneficial for both novice and experienced top bar hive beekeepers. These online communities provide a platform for beekeepers to exchange ideas, ask questions, and learn from one another’s experiences.
One popular online forum is the Beekeeping Forum (www.beekeepingforum.co.uk), where beekeepers from around the world come together to discuss various aspects of beekeeping, including top bar hive plans. This forum is a treasure trove of knowledge, with threads dedicated to hive construction, maintenance tips, and common issues.
If you prefer a more localized approach, joining a local beekeeping association can provide you with a wealth of resources and support. These associations often organize workshops, seminars, and field trips, allowing you to learn from experienced beekeepers in your area. The American Beekeeping Federation (www.abfnet.org) and the British Beekeepers Association (www.bbka.org.uk) are just two examples of reputable associations that offer valuable resources and networking opportunities for top bar hive enthusiasts.
Local Beekeeping Associations
Local beekeeping associations are an invaluable resource for top bar hive beekeepers. These associations bring together beekeepers in a specific region, providing a platform for knowledge sharing, mentorship, and collaboration.
By joining a local beekeeping association, you gain access to a network of experienced beekeepers who can offer guidance and support as you embark on your top bar hive journey. These associations often organize workshops, seminars, and field trips, allowing you to learn hands-on from experts in your area.
To find a local beekeeping association near you, a simple internet search or a visit to your local library can provide you with a list of options. Additionally, contacting your nearest agricultural extension office or reaching out to a nearby apiary can lead you to the right association for your needs.
In conclusion, the resources available for top bar hive beekeepers are vast and varied. From books and websites to beekeeping communities and local associations, there is no shortage of information and support to help you succeed in your top bar hive endeavors. So, grab a book, join a forum, and connect with fellow beekeepers – the world of top bar hive beekeeping is waiting for you!