Discover how to make your own beeswax lip balm with our simple recipe. Learn about the ingredients, step-by-step process, and useful tips for the best homemade lip balm.
Ingredients for Beeswax Lip Balm Recipe
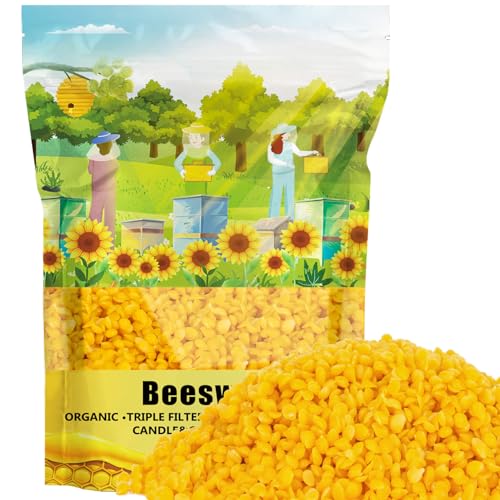
Beeswax
Beeswax is a key ingredient in making homemade lip balm. It is a natural wax produced by honeybees and has numerous benefits for the skin. Beeswax acts as a humectant, which means it helps to lock in moisture and keep your lips hydrated. It also provides a protective barrier, shielding your lips from harsh environmental factors like wind and cold weather. In addition, beeswax has anti-inflammatory properties that can help soothe and heal chapped lips. When choosing beeswax for your lip balm recipe, opt for high-quality, pure beeswax to ensure the best results.
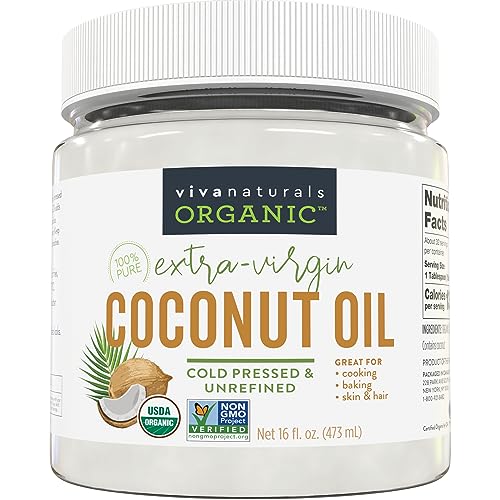
Coconut Oil
Coconut oil is another important ingredient in beeswax lip balm. It is known for its moisturizing properties and is easily absorbed by the skin. Coconut oil contains fatty acids that nourish and hydrate the lips, leaving them soft and supple. It also has antimicrobial properties, which can help prevent infections or irritations on the lips. When selecting coconut oil for your lip balm recipe, look for organic, unrefined coconut oil to ensure it retains its natural benefits.
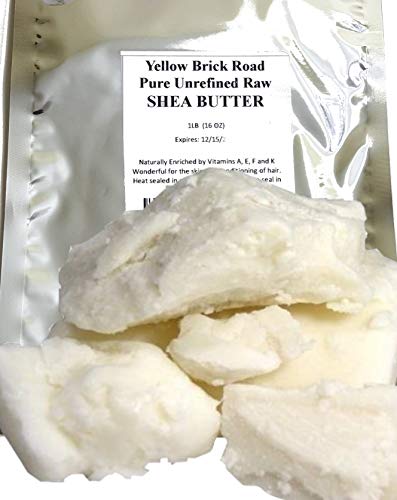
Shea Butter
Shea butter is a rich and creamy ingredient that adds extra nourishment to your homemade lip balm. It is derived from the nuts of the shea tree and is packed with vitamins and fatty acids that moisturize and protect the lips. Shea butter has a luxurious texture that glides smoothly on the lips, leaving them feeling silky and hydrated. It also helps to lock in moisture and prevent dryness. Choose raw, unrefined shea butter for your lip balm recipe to maximize its moisturizing benefits.
Essential Oils
Adding essential oils to your beeswax lip balm recipe not only gives it a delightful scent but also provides additional benefits for your lips. Essential oils are concentrated plant extracts that have various properties, such as soothing, healing, or uplifting. Some popular essential oils for lip balms include peppermint, lavender, and citrus oils. Peppermint oil provides a cooling sensation and helps to plump the lips, while lavender oil has calming and soothing effects. Citrus oils, such as orange or lemon, add a refreshing scent and can help brighten the lips. When using essential oils, it is important to choose high-quality, pure oils and use them sparingly to avoid any potential skin irritations.

Overall, these four ingredients – beeswax, coconut oil, shea butter, and essential oils – form the foundation of a nourishing and moisturizing beeswax lip balm recipe. By combining these natural ingredients, you can create a lip balm that not only keeps your lips soft and hydrated but also provides additional benefits for your skin. Experiment with different ratios and essential oil combinations to find the perfect lip balm recipe that suits your preferences and needs.
- Beeswax: Locks in moisture and provides a protective barrier.
- Coconut Oil: Moisturizes and absorbs easily into the skin.
- Shea Butter: Nourishes and hydrates the lips.
- Essential Oils: Adds fragrance and provides additional benefits.
Remember, when making your own lip balm, always use high-quality ingredients to ensure the best results. Now that you know the main ingredients, let’s move on to the equipment needed for the lip balm recipe.
Equipment Needed for Beeswax Lip Balm Recipe
Making your own beeswax lip balm is a fun and rewarding DIY project. To get started, you’ll need a few essential equipment and tools. Let’s take a look at what you’ll need:
Double Boiler or Heatproof Bowl
To melt the beeswax, coconut oil, and shea butter, you’ll need a double boiler or a heatproof bowl. A double boiler is a set of two pots, where one fits inside the other. The bottom pot is filled with water, while the top pot holds the ingredients. This setup allows for gentle and even heating, preventing the ingredients from scorching or burning. If you don’t have a double boiler, you can use a heatproof bowl placed over a pot of simmering water as an alternative.
Measuring Spoons
Accurate measurements are crucial in creating a well-balanced lip balm recipe. Having a set of measuring spoons will ensure that you add the right amount of each ingredient. You’ll need spoons for measuring the beeswax, coconut oil, and shea butter. It’s best to use separate spoons for each ingredient to avoid cross-contamination and maintain the purity of your lip balm.
Lip Balm Tubes or Containers
Once you’ve prepared your lip balm mixture, you’ll need containers to store and apply the final product. Lip balm tubes or small jars are the most common choices for packaging. Lip balm tubes are convenient for on-the-go use, while jars allow for easy application with your fingers. Make sure to choose containers that are clean, sterile, and specifically designed for lip balm to maintain hygiene and product integrity.
Stirring Utensil
A stirring utensil is essential for blending the ingredients together smoothly. You can use a stainless steel spoon or a heat-resistant silicone spatula for this purpose. The utensil should be clean and dry before use to prevent any contamination. Stirring helps in evenly distributing the ingredients and creating a homogenous mixture, ensuring that every application of your lip balm is consistent and effective.
Now that you have all the necessary equipment, you’re ready to embark on your beeswax lip balm making journey. Remember to gather all the ingredients listed in the previous section, as they are equally important in creating a high-quality lip balm. With the right tools and ingredients at hand, you’ll be able to craft your own personalized lip balm that will keep your lips moisturized and nourished.
If you’re unsure about the measurements or need guidance on the steps involved, don’t worry! We’ll delve into the detailed instructions in the next section, where you’ll find a step-by-step guide to making your beeswax lip balm. Stay tuned and let’s continue this exciting DIY adventure!
Double Boiler or Heatproof Bowl
Measuring Spoons
Lip Balm Tubes or Containers
Stirring Utensil
Steps to Make Beeswax Lip Balm
Step 1: Prepare Your Work Area
Before you begin making your own beeswax lip balm, it’s important to set up your work area properly. This will ensure that the process goes smoothly and that you have all the necessary tools and ingredients within reach. Here are some steps to follow:
- Find a clean and well-lit space: Choose an area in your kitchen or workspace where you have plenty of room to work and can easily access all your supplies. Make sure the area is clean and free from any potential contaminants.
- Gather your equipment: Assemble all the equipment you will need for the lip balm recipe. This includes a double boiler or heatproof bowl, measuring spoons, lip balm tubes or containers, and a stirring utensil. Having everything organized and ready will make the process more efficient.
- Clean and sanitize: Before you start, make sure all your equipment is clean and sanitized. Wash your hands thoroughly and clean your utensils with hot, soapy water. This will help prevent any contamination and ensure that your lip balm is safe to use.
Step 2: Melt the Beeswax, Coconut Oil, and Shea Butter
Now that your work area is prepared, it’s time to start melting the ingredients for your beeswax lip balm. Follow these steps:
- Set up a double boiler: If you have a double boiler, fill the bottom pot with water and place it on the stove over medium heat. If you don’t have a double boiler, you can use a heatproof bowl placed on top of a pot with simmering water.
- Add the beeswax, coconut oil, and shea butter: Measure out the desired amounts of beeswax, coconut oil, and shea butter according to your recipe. Place them in the top pot or heatproof bowl of the double boiler and allow them to melt slowly. Stir occasionally to ensure even melting.
- Be patient: It’s important not to rush the melting process. Allow the ingredients to melt slowly and completely before moving on to the next step. This will help ensure that your lip balm has a smooth and consistent texture.
Step 3: Add Essential Oils (Optional)
Adding essential oils to your beeswax lip balm can provide a pleasant scent and additional benefits for your lips. Here’s how to incorporate them into your recipe:
- Choose your essential oils: Select essential oils that are safe for topical use and have properties that you desire. Popular choices include lavender for relaxation, peppermint for a refreshing tingle, or citrus oils for a burst of freshness.
- Measure and add the essential oils: Once your beeswax, coconut oil, and shea butter have melted completely, remove them from the heat source. Allow the mixture to cool slightly before adding the essential oils. Measure the recommended amount of essential oils according to your recipe and stir them into the melted mixture.
- Mix thoroughly: Use your stirring utensil to ensure that the essential oils are evenly distributed throughout the mixture. This will help ensure that each lip balm you make will have the desired scent and benefits.
Step 4: Pour the Mixture into Lip Balm Tubes or Containers
Now that your lip balm mixture is ready, it’s time to transfer it into lip balm tubes or containers. Follow these steps:
- Prepare the tubes or containers: Clean and sanitize your lip balm tubes or containers to ensure they are free from any dirt or bacteria. If you’re using tubes, make sure to have the caps ready.
- Pour the mixture: Carefully pour the melted lip balm mixture into the tubes or containers. Be cautious not to spill or overfill them. A small funnel can be helpful for a precise pour.
- Allow to cool: Once you have filled all the tubes or containers, let them cool at room temperature. Avoid moving or disturbing them during this time to ensure they solidify properly.
Step 5: Let the Lip Balm Cool and Solidify
After pouring the mixture into the lip balm tubes or containers, it’s important to allow them to cool and solidify completely. Follow these steps:
- Set aside undisturbed: Find a cool, dry place to set your lip balm tubes or containers. Let them sit undisturbed for at least an hour or until they are completely solid.
- Check the consistency: Once the lip balm has solidified, check the consistency by twisting up one of the tubes or opening a container. It should be firm but glide smoothly on your lips.
- Label and store: Finally, label your homemade lip balm with the ingredients used and the date of creation. Store them in a cool, dry place away from direct sunlight. Your lip balm is now ready to use and enjoy!
By following these simple steps, you can create your own beeswax lip balm that is personalized to your preferences and needs. Experiment with different essential oil combinations and have fun customizing your lip balm creations. Making your own lip balm not only allows you to control the ingredients but also provides a satisfying and rewarding experience. So why not give it a try and pamper your lips with a nourishing and natural homemade lip balm?
Tips for Making Beeswax Lip Balm
Are you ready to create your own beeswax lip balm? With a few simple tips, you can ensure that your homemade lip balm turns out perfect every time. Let’s dive into the tips that will make your lip balm making experience a breeze.
Tip 1: Use High-Quality Ingredients
When it comes to making beeswax lip balm, the quality of your ingredients matters. Using high-quality ingredients will result in a lip balm that is effective and nourishing for your lips. Here are some key ingredients you’ll want to include:
- Beeswax: Beeswax is the main ingredient in lip balm and provides a protective barrier for your lips. Look for pure, cosmetic-grade beeswax for the best results.
- Coconut Oil: Coconut oil is a natural moisturizer that helps to soften and hydrate your lips. Choose organic, unrefined coconut oil to reap the full benefits.
- Shea Butter: Shea butter is rich in vitamins and fatty acids, making it an excellent ingredient for nourishing and repairing dry lips. Opt for raw, unrefined shea butter for optimal results.
- Essential Oils: Adding essential oils to your lip balm can give it a pleasant scent and provide additional benefits. Popular choices include lavender for relaxation, peppermint for a cooling effect, and citrus oils for a refreshing scent.
By using high-quality ingredients, you can ensure that your lip balm is not only effective but also safe and gentle for your lips.
Tip 2: Experiment with Essential Oil Combinations
One of the joys of making your own lip balm is the ability to customize the scent and flavor. Essential oils offer a wide range of options to create unique combinations. Why settle for just one flavor when you can experiment and create your own signature blend?
Try combining different essential oils to create your desired scent. For example, a blend of lavender and vanilla creates a calming and soothing lip balm, perfect for relaxation before bedtime. Or, if you prefer a refreshing and invigorating lip balm, mix peppermint and citrus oils. The possibilities are endless, so don’t be afraid to get creative and find your favorite combinations.

Tip 3: Clean Up Spills and Equipment Immediately
Lip balm making can get a bit messy, especially when dealing with melted ingredients. It’s important to clean up spills and equipment immediately to avoid any accidents or damage.
Keep a damp cloth or paper towels nearby to quickly wipe up any spills. This will prevent the ingredients from hardening and becoming difficult to clean later on. Also, make sure to wash your utensils and containers thoroughly after each use. This will prevent any cross-contamination and ensure that your lip balm remains fresh and hygienic.
Tip 4: Store Lip Balm in a Cool, Dry Place
Proper storage is essential to maintain the quality and effectiveness of your homemade lip balm. To prevent melting and preserve its longevity, store your lip balm in a cool, dry place.
Avoid exposing your lip balm to direct sunlight or high temperatures, as this can cause it to melt or degrade. Instead, store it in a drawer or cupboard away from heat sources. Lip balm tubes or containers with lids are ideal for keeping out moisture and maintaining the integrity of your lip balm.
By following these tips, you’ll be well on your way to creating your own high-quality, customized beeswax lip balm. Enjoy the process of making your lip balm and embrace the endless possibilities of scents and flavors. Your lips will thank you for the nourishment and protection that homemade lip balm provides.
Remember, the key to successful lip balm making is using high-quality ingredients, experimenting with essential oil combinations, promptly cleaning up spills, and storing your lip balm properly. With these tips in mind, you’ll be able to create lip balms that are not only effective but also a pleasure to use. So get ready to showcase your creativity and pamper your lips with the perfect homemade lip balm!
Variations of Beeswax Lip Balm
When it comes to beeswax lip balm, there are several variations that you can try to suit your preferences and needs. Whether you want a pop of color, a burst of flavor, or a vegan-friendly option, there’s a variation for everyone. Let’s take a closer look at three popular variations: tinted beeswax lip balm, flavored beeswax lip balm, and vegan beeswax lip balm.
Tinted Beeswax Lip Balm
Tinted beeswax lip balm is a great option for those who want to add a touch of color to their lips while still enjoying the benefits of beeswax. With this variation, you can achieve a subtle or bold tint, depending on your preference. The tinted beeswax lip balm can come in various shades, from natural hues like nude and pink to bolder options like red or plum.
To create your own tinted beeswax lip balm, you can add natural colorants like beetroot powder, cocoa powder, or even crushed berries to the mixture. These natural colorants not only provide a beautiful tint but also offer additional benefits such as antioxidants and moisturizing properties. Experiment with different color combinations to find your perfect shade.
Flavored Beeswax Lip Balm
If you’re someone who enjoys a burst of flavor on your lips, flavored beeswax lip balm is the way to go. This variation adds a delightful taste to your lip balm, making your application experience even more enjoyable. From fruity flavors like strawberry, mango, and citrus to sweet options like vanilla or chocolate, there’s a wide range of flavors to choose from.
To create flavored beeswax lip balm, you can add natural extracts or essential oils to the mixture. These ingredients not only provide the desired flavor but also offer additional benefits. For example, adding peppermint essential oil can give a refreshing sensation to your lips, while lavender essential oil can provide a soothing effect. Experiment with different flavor combinations to find your favorite.
Vegan Beeswax Lip Balm
For those who follow a vegan lifestyle, vegan beeswax lip balm is a perfect choice. Traditional beeswax lip balms contain beeswax, which is derived from bees. However, the vegan variation replaces beeswax with vegan-friendly alternatives while still providing all the benefits of a regular lip balm.
To create vegan beeswax lip balm, you can use ingredients like candelilla wax or carnauba wax, which are plant-based alternatives to beeswax. These waxes provide the same protective and moisturizing properties as beeswax, making them an excellent choice for vegans. Additionally, you can still incorporate nourishing oils and butters, such as coconut oil and shea butter, into the mixture for added benefits.
- Have you ever tried a tinted beeswax lip balm? How did you like the color?
- What is your favorite flavor for a lip balm?
- Are you interested in trying a vegan beeswax lip balm?
Benefits of Using Beeswax Lip Balm
Moisturizes and Nourishes Lips
Beeswax lip balm is a fantastic natural remedy to keep your lips moisturized and nourished. The combination of beeswax, coconut oil, and shea butter creates a powerful barrier that locks in moisture and prevents dryness. When applied to your lips, this lip balm deeply hydrates and replenishes the delicate skin, leaving your lips soft and supple.
Provides a Protective Barrier
One of the key benefits of using beeswax lip balm is its ability to provide a protective barrier against harsh environmental elements. Whether it’s cold winter winds or scorching summer sun, this lip balm acts as a shield, safeguarding your lips from the damaging effects of extreme weather conditions. It forms a thin layer on the surface of your lips, sealing in moisture and preventing moisture loss.
Contains Natural Ingredients
What sets beeswax lip balm apart from other commercial lip balms is its use of natural ingredients. Beeswax, coconut oil, and shea butter are all-natural and known for their moisturizing properties. These ingredients are carefully chosen to ensure that your lips receive the best care without any harsh chemicals or synthetic additives. By opting for a natural lip balm, you can feel confident knowing that you are treating your lips with pure goodness.
Helps Prevent Chapped Lips
Chapped lips can be a real nuisance, causing discomfort and even pain. Beeswax lip balm is an effective solution to prevent chapped lips and keep them smooth and healthy. The moisturizing properties of beeswax, coconut oil, and shea butter work together to soothe dry and cracked lips, providing relief and promoting healing. Regular use of beeswax lip balm can help you say goodbye to chapped lips once and for all.
Frequently Asked Questions about Beeswax Lip Balm
Are Beeswax Lip Balms Safe for Allergic Individuals?
Beeswax lip balms are generally safe for most individuals, including those with allergies. However, it’s important to note that some people may be allergic to beeswax or other ingredients commonly found in lip balms. If you have a known allergy to beeswax or any other specific ingredient, it’s best to avoid using products that contain those ingredients.
To determine if you are allergic to beeswax lip balm, it’s recommended to perform a patch test before applying it to your lips. Apply a small amount of the lip balm to a small area of your skin, such as the inside of your wrist, and wait for 24 hours to see if any allergic reactions occur. If you experience any redness, itching, swelling, or other signs of an allergic reaction, discontinue use immediately and consult with a healthcare professional.
If you have a history of severe allergies or are unsure about using beeswax lip balm, it’s always best to consult with a dermatologist or allergist for personalized advice.
How Long Does Beeswax Lip Balm Last?
The longevity of beeswax lip balm depends on various factors, including the frequency of use and the amount applied. On average, a standard-sized lip balm tube or container typically lasts anywhere from one to three months with regular use.
It’s important to note that the shelf life of a lip balm can also affect its effectiveness and safety. Beeswax lip balms usually have a shelf life of one to two years, but this can vary depending on the specific formulation and storage conditions. To ensure the longevity of your lip balm, it’s best to store it in a cool, dry place away from direct sunlight and extreme temperatures.
If you notice any changes in the texture, smell, or color of your lip balm, or if it becomes dried out or discolored, it’s recommended to replace it with a fresh one. Using expired or deteriorated lip balm may not provide the same benefits and could potentially cause irritation.
Can I Use Beeswax Lip Balm on Other Parts of the Body?
While beeswax lip balm is primarily designed for use on the lips, it can also be used on other parts of the body that may require moisturization or protection. The emollient properties of beeswax, along with its ability to create a protective barrier, make it suitable for various skin areas.
Some common areas where beeswax lip balm can be applied include:
- Cuticles: Apply a small amount of lip balm to your cuticles and massage it in gently. This can help moisturize and soften dry or cracked cuticles.
- Elbows and knees: These areas tend to be rough and prone to dryness. Apply a thin layer of lip balm and massage it into the skin to help hydrate and nourish.
- Minor scrapes and burns: Beeswax lip balm can be used as a natural alternative to petroleum jelly for minor scrapes and burns. Clean the affected area, apply a thin layer of lip balm, and cover it with a clean bandage if necessary.
While using beeswax lip balm on other body parts can be beneficial, it’s important to remember that lip balms are not formulated for every skin type or condition. If you have specific concerns or skin conditions, it’s best to consult with a healthcare professional for personalized advice.
Can I Customize the Scent and Flavor of Beeswax Lip Balm?
Yes, you can customize the scent and flavor of beeswax lip balm to suit your preferences. Adding essential oils to your lip balm recipe can not only provide a pleasant aroma but also offer additional benefits for your lips.
To customize the scent and flavor of your beeswax lip balm, follow these steps:
- Choose high-quality essential oils: Select essential oils that are safe for topical use and have properties that align with your desired scent or flavor. Some popular choices include peppermint, lavender, citrus, and vanilla.
- Determine the amount: Essential oils are highly concentrated, so it’s important to use them sparingly. Start with a small amount, such as a few drops, and adjust according to your preference.
- Add the essential oils: Once you have melted the beeswax, coconut oil, and shea butter according to the recipe, remove the mixture from heat and let it cool slightly. Add the desired amount of essential oils and stir well to ensure even distribution.
- Test the scent and flavor: Before pouring the mixture into lip balm tubes or containers, you can perform a small test to check if the scent and flavor are to your liking. Take a small amount of the mixture and apply it to your lips. If you’re satisfied, proceed with pouring the remaining mixture into your chosen containers.
By customizing the scent and flavor of your beeswax lip balm, you can create a personalized and enjoyable experience every time you apply it.
In conclusion, beeswax lip balms are generally safe for allergic individuals, but it’s recommended to perform a patch test if you have known allergies. The longevity of beeswax lip balm can vary, and it’s important to replace expired or deteriorated products. While primarily designed for the lips, beeswax lip balm can be used on other parts of the body for moisturization and protection. Lastly, you can customize the scent and flavor of beeswax lip balm by adding essential oils, allowing you to create a unique and enjoyable product.