Discover the perfect recipe for drying apples and enjoy the delicious taste of homemade dried apples. Follow our easy steps and explore different seasonings and recipes using dried apples.
Preparation for Drying Apples
Drying apples is a wonderful way to preserve their flavor and enjoy them throughout the year. Before you begin the drying process, it’s important to properly prepare the apples. This involves selecting the right apples, washing them thoroughly, and peeling and coring them. Let’s delve into each of these steps to ensure your dried apples turn out perfectly.
Selecting and Washing the Apples
When it comes to selecting apples for drying, it’s crucial to choose the right variety. Not all apples are suitable for drying, as some may become too soft or lose their flavor during the process. The best apple varieties for drying are those that are firm and slightly tart. Popular choices include Granny Smith, Honeycrisp, and Fuji apples.
Once you’ve selected your apples, it’s time to give them a good wash. Start by rinsing them under cool water to remove any dirt or debris. Gently rub the surface of each apple with your fingers to ensure a thorough cleaning. Alternatively, you can use a soft brush to scrub the apples gently. This will help remove any wax or pesticide residue that may be present on the skin.
Peeling and Coring the Apples
After washing the apples, it’s necessary to peel and core them. While the skin of the apple contains nutrients and fiber, it can become tough and chewy when dried, affecting the overall texture of the dried apple slices. Peeling the apples also helps to remove any remaining wax or residue.

To peel the apples, you can use a vegetable peeler or a paring knife. Start by removing a small section of the peel at the top of the apple. Hold the apple firmly and move the peeler or knife downward, following the curve of the apple. Rotate the apple as you go, ensuring that all the skin is removed. Repeat this process for each apple.
Once the apples are peeled, it’s time to core them. You can use an apple corer or a small knife to remove the core. Place the corer in the center of the apple and push it down firmly until the core is removed. If using a knife, make a vertical cut around the core, avoiding cutting too much of the flesh.
Slicing the Apples
Now that the apples are peeled and cored, it’s time to slice them into uniform pieces. The thickness of the slices will determine the drying time and the final texture of the dried apples. For a chewier texture, slice the apples into thicker pieces. For a crispier texture, opt for thinner slices.
To ensure even slices, you can use a sharp knife or a mandoline slicer. Start by cutting the apple in half horizontally. Place each half flat side down on the cutting board and make consistent, even slices. Aim for slices that are about 1/4 inch thick, but feel free to adjust according to your preference.
As you slice the apples, it’s important to work quickly to prevent browning. Apples naturally oxidize and turn brown when exposed to air. To minimize browning, you can place the sliced apples in a bowl of cold water with a squeeze of lemon juice. The acid in the lemon juice will help preserve the color of the apples.

Once you’ve sliced all the apples, carefully drain them and pat them dry with a clean kitchen towel or paper towels. Now, your apples are ready for the drying process.
Methods for Drying Apples
Oven Drying
When it comes to drying apples, one of the most popular methods is oven drying. This method is perfect for those who want to quickly dry their apples without having to wait for the sun to do its work. To get started with oven drying, follow these simple steps:
- Preheat your oven to a low temperature, around 150°F (65°C). This low temperature ensures that the apples dry slowly and evenly, preserving their flavor and nutrients.
- While the oven is preheating, prepare your apples by washing them thoroughly and removing any stems or leaves. You can choose to peel and core the apples, but it is not necessary. Leaving the skin on adds a nice texture and flavor to the dried apples.
- Slice the apples into thin, even slices. This can be done using a sharp knife or a mandoline slicer. The thickness of the slices should be around 1/4 inch (0.6 cm) to ensure that they dry properly.
- Arrange the apple slices on a baking sheet lined with parchment paper. Make sure to leave some space between each slice to allow for air circulation.
- Place the baking sheet in the preheated oven and let the apples dry for several hours. The exact drying time will depend on the thickness of the slices and the moisture content of the apples. It usually takes around 4 to 6 hours for the apples to fully dry.
- Throughout the drying process, check on the apples regularly to ensure that they are drying evenly. You can rotate the baking sheet or flip the slices if necessary.
- Once the apples are dry, remove them from the oven and let them cool completely. They should be crispy and slightly chewy.
Oven drying is a convenient method that allows you to dry apples any time of the year, regardless of the weather outside. It is also a great way to preserve the flavors of the apples while concentrating their sweetness.
Sun Drying
If you prefer a more natural and traditional method of drying apples, sun drying is the way to go. This method requires patience and a sunny climate, but the results are worth it. Here’s how to sun dry your apples:
- Start by selecting ripe and unblemished apples. Wash them thoroughly and remove any stems or leaves. Peeling and coring the apples is optional, but it may help speed up the drying process.
- Slice the apples into thin, even slices. Aim for a thickness of around 1/4 inch (0.6 cm) to ensure that they dry properly.
- Find a sunny spot outdoors where you can set up your drying rack. The rack can be as simple as a clean, sturdy cloth or a mesh screen. Make sure it is elevated to allow for air circulation underneath the apples.
- Arrange the apple slices on the drying rack, making sure they are not touching each other. This will help prevent mold or spoilage during the drying process.
- Place the drying rack in a sunny location where it will receive direct sunlight for the entire day. It is important to choose a spot that is well-ventilated and protected from pests.
- Leave the apples to dry in the sun for several days, turning them occasionally to ensure even drying. The drying time will depend on the temperature and humidity levels in your area. It can take anywhere from 3 to 7 days for the apples to fully dry.
- Once the apples are dry, they should be leathery to the touch and slightly firm. Store them in an airtight container or resealable bag to keep them fresh.
Sun drying is a slow and natural method that allows the apples to retain their natural flavors and sweetness. It is a great option for those who enjoy the process of preserving food and want to avoid using any artificial heat sources.

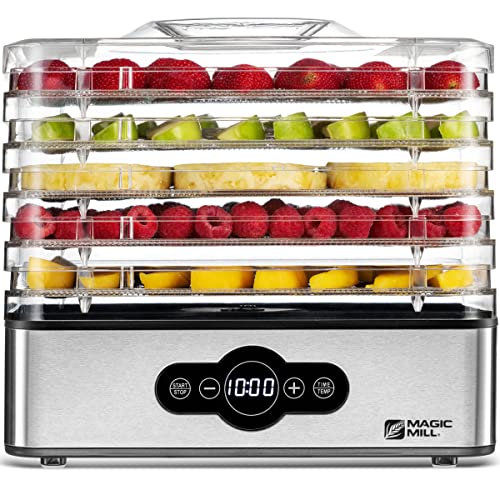
Using a Food Dehydrator
For those who want a hassle-free and efficient way to dry apples, using a food dehydrator is the way to go. This method provides consistent heat and airflow, resulting in perfectly dried apples every time. Here’s how to use a food dehydrator to dry your apples:
- Start by selecting ripe and unblemished apples. Wash them thoroughly and remove any stems or leaves. You can choose to peel and core the apples, but it is not necessary.
- Slice the apples into thin, even slices. Aim for a thickness of around 1/4 inch (0.6 cm) to ensure that they dry evenly.
- Arrange the apple slices on the dehydrator trays, making sure they are not overlapping. Leave some space between each slice to allow for proper airflow.
- Set the temperature of the food dehydrator according to the manufacturer’s instructions. The recommended temperature for drying apples is usually around 135°F (57°C).
- Place the trays inside the food dehydrator and turn it on. Leave the apples to dry for several hours, checking on them occasionally to ensure even drying.
- The drying time will vary depending on the thickness of the slices and the moisture content of the apples. It usually takes around 6 to 12 hours for the apples to fully dry in a food dehydrator.
- Once the apples are dry, let them cool completely before storing them in an airtight container or resealable bag.
Using a food dehydrator is a convenient and reliable method for drying apples. It allows you to have full control over the drying process and ensures consistent results every time. Plus, you can easily adjust the drying time and temperature to suit your preferences.
Seasonings and Flavorings for Dried Apples
Dried apples on their own are delicious and nutritious snacks, but adding seasonings and flavorings can take them to a whole new level. In this section, we will explore three popular ways to enhance the taste of dried apples: cinnamon and sugar coating, honey drizzle, and citrus zest sprinkle.
Cinnamon and Sugar Coating
One classic and irresistible way to elevate the flavor of dried apples is by coating them with a delicious combination of cinnamon and sugar. The warm and comforting aroma of cinnamon paired with the sweetness of sugar creates a delightful treat that will satisfy your cravings.
To achieve a cinnamon and sugar coating, follow these simple steps:
- Start by preparing a mixture of cinnamon and sugar. You can adjust the ratio to your preference, depending on how strong you want the cinnamon flavor to be.
- Once you have your cinnamon and sugar mixture ready, sprinkle it generously over your dried apple slices. Make sure to coat both sides evenly.
- Gently press the cinnamon and sugar mixture onto the dried apple slices to ensure it sticks properly.
- Allow the coated dried apple slices to sit for a few minutes, allowing the flavors to meld together.
The result? A delectable snack with a perfect balance of sweetness and warm spice. Each bite will bring you the nostalgic flavors of apple pie, making it an ideal treat for autumn or any time of the year.
Honey Drizzle
If you prefer a natural sweetener and a touch of sticky goodness, drizzling honey over your dried apples is a delightful option. Honey adds a unique depth of flavor and a hint of floral sweetness, enhancing the natural taste of the dried apples.
To create honey-drizzled dried apples, here’s what you need to do:
- Choose your favorite variety of dried apple slices. Crisp and slightly tart varieties work particularly well with the sweetness of honey.
- Lay the dried apple slices on a plate or a serving dish.
- With a spoon, gently drizzle honey over the dried apple slices. You can control the amount of honey based on your preference for sweetness.
- Allow the honey to spread and seep into the dried apple slices, creating a luscious glaze.
The combination of honey and dried apples creates a harmonious blend of flavors that will satisfy your sweet tooth. It’s a healthier alternative to sugary snacks, providing you with a burst of energy and a dose of natural goodness.
Citrus Zest Sprinkle
For a tangy and refreshing twist, consider sprinkling citrus zest over your dried apples. The zesty flavor of citrus fruits, such as lemon or orange, adds a burst of brightness that complements the natural sweetness of the dried apples.

To achieve a citrus zest sprinkle, follow these steps:
- Start by selecting a fresh lemon, orange, or any citrus fruit of your choice.
- Using a zester or a fine grater, gently scrape the outer layer of the citrus fruit to obtain the zest. Be careful not to grate the bitter white pith.
- Once you have the citrus zest, sprinkle it over your dried apple slices. Make sure to distribute it evenly for the best flavor experience.
- Gently press the zest onto the dried apple slices to ensure it sticks.
The citrus zest adds a vibrant and invigorating element to the dried apples, making them even more enjoyable to snack on. The combination of sweet and tangy flavors creates a delightful contrast that will awaken your taste buds.
Remember, these seasonings and flavorings are not limited to just snacking. You can incorporate them into various recipes, such as apple pies, granola bars, or apple cinnamon oatmeal, which we will explore in later sections. So grab your dried apple slices, get creative with your seasonings, and indulge in the wonderful world of flavors that dried apples have to offer.
Storing and Preserving Dried Apples
Airtight Packaging
When it comes to storing and preserving your dried apples, one of the most important factors to consider is ensuring they are stored in airtight packaging. This will help to maintain their freshness and prevent any moisture from seeping in. Moisture is the enemy when it comes to dried fruits, as it can lead to spoilage and the growth of mold.
There are various options available for airtight packaging, depending on your preference and the quantity of dried apples you have. One popular choice is to use resealable plastic bags, as they provide a tight seal and are easy to use. Simply place your dried apples in the bag, press out any excess air, and seal it tightly. This will help to keep your apples fresh for a longer period of time.
Another option is to use airtight containers or jars. These are especially useful if you have a larger quantity of dried apples or if you want to store them for an extended period. Make sure to choose containers that have a tight-fitting lid to ensure maximum freshness. Glass jars with rubber gaskets are a great choice as they provide an airtight seal and are also visually appealing.
It’s important to note that when using airtight packaging, you should try to remove as much air as possible before sealing. This will help to prevent the oxidation of the dried apples, which can lead to a loss of flavor and color. Additionally, be sure to label your packaging with the date of drying to keep track of their freshness.
Refrigeration or Freezing
While airtight packaging is essential for storing dried apples, there are additional steps you can take to further extend their shelf life. One option is to store them in the refrigerator or freezer. This method is particularly useful if you live in a hot and humid climate, as it helps to prevent any moisture absorption.
If you choose to refrigerate your dried apples, place them in an airtight container or bag and store them in the refrigerator. They can last for several months when refrigerated properly. However, keep in mind that refrigeration may cause some loss of texture and crispness in the dried apples.
Freezing is another great option for long-term storage of dried apples. To freeze them, place the dried apples in a freezer-safe bag or container and ensure it is tightly sealed. Frozen dried apples can last for up to a year without losing their quality. When you’re ready to use them, simply thaw them at room temperature for a few minutes or add them directly to your recipes.
Using Oxygen Absorbers
For those looking for an extra level of protection against moisture and spoilage, using oxygen absorbers can be a game-changer. Oxygen absorbers are small packets that contain iron powder and salt. They work by absorbing the oxygen present in the packaging, creating an environment where bacteria and mold cannot thrive.
To use oxygen absorbers, place them in your airtight packaging along with the dried apples. The number of absorbers needed depends on the size of the packaging and the amount of dried apples you are storing. As a general guideline, a 300cc oxygen absorber is suitable for a one-gallon container.
It’s important to note that once the package is opened, the oxygen absorbers can no longer be reused. Therefore, it’s advisable to store your dried apples in smaller, portioned packages to avoid unnecessary waste.
Recipes for Using Dried Apples
Apple Pie
Are you craving a warm and comforting dessert that showcases the delicious flavor of dried apples? Look no further than a classic apple pie! This timeless recipe combines the sweetness of dried apples with a flaky pie crust for a satisfying treat that will have your taste buds dancing.
To start, gather your ingredients. You will need a pre-made pie crust, or you can make your own if you’re feeling adventurous. For the filling, you’ll need dried apple slices, sugar, cinnamon, nutmeg, and a pinch of salt. Don’t forget to have some butter on hand as well.
First, preheat your oven to 375°F (190°C). While the oven is warming up, rehydrate your dried apple slices. Place them in a bowl of warm water and let them soak for about 10 minutes. Once they have softened, drain the water and pat the slices dry with a paper towel.
Next, mix the dried apple slices with sugar, cinnamon, nutmeg, and a pinch of salt in a separate bowl. Toss the ingredients together until the apples are evenly coated. This will ensure that every bite of your apple pie is bursting with flavor.
Now it’s time to assemble your pie. Roll out the pie crust and place it in a pie dish. Fill the crust with the seasoned dried apple slices, spreading them out evenly. Dot the top of the filling with small pieces of butter. This will add richness and moisture to the pie as it bakes.
Place the pie in the preheated oven and bake for about 45-50 minutes, or until the crust is golden brown and the filling is bubbling. The aroma of cinnamon and apples will waft through your kitchen, tempting everyone in the house.
Once the pie is done, remove it from the oven and let it cool for a few minutes before serving. You can enjoy it on its own or top it with a scoop of vanilla ice cream for an extra special treat.
Granola Bars with Dried Apples
Looking for a healthy and convenient snack that incorporates the goodness of dried apples? Try making homemade granola bars with dried apples! These bars are packed with fiber, protein, and vitamins, making them a perfect on-the-go option for a quick energy boost.
To make granola bars with dried apples, you’ll need rolled oats, honey, peanut butter, dried apple pieces, chopped nuts (such as almonds or walnuts), and a touch of cinnamon for extra flavor. You can also add in other mix-ins like chocolate chips or dried cranberries if you desire.
Start by preheating your oven to 350°F (175°C). In a large bowl, combine the rolled oats, dried apple pieces, chopped nuts, and cinnamon. Mix everything together until well combined. This will ensure that each bite of your granola bars is filled with a variety of textures and flavors.
In a separate small saucepan, warm the honey and peanut butter over low heat until they are melted and well combined. Pour the honey and peanut butter mixture over the dry ingredients in the bowl. Stir everything together until the mixture is evenly coated.
Transfer the mixture to a baking dish lined with parchment paper, pressing it down firmly to create an even layer. This will help the granola bars hold their shape once they are baked. Bake in the preheated oven for about 20-25 minutes, or until the edges are golden brown.
Once the granola bars are done baking, remove them from the oven and let them cool completely in the baking dish. This will allow them to firm up and become easier to handle. Once cooled, cut the bars into desired sizes and enjoy them as a snack whenever you need a quick pick-me-up.
Apple Cinnamon Oatmeal
Start your day off right with a warm and comforting bowl of apple cinnamon oatmeal. This breakfast recipe combines the heartiness of oats with the sweetness of dried apples and the warmth of cinnamon for a satisfying and nutritious meal to fuel your morning.
To make apple cinnamon oatmeal, you’ll need rolled oats, dried apple slices, cinnamon, milk (or water if you prefer), a pinch of salt, and a sweetener of your choice, such as honey or maple syrup.
Begin by bringing a saucepan of water (or milk) to a boil. Once boiling, add the rolled oats, dried apple slices, cinnamon, and a pinch of salt. Stir everything together and reduce the heat to low. Let the mixture simmer for about 5-7 minutes, or until the oats have absorbed the liquid and become creamy.
Once the oatmeal reaches your desired consistency, remove it from the heat and let it sit for a minute or two to cool slightly. This will allow the flavors to meld together, creating a harmonious blend of apple and cinnamon.
Serve the apple cinnamon oatmeal in a bowl and drizzle it with your favorite sweetener, such as honey or maple syrup. Feel free to top it off with additional toppings like chopped nuts or a sprinkle of cinnamon for an extra touch of flavor.
With just a few simple ingredients and a little bit of time, you can enjoy a comforting and nutritious bowl of apple cinnamon oatmeal that will keep you satisfied throughout the morning.
Tips and Tricks for Perfectly Dried Apples
When it comes to drying apples, there are a few tips and tricks that can help you achieve perfectly dried slices every time. Whether you plan to use them for snacking, baking, or adding to your favorite recipes, these tips will ensure that your dried apples turn out just right.
Choosing the Right Apple Variety
The first step in preparing perfectly dried apples is to choose the right apple variety. Not all apples are created equal when it comes to drying. Some apples, like Granny Smith or Honeycrisp, have a firm and crisp texture that holds up well during the drying process. These varieties are ideal for drying as they retain their shape and flavor.
On the other hand, softer varieties like Golden Delicious or Red Delicious may become mushy when dried, making them less suitable for this purpose. It’s important to select apples that are firm and slightly tart for the best results. If you’re unsure which apple variety to choose, consult your local farmer’s market or orchard for recommendations.
Achieving Even Slices
To ensure that your dried apples dry evenly and at the same rate, it’s important to achieve uniform slices. This can be done by using a mandoline slicer or a sharp knife. Start by coring the apples and then proceed to slice them into thin, even slices. Aim for slices that are approximately 1/8 to 1/4 inch thick.
By slicing the apples uniformly, you’ll ensure that they all dry at the same rate, resulting in a consistent texture and flavor. Uneven slices may lead to some pieces drying faster than others, which can result in a mix of overly dry and under-dried apples.
Testing for Proper Dryness
Knowing when your dried apples are perfectly dry is crucial to achieving the desired texture and taste. To test for proper dryness, simply remove a slice from the drying process and allow it to cool completely. Once cooled, check the texture. The dried apple should be firm and leathery, with no moisture remaining.
If the dried apple feels soft or pliable, it needs more drying time. Return it to the drying process and check again after a few more hours. On the other hand, if the dried apple feels brittle or overly dry, it may have been left in the drying process for too long. Adjust the drying time accordingly for future batches.
Conclusion
With your perfectly dried apples in hand, you’ll be ready to enjoy them as a healthy snack, incorporate them into your favorite recipes, or simply savor their natural sweetness. So go ahead and give it a try! Experiment with different apple varieties and seasonings to create your own unique dried apple creations. Happy drying!