Are you interested in starting beekeeping? This comprehensive guide covers everything beginners need to know, from selecting the right beehive and bee species to maintaining the hive, harvesting honey, and addressing common issues. Stay safe and compliant with regulations while enjoying the rewards of beekeeping.
Getting Started with Beekeeping
Beekeeping is an exciting and rewarding hobby that allows you to connect with nature and contribute to the environment. Whether you are interested in beekeeping for honey production, pollination purposes, or simply because you have a fascination with bees, this guide will provide you with all the information you need to get started.
Choosing the Right Beehive
One of the first decisions you’ll need to make when starting beekeeping is choosing the right beehive. There are several types of beehives available, but the most common ones are Langstroth, Top Bar, and Warre hives. Each type has its own advantages and disadvantages, so it’s important to consider your specific needs and preferences.
- The Langstroth hive is the most popular choice among beekeepers. It consists of stacked boxes with removable frames, making it easy to inspect and manage the colony. This type of hive is highly recommended for beginners due to its versatility and widespread availability.
- Top Bar hives, on the other hand, are a more natural and sustainable option. They consist of a long, horizontal box with bars across the top where bees build their comb. This type of hive requires less maintenance and is ideal for those who prefer a hands-off approach to beekeeping.
- Warre hives are similar to Langstroth hives but with a more vertical design. They mimic the natural habitat of bees and encourage natural comb building. Warre hives are known for their simplicity and low intervention approach, making them a good choice for beekeepers who want to promote bee health and well-being.
When choosing a beehive, consider factors such as your beekeeping goals, available space, and local regulations. It’s also important to ensure that your chosen hive is made of high-quality materials and provides adequate insulation for your bees, especially in colder climates.
Selecting the Right Bee Species
Once you have chosen a beehive, the next step is to select the right bee species. The most common bee species used in beekeeping are the European honeybee (Apis mellifera) and the Carniolan honeybee (Apis mellifera carnica). Each species has its own characteristics and advantages, so it’s important to choose one that suits your needs and local conditions.

- European honeybees are known for their gentle temperament and high honey production. They are adaptable to various climates and are the most commonly used bee species in beekeeping. If you are a beginner, European honeybees are a good choice as they are easy to manage and readily available.
- Carniolan honeybees are native to the central and eastern parts of Europe. They are known for their hardiness and resistance to diseases and pests. Carniolan honeybees are particularly suitable for colder climates and areas with short summers. They are also less prone to swarming, making them a good choice for beekeepers who want to minimize colony losses.
When selecting a bee species, consider factors such as climate, local availability, and your beekeeping goals. It’s also important to source your bees from reputable suppliers to ensure their health and genetic diversity.
Obtaining the Necessary Equipment
Before you can start beekeeping, you will need to obtain some essential equipment. Here is a list of the basic equipment you will need:
- Beekeeping suit: A beekeeping suit is essential for your safety and protection. It typically consists of a full-body suit, gloves, and a veil. Choose a suit made of high-quality materials that provide maximum protection against bee stings.
- Smoker: A smoker is a tool used to calm the bees during hive inspections. It produces cool smoke that masks the bees’ alarm pheromones, making them less likely to sting. Choose a smoker with a good airflow and a comfortable handle for easy use.
- Hive tool: A hive tool is a versatile tool used for prying open hive boxes, separating frames, and scraping off propolis and wax. Choose a hive tool with a sharp edge and a sturdy construction for durability.
- Bee brush: A bee brush is used to gently brush bees off frames and other surfaces during hive inspections. Choose a bee brush with soft bristles to avoid harming the bees.
- Hive components: Depending on the type of hive you choose, you will need hive boxes, frames, foundation, and other components. These are used to provide space for the bees to build their comb and store honey. Choose high-quality, durable components that fit your chosen hive.
- Feeder: A feeder is used to provide supplemental food to the bees, especially during times of scarcity. Choose a feeder that is easy to fill and clean and that fits securely within your hive.
- Protective gear: In addition to a beekeeping suit, you may also need other protective gear such as sturdy boots, long socks, and a hat. These additional items will provide extra protection against bee stings.
When obtaining equipment, it’s important to invest in high-quality items that will last for many years. Proper maintenance and regular cleaning of your equipment will also help ensure the health and longevity of your beekeeping endeavor.
Setting Up Your Beehive
So, you’ve decided to embark on the exciting journey of beekeeping! Setting up your beehive is the first step towards becoming a successful beekeeper. In this section, we will guide you through finding the ideal location for your beehive, assembling the necessary components, and installing the bees in your hive.
Finding the Ideal Location for Your Beehive
Finding the perfect location for your beehive is crucial for the health and productivity of your bees. Here are some factors to consider when choosing the right spot:

- Sunlight: Bees thrive in warm environments, so it’s important to place your hive in an area that receives ample sunlight throughout the day. Aim for at least six hours of direct sunlight.
- Protection from the Elements: While bees love the sun, they also need protection from strong winds and heavy rains. Select a location that offers some natural windbreaks, such as hedges or trees, to shield the hive from gusty winds.
- Accessibility: Consider easy access to your beehive for regular inspections and maintenance. Ensure there is enough space around the hive for you to maneuver comfortably without disturbing the bees.
- Water Source: Bees require a nearby water source for hydration and cooling the hive. Ideally, your beehive should be within a short flying distance to a pond, river, or any other clean water source.
- Neighbors and Legal Restrictions: Be considerate of your neighbors and any local regulations regarding beekeeping. It’s important to inform your neighbors about your intentions and make sure you comply with any local beekeeping laws or restrictions.
Remember, bees are essential pollinators, so placing your beehive in an area with abundant flowering plants and trees will provide a diverse and nutritious food source for your bees.
Assembling Your Beehive Components
Now that you have found the perfect location for your beehive, it’s time to assemble the necessary components. Here’s a step-by-step guide:
- Hive Boxes: Start by setting up the hive boxes, also known as supers or brood boxes. These are the main structure of your beehive and provide the bees with space to build their comb, store honey, and raise brood. Follow the manufacturer’s instructions to stack the boxes securely.
- Frames and Foundation: Each hive box will contain frames that hold the beeswax foundation. The foundation provides a guide for bees to build their comb. Insert the frames into the hive boxes, ensuring they fit snugly. Be sure to space the frames evenly to allow for easy inspection.
- Inner Cover and Outer Cover: Place the inner cover on top of the hive boxes, providing ventilation and insulation. Finally, secure the outer cover to protect the hive from the elements.
- Entrance Reducer: Attach the entrance reducer to the front of the hive to regulate the size of the entrance. This helps the bees defend against intruders and control ventilation.
Remember to wear protective gear, such as a beekeeper’s suit, gloves, and a veil, while assembling the beehive components to minimize the risk of bee stings.
Installing the Bees in Your Hive
Congratulations, your beehive is ready! Now it’s time to introduce the bees to their new home. Follow these steps to ensure a smooth installation:
- Ordering Bees: Purchase bees from a reputable source, either as a package or a nucleus colony (nuc). Packages typically consist of a queen bee and a certain number of worker bees, while nucs include frames with brood, bees, and a queen.
- Preparing the Hive: Before installing the bees, remove a few frames from the hive to create space for the bee package or nuc. This will allow the bees to settle comfortably.
- Spraying with Sugar Water: Prior to releasing the bees, lightly spray them with sugar water. This helps keep them calm and encourages them to stay in the hive.
- Releasing the Bees: If you have a package of bees, carefully remove the queen cage and hang it between the frames. Then, gently pour the bees into the hive. For a nuc, transfer the frames with the bees directly into the hive.
- Feeding the Bees: To help the bees establish their colony, provide them with a sugar syrup solution in a feeder. This will supplement their food source until they can forage for nectar and pollen.
Monitor the bees closely during the first few days to ensure they are settling in well. Regularly check the hive for signs of a healthy queen, brood development, and a steady increase in population.

Setting up your beehive is an exciting and important step in your beekeeping journey. By finding an ideal location, assembling the hive components correctly, and installing the bees properly, you are laying a strong foundation for your colony’s success. The next section will delve into the basics of beekeeping, where you’ll learn more about bee behavior, the roles of bees in the hive, and the fascinating lifecycle of these incredible insects.
Beekeeping Basics
Understanding Bee Behavior
Bees are fascinating creatures known for their complex social structure and highly organized behavior. Understanding their behavior is crucial for successful beekeeping.
Firstly, bees are highly sensitive to their environment and are attracted to certain flowers based on their color, scent, and nectar production. They communicate with each other through a dance known as the waggle dance, which conveys information about the location of food sources. By observing their behavior, beekeepers can gain insights into the availability and quality of nearby forage.
Secondly, bees have different roles within the hive. The queen bee is responsible for reproduction and laying eggs, while worker bees perform various tasks such as foraging, nursing the brood, and building honeycombs. Drones, on the other hand, are male bees whose sole purpose is to mate with the queen. Understanding these roles helps beekeepers identify and address any issues within the hive.
Identifying the Different Roles of Bees in the Hive
To identify the different roles of bees in the hive, beekeepers need to observe their behavior and physical characteristics. Worker bees, which make up the majority of the hive population, can be recognized by their smaller size and specialized body structures. They have pollen baskets on their hind legs for collecting and transporting pollen back to the hive. Worker bees also have a stinger, which they use for defense.

The queen bee, on the other hand, is larger in size and has a distinct elongated abdomen. She is the only bee capable of laying eggs and is essential for the survival and growth of the hive. Drones, the male bees, are larger than worker bees but smaller than the queen. They have large eyes and a stockier body.
Observing the behavior of bees can also provide insights into their roles. For example, worker bees are often seen foraging for nectar and pollen, while the queen bee is usually found in the center of the hive, surrounded by worker bees attending to her needs. Drones are typically seen flying around the hive, waiting for an opportunity to mate with a queen.
Learning the Lifecycle of Bees
Understanding the lifecycle of bees is essential for beekeepers to manage their hives effectively. Bees undergo complete metamorphosis, which means they go through four distinct stages: egg, larva, pupa, and adult.
The queen bee lays eggs in the honeycomb cells, which hatch into larvae after a few days. The larvae are fed a special substance called royal jelly by the worker bees. This nutrient-rich diet allows the larvae to grow rapidly. After a few days, the cells are capped with beeswax, and the larvae enter the pupa stage. During this time, they undergo metamorphosis and transform into adult bees.
The length of each stage varies depending on the type of bee. For worker bees, it takes approximately 21 days from egg to adult emergence. Drones take slightly longer, with a development period of around 24 days. The queen bee, however, requires 16 days to develop from egg to adult.
By understanding the lifecycle of bees, beekeepers can anticipate the needs of the hive and take appropriate actions at each stage. For example, during the larval stage, ensuring an adequate supply of royal jelly is crucial for the healthy development of the bees. Additionally, knowing the timing of adult emergence helps beekeepers plan hive inspections and other maintenance tasks.
Beehive Maintenance
Beehive maintenance is a crucial aspect of successful beekeeping. Regular hive inspections, checking for signs of disease or infestation, and managing honey production are all important tasks that beekeepers need to undertake to ensure the health and productivity of their hives.
Regular Hive Inspections
Regular hive inspections are essential for monitoring the overall health of the hive and identifying any potential issues. These inspections should be conducted every week or two during the active beekeeping season.
During a hive inspection, beekeepers should carefully examine each frame in the hive, looking for signs of brood development, honey storage, and the general condition of the bees. They should also check for any signs of disease or infestation, such as the presence of mites, beetles, or other pests.
To conduct a proper hive inspection, beekeepers should follow these steps:
- Preparation: Before opening the hive, make sure you have all the necessary equipment, including a smoker, hive tool, and protective gear. This will help ensure your safety and minimize stress on the bees.
- Smoke the Hive: Start by gently puffing some smoke into the hive entrance and around the edges of the hive. This helps to calm the bees and reduce the risk of stings.
- Remove the Hive Cover: Carefully remove the hive cover, taking care not to crush any bees in the process. Set the cover aside in a safe place.
- Inspect the Frames: Begin by inspecting the outer frames first. Carefully lift each frame out of the hive, one at a time, and examine both sides for signs of brood, honey, pollen, and any abnormalities.
- Check for Disease and Infestation: While inspecting the frames, keep an eye out for any signs of disease or infestation. Look for abnormal brood patterns, such as spotty brood or brood with sunken or perforated cappings, which could indicate the presence of diseases like American Foulbrood or European Foulbrood. Examine the bees for signs of mites or beetles, such as mite droppings or beetle larvae.
- Monitor Honey Stores: Assess the amount of honey stored in the frames. Ensure that the bees have enough food to sustain themselves, especially during periods of low nectar flow. If the honey stores are low, consider supplemental feeding to support the colony.
- Record Observations: Take notes during the inspection, recording any significant observations, such as the number of frames with brood, honey stores, and signs of disease or infestation. This documentation will help you track the progress of the hive over time and make informed decisions about its management.
- Close the Hive: Once you have completed the inspection, carefully place the frames back into the hive in the same order as they were removed. Ensure that the frames are properly aligned and fit snugly within the hive. Place the hive cover back on top, making sure it is secure.
Checking for Signs of Disease or Infestation
Regularly checking for signs of disease or infestation is crucial for maintaining the health of your beehive. Early detection and intervention can prevent the spread of diseases and help keep your bees strong and productive.
Here are some common signs of disease or infestation to look out for during hive inspections:
- Mite infestation: Varroa mites are one of the most common pests that affect honeybees. Look for adult mites on the bees’ bodies or in the brood cells. Additionally, check for deformed wings on adult bees, as this can be a sign of a mite infestation.
- Foulbrood diseases: American Foulbrood (AFB) and European Foulbrood (EFB) are bacterial diseases that can devastate a beehive if left untreated. Look for larvae with sunken, darkened, or perforated cappings. A foul odor may also be present.
- Wax moth infestation: Wax moths can cause damage to the comb and weaken the hive. Look for webbing or silky threads on the frames, which are signs of wax moth larvae. Larvae can also leave behind a granular substance called “frass.”
- Small hive beetles: Small hive beetles are another common pest that can infest beehives. Look for adult beetles running on the frames or larvae in the honeycomb. Beetle larvae may also leave behind slimy trails.
- Nosema infection: Nosema is a fungal infection that affects the digestive system of bees. Look for dysentery, which presents as brown streaks on the outside of the hive or on the frames. Bees with nosema infection may also appear lethargic or have distended abdomens.
If you observe any of these signs during an inspection, it is essential to take appropriate action to address the issue. This may involve treatments such as using miticides for mite control or antibiotics for bacterial infections. It is crucial to follow local regulations and guidelines when treating beehives for diseases or pests.
Managing Honey Production
One of the rewards of beekeeping is the opportunity to harvest honey from your hives. Proper management of honey production ensures that you can enjoy a bountiful harvest while still ensuring the health and well-being of your bees.
Here are some key considerations for managing honey production:
- Timing: Knowing when to harvest honey is essential. Bees need sufficient time to cap the honey cells and reduce the moisture content. Typically, honey can be harvested when the majority of the cells are capped, indicating that the honey has reached the proper moisture level.
- Harvesting Techniques: There are different methods for extracting honey from the hive, including using a honey extractor or crush-and-strain method. Each method has its advantages and considerations. Choose the method that suits your preferences and resources.
- Hive Capacity: Ensure that your hive has enough space to accommodate honey production. If the bees run out of space, they may swarm or become congested, leading to a decline in productivity. Add additional supers or honey boxes as needed to give the bees room to store honey.
- Honey Extraction: After harvesting the honey, it is important to properly extract and process it. Use a honey extractor to spin the honey out of the frames, or crush and strain the comb to separate the honey from the wax. Filter the honey to remove any impurities and store it in clean, food-grade containers.
- Honey Storage: Proper honey storage is crucial to maintain its quality and prevent spoilage. Store the honey in a cool, dry place away from direct sunlight. Ensure that the containers are tightly sealed to prevent moisture absorption and contamination.
By effectively managing honey production, you can enjoy the fruits of your bees’ labor while ensuring the sustainability and well-being of your hive. Remember to always leave enough honey for the bees to sustain themselves through the winter months.
Harvesting Honey
Knowing when to harvest honey is an essential skill for any beekeeper. It requires careful observation and understanding of the bees’ behavior and the readiness of the honeycombs. In this section, we will explore the key factors to consider when determining the right time to harvest honey, the process of extracting honey from the hive, and the subsequent steps for storing and packaging your precious honey.
Knowing When to Harvest Honey
Harvesting honey at the right time ensures that you obtain the highest quality and quantity of honey from your beehive. Several factors influence the timing of honey harvest, such as the nectar flow, weather conditions, and the overall strength of the colony. Here are some indicators to help you determine when the honey is ready to be harvested:
- Capped Honeycombs: Bees cap honeycombs with a layer of wax when the honey is fully ripened and ready for harvest. Check for fully capped honeycombs as a clear sign that the honey is matured.
- Honey Moisture Content: Honey should ideally have a moisture content of around 17-18%. You can use a honey refractometer or hydrometer to measure the moisture levels. Harvesting honey with higher moisture content can lead to fermentation and a shorter shelf life.
- Honey Color and Flavor: Different types of honey have varying colors and flavors, but generally, fully ripened honey is golden or amber in color. Taste a small sample of honey to ensure it has the desired flavor before harvesting the entire batch.
- Bee Activity: Bees will show increased activity around the honey supers when the honey is ready for harvest. You may observe bees fanning their wings and a higher number of bees visiting the honey supers.
Remember, it’s crucial not to harvest honey too early as it may result in a lower yield and unfinished honeycombs. Conversely, delaying the harvest excessively can lead to honeydew contamination or the bees consuming the honey themselves.
Extracting Honey from the Hive
Once you have determined that the honey is ready for harvest, it’s time to extract it from the hive. Here’s a step-by-step process to guide you through the extraction:
- Bee Removal: Before extracting honey, remove the bees from the honey supers. You can do this by using a bee brush or a fume board. Ensure the bees have time to relocate before proceeding.
- Removing the Honey Supers: Carefully lift the honey supers from the hive, ensuring you do not harm the bees or damage the comb. Place them in a clean and covered area to protect them from any contaminants.
- Uncapping the Honeycomb: To access the honey, you need to remove the wax cappings that seal the honeycomb cells. You can use a hot knife, an uncapping fork, or an electric uncapping knife for this process. Work methodically from one side of the frame to the other, removing the wax cappings as you go.
- Honey Extraction: After uncapping the honeycomb, place the frames in an extractor—a device that uses centrifugal force to spin the frames and extract honey. Extractors are available in manual, electric, and radial models. Spin the frames until the honey is extracted and collects at the bottom of the extractor.
- Filtering the Honey: Once the honey is extracted, it may contain small particles of wax and other impurities. To ensure a clear and smooth product, filter the honey using a fine mesh or cheesecloth to remove any debris.
Storing and Packaging Your Honey
Proper storage and packaging are crucial to maintain the quality and longevity of your honey. Follow these steps to ensure your honey remains fresh and appealing:
- Clean Containers: Use clean and sterilized jars or bottles for storing your honey. Glass or food-grade plastic containers with tight-fitting lids are ideal for preserving the honey’s flavor and preventing contamination.
- Labeling: Clearly label your containers with the date of harvest and any other relevant information such as the floral source or location. This helps you keep track of the honey’s age and assists customers in making informed choices.
- Storage Temperature: Store your honey in a cool, dry place away from direct sunlight. Ideally, the temperature should be around 50-70°F (10-21°C). Avoid storing honey in the refrigerator, as it can accelerate crystallization.
- Preventing Crystallization: Honey naturally crystallizes over time, but you can slow down the process by storing it at warmer temperatures or gently heating crystallized honey in a warm water bath. Avoid overheating, as excessive heat can degrade the honey’s quality.
- Packaging: If you plan to sell or gift your honey, consider attractive packaging options. Decorative labels, customized tags, or gift boxes can enhance the presentation and appeal of your honey.
Remember, honey is a natural product, and its shelf life can vary depending on various factors. Regularly inspect your stored honey for any signs of spoilage or fermentation and discard any honey that appears discolored, has an off odor, or shows signs of mold.
Troubleshooting Common Beekeeping Issues
Beekeeping can be an incredibly rewarding and fulfilling hobby, but like any other activity, it comes with its fair share of challenges. In this section, we will explore some of the common issues that beekeepers face and discuss effective strategies to address them. By being prepared and knowledgeable, you can overcome these obstacles and ensure the health and productivity of your bee colony.
Dealing with Swarming Bees
Swarming is a natural behavior of honeybees and occurs when a colony becomes overcrowded. It is their way of reproducing and establishing new colonies. While swarming is a normal part of the honeybee life cycle, it can be a cause of concern for beekeepers.
One way to prevent swarming is by regularly inspecting your hives and ensuring they have enough space to accommodate the growing bee population. If you notice signs of overcrowding, such as bees clustering at the hive entrance or building queen cells, it’s important to take action.
One effective method to prevent swarming is to perform a technique called “splitting the hive.” This involves creating a new hive by dividing the existing colony into two separate ones. By doing this, you provide the bees with additional space and reduce the likelihood of swarming.
If swarming has already occurred, you have a couple of options. One option is to capture the swarm and relocate it to a new hive. This can be done by placing a bait hive nearby or using a swarm trap. Another option is to let the swarm find a new home on its own, but this can be risky as they may choose an undesirable location, such as a neighbor’s property.
Addressing Queen Bee Issues
The queen bee is the heart of the colony and plays a crucial role in maintaining its productivity. However, queen-related issues can arise, impacting the overall health and performance of the hive. It’s important to address these issues promptly to ensure the well-being of your bee colony.
One common queen bee issue is a failing or absent queen. This can lead to a decline in egg-laying and a decrease in the population of worker bees. To address this, you can introduce a new queen to the hive. There are different methods for introducing a new queen, such as using a queen cage or performing a newspaper introduction. It’s essential to follow the proper procedures to increase the chances of a successful queen integration.
Another queen-related issue is the presence of a queen with poor genetics. This can result in aggressive behavior, low honey production, or other undesirable traits. In such cases, it may be necessary to replace the queen with a new one with desirable characteristics. This can be done by purchasing a queen from a reputable breeder or allowing the bees to raise a new queen from eggs or larvae.
Regularly monitoring and evaluating the performance of your queen is crucial. Look for signs of a healthy queen, such as a strong brood pattern, active egg-laying, and a calm demeanor. If you notice any abnormalities or concerns, take the necessary steps to address them promptly.
Managing Pests and Predators
Pests and predators can pose significant threats to the well-being of your bee colony. It’s essential to implement effective pest management strategies to protect your bees and ensure their ability to thrive.
One common pest in beekeeping is the Varroa mite. These tiny parasites attach themselves to adult bees and their brood, weakening the bees’ immune system and transmitting diseases. Regular monitoring and treatment for Varroa mites are crucial to prevent infestations and keep the colony healthy. There are various methods for mite management, including the use of chemical treatments, integrated pest management techniques, and natural remedies.
Other pests that can cause problems in beekeeping include small hive beetles, wax moths, and ants. These pests can damage comb, consume honey, and weaken the overall hive structure. Maintaining a clean and well-maintained hive, practicing good sanitation, and using traps or barriers can help deter these pests.
Predators, such as bears, raccoons, skunks, and birds, can also pose a threat to your bee colony. Installing sturdy fences, using electric fencing, or placing hive stands on elevated platforms can help protect your hives from these potential intruders.
Safety and Regulations in Beekeeping
Beekeeping can be an incredibly rewarding hobby or business venture, but it’s important to prioritize safety and adhere to regulations to ensure a positive and successful experience. In this section, we will discuss the importance of wearing the proper protective gear, understanding local beekeeping laws and regulations, and how to handle bee stings and allergic reactions.
Wearing the Proper Protective Gear
When it comes to working with bees, protecting yourself is essential. Bee stings can be painful and potentially dangerous, especially for those who are allergic. The right protective gear can make all the difference in keeping you safe and comfortable during hive inspections and honey harvesting.
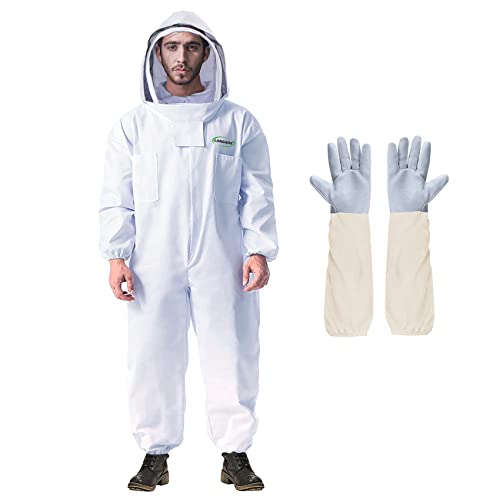
A beekeeper’s protective gear typically consists of a beekeeping suit, gloves, a veil, and boots. The beekeeping suit is designed to cover your entire body, providing a barrier between you and the bees. It is usually made of a lightweight, breathable material that allows air circulation while keeping bees out. The suit should fit snugly to prevent bees from finding their way inside.
Gloves are crucial for protecting your hands from stings. Opt for gloves made specifically for beekeeping, as they are usually made of a material that is sting-resistant but still allows for dexterity. It’s important to note that some beekeepers prefer not to wear gloves as it can reduce their ability to handle the bees with precision. However, if you are a beginner or particularly sensitive to bee stings, gloves are highly recommended.
A veil is an essential piece of protective gear that covers your head and face. It is typically made of fine mesh or netting that allows for good visibility while preventing bees from coming into contact with your skin. Veils come in various styles, including those that attach to the beekeeping suit or separate veils that can be worn with a hat or helmet.
Lastly, boots are an often overlooked but important part of protective gear. Beekeeping boots should be sturdy, covering your ankles and providing protection against potential bee stings. Ensure that the boots are comfortable and well-fitting to allow for ease of movement during hive inspections.
Remember, wearing the appropriate protective gear is vital, regardless of your experience level. It not only protects you from bee stings but also helps create a calm and confident environment for the bees themselves.
Understanding Local Beekeeping Laws and Regulations
Before embarking on your beekeeping journey, it’s crucial to familiarize yourself with the local laws and regulations that govern beekeeping in your area. Each region may have specific guidelines and requirements that need to be followed to ensure the safety of both the beekeeper and the surrounding community.
Start by contacting your local agricultural extension office or beekeeping association. They can provide you with information on any permits or licenses you may need to obtain before setting up your beehives. They can also guide you on the appropriate placement of your hives to comply with zoning regulations.
It’s important to understand any restrictions on the number of hives you can keep and the distance they must be from neighboring properties. This is to prevent any potential conflicts with neighbors and to ensure that the bees have enough forage area without causing nuisance or safety concerns.
Additionally, some areas may have specific requirements for hive maintenance and disease management. Familiarize yourself with any regulations regarding hive inspections, disease control measures, and reporting requirements.
By following local beekeeping laws and regulations, you not only ensure your own safety but also contribute to the overall health and well-being of the beekeeping community. Compliance with these regulations helps prevent the spread of diseases and pests and promotes responsible beekeeping practices.
Handling Bee Stings and Allergic Reactions
Even with the proper protective gear and precautions, bee stings can still happen. It’s essential to know how to handle bee stings and be prepared for potential allergic reactions.
If you are stung by a bee, the first step is to remain calm. Remove the stinger as quickly as possible to minimize the injection of venom. Using a credit card or your fingernail, scrape the area to remove the stinger. Avoid squeezing or pinching the stinger, as this can release more venom into your skin.
After removing the stinger, wash the area with mild soap and water. Applying a cold compress or ice pack can help reduce pain and swelling. Over-the-counter pain relievers can also be taken to alleviate any discomfort.
For individuals who have known allergies to bee stings, it’s crucial to have an emergency action plan in place. This may include carrying an epinephrine auto-injector (such as an EpiPen) at all times and knowing how to use it. If you or someone you know experiences symptoms of an allergic reaction, such as difficulty breathing, swelling of the face or throat, or dizziness, seek immediate medical attention.
It’s important to note that bee stings can cause different reactions in different individuals. Some people may experience only localized pain and swelling, while others may have more severe allergic reactions. If you are unsure about your sensitivity to bee stings, consult with a healthcare professional for guidance.
In conclusion, safety and regulations are paramount in beekeeping. By wearing the proper protective gear, understanding and complying with local laws, and knowing how to handle bee stings and allergic reactions, you can create a safe and enjoyable environment for both yourself and your bees. Remember, beekeeping is a journey, and prioritizing safety ensures a positive experience for everyone involved.