Want to reduce your plastic waste? Follow our step-by-step guide on how to make beeswax wraps. From preparing the fabric to caring for them, we’ve got you covered. Start making eco-friendly wraps today!
Materials Needed for Making Beeswax Wraps
Making your own beeswax wraps is a fun and eco-friendly alternative to using plastic wrap. To get started, you’ll need a few essential materials. Let’s take a closer look at what you’ll need:
Beeswax
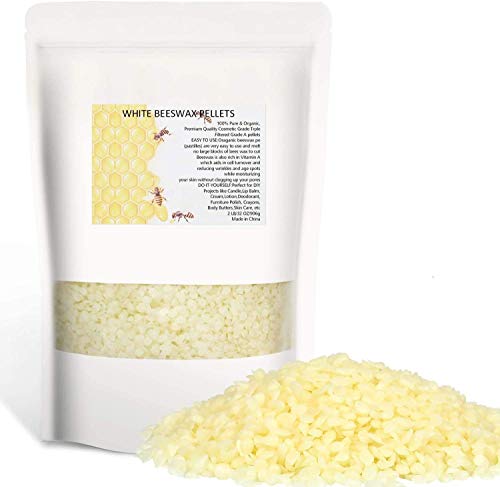
The star ingredient in beeswax wraps is, of course, beeswax itself. Beeswax is a natural wax that is produced by honeybees. It has a high melting point, which makes it perfect for creating a durable and reusable food wrap. Beeswax also has antibacterial properties, helping to keep your food fresh for longer.
When purchasing beeswax, it’s important to choose a high-quality product. Look for organic, pure beeswax that is free from any additives or chemicals. This ensures that your beeswax wraps are safe to use with food. You can find beeswax in various forms, such as blocks or pellets, depending on your preference.
Fabric
Another essential material for making beeswax wraps is fabric. Opt for 100% cotton fabric, as it is breathable and easy to work with. Choosing a colorful and patterned fabric can also add a touch of creativity to your wraps.

Before selecting your fabric, consider the size of the wraps you want to make. A yard of fabric can yield several wraps, so keep that in mind when making your purchase. Additionally, make sure to prewash and dry the fabric before starting the process, as this helps to remove any chemicals or residues that may be present.
Pinking Shears
To achieve clean and professional-looking edges on your beeswax wraps, pinking shears are a must-have tool. These special scissors have zigzag-shaped blades that create a decorative edge while preventing fraying. Pinking shears are readily available in craft stores or online, and investing in a good pair will make a noticeable difference in the final appearance of your wraps.
Once you have gathered all the necessary materials, you are ready to move on to the next steps in creating your own beeswax wraps. In the following sections, we will guide you through the process of preparing the fabric, applying the beeswax, setting the beeswax, and caring for your wraps.
But before we dive into that, let’s take a moment to appreciate the simplicity and sustainability of beeswax wraps. By using beeswax wraps instead of single-use plastic wraps, you are making a positive impact on the environment. These wraps can be used repeatedly, reducing waste and helping to reduce your carbon footprint. Plus, they add a touch of charm to your kitchen with their vibrant colors and patterns.
So, let’s get started on making your very own beeswax wraps. With just a few simple steps, you’ll be well on your way to reducing plastic waste and embracing a more sustainable lifestyle.

- Here’s a quick list of the materials needed for making beeswax wraps:
- Beeswax (organic and pure)
- Fabric (100% cotton)
- Pinking shears (for clean edges)
Preparing the Fabric
When it comes to making beeswax wraps, preparing the fabric is an important first step. This involves two main tasks: washing the fabric and cutting it to size. By properly preparing the fabric, you will ensure that your beeswax wraps are clean, free from any chemicals or residue, and the right size for their intended use.
Washing the Fabric
Before you start making your beeswax wraps, it’s essential to wash the fabric to remove any dirt, dust, or chemicals that may be present. This step is crucial because it ensures that your wraps are safe to use with food and won’t transfer any unwanted substances onto your food.
To wash the fabric, follow these simple steps:
- Gather the fabric: Start by collecting the fabric you will be using for your beeswax wraps. It’s best to choose natural fabrics such as cotton or linen, as they work well with beeswax and are more sustainable options.
- Pre-treat any stains: If your fabric has any stains, pre-treat them before washing. You can use a mild detergent or stain remover to gently remove any spots or marks. Be sure to follow the instructions on the stain remover and rinse the fabric thoroughly afterwards.
- Select a gentle detergent: Choose a gentle detergent that is suitable for delicate fabrics. Avoid using harsh chemicals or bleach, as these can damage the fabric and affect the beeswax coating later on.
- Machine or hand wash: Depending on the fabric and your personal preference, you can either machine wash or hand wash the fabric. If using a washing machine, select a delicate or gentle cycle with cold water. If hand washing, fill a basin or sink with cold water and add the detergent.
- Wash and rinse: Place the fabric in the washing machine or soak it in the soapy water. Gently agitate the fabric to ensure thorough cleaning. After washing, rinse the fabric with cold water to remove any remaining detergent.
- Air dry: Once the fabric is clean, let it air dry completely. Avoid using a dryer, as the heat can shrink or damage the fabric. Hang the fabric up or lay it flat on a clean surface until it is fully dry.
By following these steps, you will have clean and ready-to-use fabric for your beeswax wraps. Remember to choose a detergent that is gentle and suitable for the type of fabric you are using to ensure optimal results.
Cutting the Fabric to Size
After washing and drying the fabric, the next step is to cut it to the desired size for your beeswax wraps. This allows you to customize the wraps to fit your specific needs, whether it’s covering a bowl, wrapping a sandwich, or storing produce.
Here’s how to cut the fabric to size:
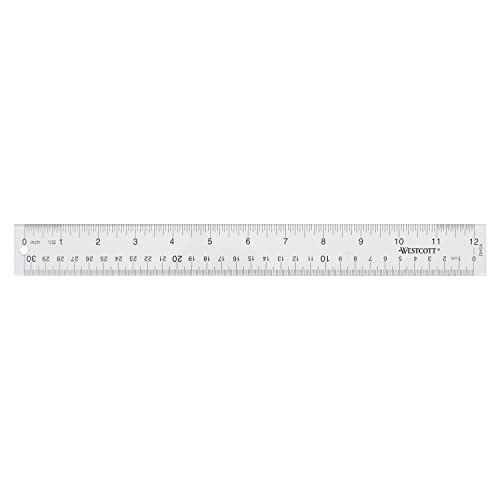
- Measure and mark: Start by measuring the fabric according to the size you want for your beeswax wraps. You can use a ruler or measuring tape to ensure accuracy. Mark the measurements with a fabric pen or pencil.
- Use pinking shears: Pinking shears are special scissors that have a zigzag pattern along the blade. They are commonly used in sewing to prevent fabric edges from fraying. When cutting fabric for beeswax wraps, using pinking shears can give the wraps a decorative edge while also serving a functional purpose.
- Cut along the marked lines: Carefully cut along the marked lines using the pinking shears. Take your time to ensure clean and straight cuts. If you don’t have pinking shears, regular fabric scissors will work as well.
- Trim any excess fabric: Once you have cut the fabric into the desired shapes and sizes, trim any excess fabric if necessary. This will give your beeswax wraps a neat and tidy appearance.
Remember, the size and shape of your beeswax wraps can vary depending on your personal preference and intended use. Some people prefer larger wraps for covering bowls or plates, while others prefer smaller wraps for wrapping sandwiches or snacks. It’s entirely up to you, so feel free to experiment with different sizes to find what works best for you.
Applying the Beeswax
Now that we have gathered all the materials needed and prepared the fabric, it’s time to move on to the exciting part – applying the beeswax! This step is crucial as it is what gives the fabric its ability to wrap and preserve food effectively. In this section, we will explore the three key steps involved in applying the beeswax: grating the beeswax, melting the beeswax, and spreading the beeswax on the fabric.
Grating the Beeswax
Before we can begin applying the beeswax to the fabric, we need to prepare it by grating the beeswax into small, manageable pieces. Grating the beeswax helps to create an even distribution when it melts onto the fabric, ensuring consistent coverage.
To grate the beeswax, you can use a regular kitchen grater or opt for a specialized beeswax grater if you have one available. Simply hold the beeswax firmly and grate it in a downward motion, applying gentle pressure. Beeswax is a relatively soft substance, so it should grate easily.
Melting the Beeswax
Once you have grated the beeswax, it’s time to melt it. There are a few different methods you can use to melt beeswax, depending on your preference and the tools you have at hand.
One popular method is to use a double boiler. Fill the bottom pot of the double boiler with water and place it on the stove over low to medium heat. Then, place the grated beeswax in the top pot and allow it to melt slowly. Stir the beeswax occasionally to ensure even melting and to prevent it from overheating.
Alternatively, if you don’t have a double boiler, you can create a makeshift one by placing a heatproof bowl over a pot of simmering water. Place the grated beeswax in the bowl and stir until it melts completely.
It’s important to note that beeswax has a relatively low melting point, so be sure to keep an eye on it and avoid overheating, as this can affect its quality.
Spreading the Beeswax on the Fabric
Once the beeswax has melted into a smooth liquid, it’s time to spread it onto the fabric. This step is where the magic happens, as the beeswax will create a protective and moldable layer on the fabric.

To begin, lay the fabric flat on a heatproof surface. You can use a baking sheet or a silicone mat to protect your work area from any drips or spills. Take a brush or a natural sponge and dip it into the melted beeswax.
Using broad strokes, start spreading the beeswax onto the fabric. The heat from the melted beeswax will allow it to penetrate the fabric fibers, ensuring a thorough coating. Work from the center of the fabric towards the edges, making sure to cover the entire surface.
As you spread the beeswax, you may notice that it starts to solidify. This is normal and indicates that the beeswax is cooling and adhering to the fabric. If the beeswax becomes too solid to spread easily, you can gently reheat it using a hairdryer or by placing the fabric in a warm oven for a few minutes.
Remember, the goal is to achieve an even and thin layer of beeswax on the fabric. You don’t want it to be too thick, as this can make the wrap less pliable and harder to mold around food.
Congratulations! You have successfully applied the beeswax to the fabric, and your beeswax wraps are taking shape. In the next section, we will explore how to set the beeswax and ensure that your wraps are ready to use.
Setting the Beeswax
Now that we have applied the beeswax to the fabric, it’s time to set it and allow it to cool and harden. This step is essential to ensure that the beeswax wraps maintain their shape and effectiveness. In this section, we will cover two key steps in setting the beeswax: cooling the beeswax wrap and removing excess wax.
Cooling the Beeswax Wrap
After spreading the beeswax onto the fabric, you will need to let it cool and solidify. This cooling process allows the beeswax to adhere to the fabric fibers, creating a sturdy and moldable wrap.
To cool the beeswax wrap, simply set it aside on a flat surface. You can place it on a cooling rack or a clean, dry towel. Avoid touching or moving the wrap while it cools to prevent any disturbances in the beeswax layer.
Depending on the room temperature and the thickness of the beeswax layer, the cooling process can take anywhere from a few minutes to half an hour. You will know the wrap is fully cooled and set when the beeswax has hardened, and the fabric feels slightly stiff to the touch.
Removing Excess Wax
Once the beeswax wrap has cooled and set, you may notice that there is some excess wax on the surface. This excess wax can make the wrap feel sticky and may affect its ability to adhere properly.
To remove the excess wax, you can use a clean cloth or parchment paper and gently rub the surface of the wrap. The warmth of your hands will help soften the excess wax, allowing it to transfer onto the cloth or parchment paper.
Continue rubbing the wrap until you have removed all the excess wax. You will notice that the wrap becomes smoother and less sticky as you remove the excess wax.
It’s important to note that a thin layer of wax should remain on the fabric to provide the desired properties of the beeswax wrap. Removing all the wax may result in a less effective wrap.
Congratulations! You have successfully set the beeswax on the fabric, and your beeswax wraps are now ready to be used. In the next section, we will explore how to care for your beeswax wraps to ensure their longevity and effectiveness.
Caring for Beeswax Wraps
Now that you have made your own beeswax wraps, it’s important to know how to care for them to ensure their longevity and effectiveness. Proper care will not only prolong the lifespan of your wraps but also maintain their ability to preserve food and reduce waste. In this section, we will cover two key steps in caring for beeswax wraps: washing beeswax wraps and storing beeswax wraps.
Washing Beeswax Wraps
To keep your beeswax wraps clean and ready for use, regular washing is essential. However, it’s important to note that beeswax wraps should not be washed with hot water or harsh detergents, as this can degrade the beeswax coating.
To wash your beeswax wraps, simply rinse them under cool water with a mild dish soap. Gently rub the surface to remove any food residue or stains. If needed, you can use a soft brush or sponge to lightly scrub the fabric.
After washing, rinse the wraps thoroughly to ensure all soap residue is removed. Be sure to avoid wringing or twisting the wraps, as this can cause them to lose their shape. Instead, gently squeeze out any excess water and pat them dry with a clean towel.
Storing Beeswax Wraps
Proper storage is key to maintaining the shape and effectiveness of your beeswax wraps. When not in use, it’s best to store them in a cool, dry place away from direct sunlight. Avoid storing them near any heat sources, as this can cause the beeswax to soften or melt.
You can either fold your beeswax wraps neatly or roll them up for storage. If rolling, be sure to secure them with a rubber band or twine to keep them in place. This will help prevent any creases or wrinkles from forming, ensuring the wraps remain easy to use.
By following these simple care instructions, your beeswax wraps will continue to serve you well for months, reducing your reliance on single-use plastics and helping you lead a more eco-friendly lifestyle.
Setting the Beeswax
When it comes to making beeswax wraps, setting the beeswax is a crucial step in ensuring that the wraps are effective in preserving and protecting your food. In this section, we will explore two important aspects of setting the beeswax: cooling the beeswax wrap and removing excess wax.
Cooling the Beeswax Wrap
After spreading the melted beeswax onto the fabric, it is essential to allow it to cool and solidify properly. This cooling process ensures that the beeswax adheres to the fabric, creating a tight seal that keeps your food fresh.
To cool the beeswax wrap, you can simply lay it flat on a clean, heat-resistant surface. The beeswax will start to solidify as it cools down, creating a smooth and pliable surface. It is important to ensure that the wrap is not folded or crumpled during this cooling process, as it may cause uneven distribution of the beeswax or lead to cracks in the wax layer.
It is recommended to let the beeswax wrap cool for at least 10-15 minutes before using it. This allows the beeswax to harden completely and ensures that it will effectively adhere to the food and containers you wrap it around.
Removing Excess Wax
Sometimes, you may find that there is excess wax on your beeswax wrap, which can make it sticky and less effective in sealing your food. Removing this excess wax is important to maintain the quality and functionality of your beeswax wraps.
One method to remove excess wax is by using a clean, lint-free cloth or paper towel. Gently press the cloth onto the beeswax wrap and slowly peel it off. The excess wax should stick to the cloth, leaving behind a smooth and evenly coated wrap. Repeat this process until you have removed all the excess wax.
Another option is to place the beeswax wrap between two sheets of parchment paper and use a warm iron on a low setting. The heat from the iron will melt the excess wax, which will then be absorbed by the parchment paper. This method is particularly useful if you have a large amount of excess wax that needs to be removed.
Remember to handle the beeswax wrap with care when removing excess wax, as the wax may still be slightly warm. Allow the wrap to cool completely before using it to ensure that the beeswax has properly set and adhered to the fabric.
By cooling the beeswax wrap and removing any excess wax, you can ensure that your beeswax wraps are ready to be used and provide optimal preservation for your food. These steps play a vital role in the overall effectiveness and longevity of your homemade beeswax wraps.
Remember to check out the other sections in this guide for more detailed information on the materials needed for making beeswax wraps, preparing the fabric, applying the beeswax, and caring for your beeswax wraps.
Caring for Beeswax Wraps
Beeswax wraps are a wonderful and eco-friendly alternative to single-use plastic wrap. Not only are they reusable, but they also help to preserve the freshness of food while reducing waste. To ensure that your beeswax wraps last as long as possible and continue to perform at their best, it is important to properly care for them. In this section, we will explore two essential aspects of caring for beeswax wraps: washing and storing.
Washing Beeswax Wraps
One of the great things about beeswax wraps is that they are easy to clean. Washing them regularly will help maintain their effectiveness and keep them in good condition. Here are some simple steps to follow when washing your beeswax wraps:
- Gently wipe: Start by wiping off any food debris or spills from the surface of the wrap using a damp cloth or sponge. Be careful not to scrub too hard as this may damage the beeswax coating.
- Mild soap: If the wraps are particularly soiled, you can use a mild soap or dish detergent to clean them. Fill a basin or sink with lukewarm water and add a small amount of soap. Place the wraps in the soapy water and gently agitate them for a few minutes.
- Rinse: After washing, rinse the wraps thoroughly with cool water to remove any soap residue. It is important to ensure that all the soap is removed as it can affect the adhesive properties of the beeswax.
- Air dry: Allow the wraps to air dry completely before storing them. You can hang them up or lay them flat on a drying rack. Avoid using heat sources such as direct sunlight or a hairdryer, as excessive heat can melt the beeswax.
By following these simple steps, you can keep your beeswax wraps clean and ready for their next use. It’s important to note that beeswax wraps are not suitable for hot temperatures or microwaves, as the beeswax can melt.
Storing Beeswax Wraps
Proper storage is key to maintaining the longevity of your beeswax wraps. Here are some tips on how to store them effectively:
- Fold or roll: Beeswax wraps can be folded or rolled for storage. Folding them neatly helps to prevent creases and maintain their shape, while rolling them up can save space in your kitchen drawer or cupboard.
- Avoid sharp objects: When storing your beeswax wraps, make sure to keep them away from sharp objects that could puncture or tear the fabric. It’s best to store them separate from other kitchen items to prevent any accidental damage.
- Cool and dry location: Choose a cool and dry location to store your beeswax wraps. Excessive heat or moisture can affect the beeswax coating and reduce its effectiveness. A kitchen drawer or cupboard away from direct sunlight is an ideal spot.
- Reusable container: Consider using a reusable container or bag to store your beeswax wraps. This not only keeps them organized but also protects them from dust and other contaminants. Look for containers made of sustainable materials like glass or silicone.
Remember, beeswax wraps are reusable, but they do have a lifespan. Over time, the beeswax coating may wear off, and the fabric may become less sticky. However, with proper care and maintenance, you can extend the life of your wraps and continue to enjoy their benefits.
[Table]
| Pros of Beeswax Wraps | Cons of Beeswax Wraps |
|———————–|———————-|
| Environmentally friendly | Limited lifespan |
| Reusable | Not suitable for hot temperatures or microwaves |
| Preserves food freshness | Beeswax coating may wear off over time |
| Easy to clean | Requires proper care and maintenance |
| Reduces plastic waste | Can be more expensive upfront |