Beeswax is a miraculous substance secreted by honey bees to build the hexagonal comb foundations of their hives. Not only does it provide the infrastructure for honey production and brood rearing, beeswax has endless uses for beekeepers and crafters.
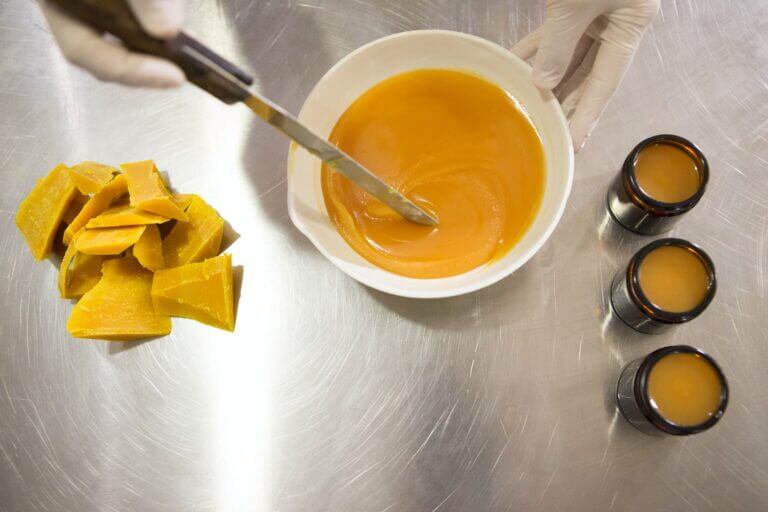
Rendering beeswax is the process of melting down raw wax from hive frames or honeycomb to purify it. Through rendering, impurities float to the top while the filtered golden beeswax can be poured into molds or blocks for use in products like candles, lotions, polishes, art, wood finishes, and more!
This step-by-step guide will walk through the entire process of rendering wax at home. You’ll learn:
- What beeswax is and why render it
- Different methods from double boilers to solar ovens
- How to store and utilize your finished beeswax
Let’s examine the origins of beeswax straight from the hive and how rendering creates a versatile, usable bee product.
What Is Beeswax and Why Render It?
Beeswax is a complex substance bees secrete from wax glands on their abdomen. It consists of over 300 chemical compounds along with some pollen and propolis.

Worker bees consume around 8 pounds of honey to create a single pound of beeswax! They use it to build honeycomb, which serves several purposes:
- Forms perfect hexagonal cells to store honey and house larvae
- Waterproofs cells to seal in honey
- Provides structural support for the colony
- Creates a soft capsule for developing bees
To extract usable beeswax, beekeepers harvest the wax cappings from honey frames or crush old brood comb. This raw wax contains debris and impurities that must be filtered out through rendering.
Benefits of rendering beeswax:
- Purifies the wax by removing contaminants
- Separates wax from other hive components
- Creates pure blocks of clean wax for crafting
- Salvages a valuable product from old equipment
- Disinfects the wax by killing pathogens
Now let’s explore different methods for rendering wax at home.
Method 1: Double Boiler for Melting Beeswax

A double boiler provides gentle, indirect heat ideal for rendering wax. The double boiler setup has two containers:
- A pot with water that simmers on the stove
- A smaller container suspended above the water that holds the beeswax
As the water heats, the suspended pot warms just enough to slowly melt the beeswax without burning it. Here is the step-by-step double boiler method:
Supplies Needed
- Chopstick or wooden spoon
- Water
- Old pot for water
- Smaller pot, jar, or tin can for beeswax
- Cheesecloth
- Glass or silicone mold (optional)
Instructions
- Fill the large pot half way with water and bring to a simmer on the stove.
- Place your raw beeswax chunks into the smaller container. Suspend this above the water.
- As the wax melts, impurities will separate and float to the top. Skim off and discard the debris periodically with a chopstick.
- Once fully melted, carefully pour the liquid wax through a cheesecloth filter and into molds or jars.
- Allow the filtered wax to cool and harden before use.
The double boiler method leaves you with pure rendered beeswax ready for projects!
Method 2: Rendering Beeswax in the Oven
An oven can also provide indirect heat to melt down beeswax for filtering. Here is how to render wax in the oven:
Supplies
- Old pot or bread pan
- Aluminum foil
- Parchment paper
- Cheesecloth
- Oven mitts
Instructions
- Wrap a large pot or bread pan in aluminum foil. The foil prevents wax sticking to the pan.
- Place a sheet of parchment paper inside the foil-lined pan. This allows easy wax removal.
- Put your raw beeswax chunks onto the parchment paper in the pan.
- Heat the oven to 200°F once the wax is loaded. Bake the wax for 1-2 hours.
- Liquid wax will pool at the bottom as impurities separate. Carefully pour through a cheesecloth filter.
- Cool and harden the filtered wax before use.
The oven provides very even, gentle rendering heat. Just be sure to monitor closely to prevent burning.

Method 3: Using a Solar Oven
For a zero-energy method, solar ovens can render beeswax using only the sun’s power. To render wax in a solar oven:
Supplies
- Solar oven (purchased or DIY design)
- Oven bag or glass/metal pan
- Aluminum foil
- Cheesecloth
Instructions
- Construct a simple box solar oven if you don’t have one. Line the inside with foil.
- Put beeswax chunks into an oven bag or pan, then place inside the solar oven.
- Position the solar oven outside in full direct sunlight.
- Let the sun slowly melt the wax over 2-6 hours. Check periodically.
- Once melted, pour the wax through a cheesecloth filter into a mold or jar.
- Allow the filtered wax to cool and harden before use.
Solar rendering may take longer but requires no electricity or fuels.
Storing and Using Rendered Beeswax
Once cooled and hardened, your finished rendered beeswax is ready to use! Here are tips on storage and usage:
Storage Tips
- Store in a cool, dry place out of direct light to prevent melting.
- Wrap pieces in plastic wrap or place in airtight glass or plastic containers.
- Refrigeration can extend shelf life. Freezing is not necessary.
- Melted beeswax can be stored for months at room temperature before use.
Usage Ideas
- Candle or soap making
- Wood finishes and polishes
- Lip balms or salves
- Waterproofing fabric or leather
- Mixed into cosmetics or lotions
- Encaustic art techniques
- Cheese and food wraps
- Wooden bowl food sealant
- Furniture repair filler
Get creative with your rendered beeswax! Share some with fellow beekeepers, crafting friends, or use it yourself.
Final Thoughts
Rendering beeswax may seem intimidating but becomes simple with practice. Here are final takeaways:

- Rendering purifies raw beeswax by filtering out contaminants
- Double boiler, oven, or solar heating slowly melts wax for filtering
- Pour melted wax through cheesecloth into a mold or container
- Store rendered wax in a cool, dry place out of light
- Beeswax has endless applications from candles to cosmetics
Transforming dirty raw wax into shimmering, golden beeswax bars or chunks is incredibly rewarding. The uses are unlimited.
We hope this guide helps you successfully render beeswax at home using basic supplies. Enjoy crafting beautiful products from your very own bees!