Explore the benefits and types of mason jars with pour spouts. Learn how to DIY install and maintain them, and discover creative uses like salad dressing dispensers and pancake batter pourers.
Benefits of Mason Jars with Pour Spouts
Pouring liquids from a regular jar can be a messy and inconvenient task. That’s where Mason jars with pour spouts come to the rescue. These innovative jars are designed to make your life easier and more convenient when it comes to pouring liquids. In this section, we will explore the benefits of using Mason jars with pour spouts, including easy pouring, reduced mess and spills, and increased convenience.
Easy Pouring
One of the major advantages of Mason jars with pour spouts is the ease of pouring. The pour spout allows for a controlled flow of liquid, ensuring that you can pour with precision and accuracy. Whether you are pouring salad dressing, pancake batter, or homemade syrup, the pour spout enables a smooth and effortless pouring experience.

With a regular jar, you may find yourself struggling to pour liquids without spilling or making a mess. The pour spout eliminates this problem by providing a designated opening that guides the liquid flow. This means no more awkward tipping or tilting of the jar, and no more wasted liquid dripping down the sides.
Reduced Mess and Spills
Nobody enjoys cleaning up spills and messes, especially when it comes to sticky liquids like syrup or honey. Mason jars with pour spouts are designed to minimize mess and spills, saving you time and frustration. The pour spout ensures that the liquid goes directly into your desired container, without any unnecessary drips or splatters.
The precision pouring offered by the pour spout also reduces the chances of overpouring or pouring too quickly. You can control the flow of the liquid, allowing for a more accurate pour and minimizing the risk of spills. This is particularly useful when you are pouring liquids into narrow or small openings, such as salad dressing bottles or pancake batter dispensers.
Increased Convenience

Mason jars with pour spouts offer increased convenience in various ways. Firstly, they eliminate the need for additional pouring tools or utensils. With a pour spout built into the jar, you can simply grab the jar and start pouring. This saves you time and hassle, especially when you’re in a rush or preparing multiple dishes.
Furthermore, Mason jars with pour spouts are versatile. They can be used for a wide range of liquids, from salad dressings and pancake batters to syrups and honey. This versatility makes them a valuable addition to any kitchen, as they can serve multiple purposes without taking up too much space.
Additionally, Mason jars with pour spouts are often designed with airtight lids, which help to keep the contents fresh and prevent spills or leaks during storage. This makes them ideal for storing homemade sauces, dressings, or other liquids that you may need to access frequently.
Types of Pour Spouts for Mason Jars
When it comes to choosing the right pour spout for your mason jar, you have a few options to consider. Each type of pour spout offers its own unique features and benefits, so it’s important to understand the differences before making a decision. In this section, we will explore three popular types of pour spouts: flip top pour spouts, twist off pour spouts, and clamp-on pour spouts.
Flip Top Pour Spouts
Flip top pour spouts are a convenient and user-friendly option for mason jars. These spouts feature a hinged lid that can be easily flipped open and closed, allowing for smooth pouring without the need to remove the entire lid. The flip top design helps to minimize mess and spills, making it ideal for liquids such as salad dressings, syrups, or even homemade juices.

With a flip top pour spout, you can easily control the flow of liquid by adjusting the angle of the lid. This allows for precise pouring, whether you want a slow drizzle or a steady stream. The lid also helps to keep your liquids fresh and protected from contaminants when the jar is not in use.
Twist Off Pour Spouts
If you prefer a more traditional and versatile option, twist off pour spouts are worth considering. These spouts consist of a separate lid and spout assembly that can be screwed onto the mason jar’s opening. The twist off design ensures a secure and leak-proof seal, preventing any accidental spills.
One of the advantages of twist off pour spouts is their compatibility with a wide range of jar sizes. Whether you have a small 8-ounce jar or a larger 32-ounce jar, you can easily find a twist off pour spout that fits. This makes them a popular choice for those who use mason jars for various purposes, such as storing homemade sauces, dressings, or even dry goods like nuts and grains.
Clamp-On Pour Spouts
For those who value versatility and ease of use, clamp-on pour spouts are an excellent option. These spouts feature a clamp mechanism that securely attaches to the top of the mason jar, creating a tight seal. The clamp-on design allows for easy installation and removal, making it convenient to switch between different jars as needed.
One of the key advantages of clamp-on pour spouts is their ability to accommodate different jar sizes and styles. Whether you have a regular-mouth or wide-mouth mason jar, the adjustable clamp ensures a secure fit. This makes clamp-on pour spouts suitable for a variety of uses, such as dispensing homemade beverages, oils, or even craft supplies like glitter or beads.
Now that you have a better understanding of the types of pour spouts available, let’s move on to the next section where we will explore how to create your own DIY mason jar pour spouts.
DIY Mason Jar Pour Spouts
Mason jars are not only versatile and trendy, but they can also be transformed into practical pour spouts with just a few simple materials and steps. In this section, we will explore the materials needed, provide step-by-step instructions, and offer tips for successful installation of DIY mason jar pour spouts.
Materials Needed
To create your own mason jar pour spouts, gather the following materials:
- Mason jar: Select the size and style of mason jar that best suits your needs. Consider the volume you will be dispensing and the overall aesthetics you desire.
- Pour spout: There are various types of pour spouts available on the market, such as flip top pour spouts, twist off pour spouts, and clamp-on pour spouts. Choose the one that aligns with your preferences and the purpose of your jar.
- Drill or punch: Depending on the type of pour spout you have chosen, you will need a drill with an appropriate-sized drill bit or a punch tool to create a hole in the mason jar lid.
- Silicone sealant: This will help secure the pour spout in place and prevent any leakage. Look for a food-safe silicone sealant to ensure the safety of your jar contents.
- Sandpaper: Use sandpaper to smooth any rough edges around the hole you create in the lid, ensuring a snug fit for the pour spout.
- Optional: If desired, you can also consider adding a gasket or washer to further enhance the seal between the lid and the pour spout.
Step-by-Step Instructions
Now that you have gathered all the necessary materials, let’s dive into the step-by-step process of creating your DIY mason jar pour spout:
- Start by removing the metal lid from your mason jar. Ensure it is clean and free from any debris.
- Choose the location on the lid where you want the pour spout to be placed. Keep in mind that it should be positioned in a way that allows for easy pouring without any obstructions.
- Using a drill with an appropriate-sized drill bit or a punch tool, carefully create a hole in the center of the lid. Take your time and apply gentle pressure to avoid damaging the lid or the jar.
- Once the hole is created, use sandpaper to smooth any sharp edges around the hole. This will prevent any potential injuries and ensure a secure fit for the pour spout.
- Now, insert the chosen pour spout into the hole you created. If necessary, apply a small amount of silicone sealant around the base of the pour spout to create a tight seal.
- Tighten the pour spout securely onto the lid, ensuring it is properly aligned and centered. If you are using a pour spout that requires a clamp or screw, follow the manufacturer’s instructions for installation.
- Allow the silicone sealant to cure according to the manufacturer’s guidelines. This will ensure a strong and leak-proof bond between the pour spout and the lid.
- Once the sealant is fully cured, fill your mason jar with your desired liquid or contents. Screw the lid with the pour spout onto the jar, and your DIY mason jar pour spout is ready to use!
Tips for Successful Installation
Here are some helpful tips to ensure a successful installation of your DIY mason jar pour spout:
- Take your time: Precision is key when creating the hole for the pour spout. Avoid rushing the process to minimize the risk of errors or damage.
- Test for leaks: Before filling the jar with your desired contents, perform a leak test by filling the jar with water and turning it upside down. Check for any signs of leakage and make necessary adjustments if needed.
- Clean and maintain: Regularly clean your mason jar pour spout to maintain its functionality and hygiene. Refer to the “Cleaning and Maintenance of Mason Jar Pour Spouts” section for detailed instructions on how to keep your pour spout in optimal condition.
- Customize and decorate: Get creative with your DIY mason jar pour spout by adding decorative elements or labeling. This will not only enhance the visual appeal but also make it easier to identify the contents of the jar.
With a few simple materials and steps, you can transform your ordinary mason jar into a convenient and stylish pour spout. Whether you’re looking to dispense salad dressings, pancake batter, or homemade syrups, creating your own mason jar pour spouts allows for customization and adds a personal touch to your kitchen essentials.
Cleaning and Maintenance of Mason Jar Pour Spouts
Mason jar pour spouts are a convenient addition to any kitchen, allowing for easy dispensing of liquids without the mess and spills that often accompany traditional pouring methods. To ensure the longevity of your pour spouts and maintain their functionality, regular cleaning and maintenance are essential. In this section, we will discuss various cleaning methods, how to remove stains and odors, and the importance of lubricating the spout mechanism.
Regular Cleaning Methods
Cleaning your mason jar pour spouts on a regular basis is crucial to prevent the buildup of residue and maintain their hygiene. Here are some effective cleaning methods to keep your pour spouts in top condition:
- Hand Washing: The most common and straightforward method is to hand wash the pour spouts using warm soapy water. Start by removing the spout from the jar and disassembling any removable parts. Use a small brush or sponge to scrub away any residue or debris. Rinse thoroughly and allow the parts to air dry before reassembling and attaching them back to the jar.
- Dishwasher: If your pour spouts are dishwasher-safe, you can also opt to clean them in the dishwasher. Before placing them in the dishwasher, ensure that all removable parts are disassembled and securely placed in the utensil holder or the top rack of the dishwasher. Run a regular cycle with mild detergent, and once the cycle is complete, allow the parts to dry completely before reattaching them to the jar.
- Vinegar Soak: For stubborn stains or odors, a vinegar soak can work wonders. Fill a basin or sink with equal parts white vinegar and warm water. Disassemble the pour spout and let the parts soak in the solution for about 30 minutes. After soaking, scrub away any remaining residue with a brush or sponge. Rinse thoroughly and air dry the parts before reassembling.
Remember to always check the manufacturer’s instructions for specific cleaning guidelines, as some pour spouts may have unique requirements.
Removing Stains and Odors
Over time, mason jar pour spouts may develop stains or retain lingering odors from the liquids they dispense. Here are some effective methods to remove stains and odors:
- Baking Soda Paste: Create a paste by mixing baking soda and water until it forms a thick consistency. Apply the paste to the stained areas of the pour spout and let it sit for a few minutes. Scrub gently with a brush or sponge, focusing on the stained areas. Rinse thoroughly and dry the pour spout before reassembling.
- Lemon Juice: The natural acidity of lemon juice can help eliminate odors from your pour spouts. Squeeze fresh lemon juice onto a sponge or cloth and wipe the interior and exterior of the pour spout. Rinse thoroughly with water and allow it to dry completely.
- Denture Tablets: Denture cleaning tablets can be surprisingly effective in removing stains and odors from pour spouts. Fill a basin or sink with warm water and drop a denture tablet in it. Disassemble the pour spout and let the parts soak in the solution for the recommended time. Rinse thoroughly and air dry before reattaching to the jar.
Lubricating the Spout Mechanism
To ensure smooth operation and prevent any sticking or jamming, lubricating the spout mechanism is essential. Here are some tips for lubricating your mason jar pour spout:
- Food-Grade Lubricant: Choose a food-grade lubricant specifically designed for kitchen use. Apply a small amount of lubricant to the moving parts of the pour spout mechanism, ensuring smooth movement. Wipe away any excess lubricant with a clean cloth.
- Vegetable Oil: If you don’t have a food-grade lubricant on hand, you can use vegetable oil as an alternative. Apply a small amount of vegetable oil to the moving parts of the pour spout mechanism and wipe away any excess oil. This will help maintain the smooth operation of the spout.
Regular cleaning and maintenance, along with proper lubrication, will not only prolong the lifespan of your mason jar pour spouts but also ensure an optimal pouring experience every time. By incorporating these practices into your routine, you can enjoy the benefits of easy pouring, reduced mess and spills, and increased convenience that pour spouts provide.
Now that we’ve covered the cleaning and maintenance aspect of mason jar pour spouts, let’s explore the creative and practical uses for these versatile kitchen accessories.
Creative Uses for Mason Jars with Pour Spouts
With their convenient pour spouts, mason jars become versatile tools in the kitchen. Let’s explore some creative uses for these jars that will make your cooking and food storage experiences even more enjoyable.
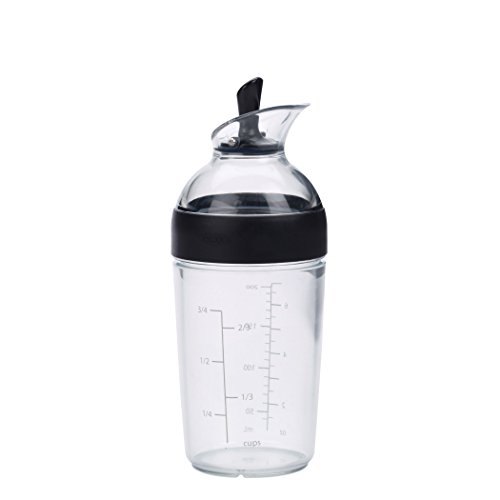
Salad Dressing Dispenser
Say goodbye to messy salad dressing containers and hello to the simplicity of using mason jars with pour spouts. These jars make it easy to mix and pour your favorite dressings without the hassle of spills or drips. Simply prepare your dressing, pour it into the jar, and close the lid. When it’s time to dress your salad, just flip the spout open and drizzle the perfect amount onto your greens. No more soggy or overdressed salads – you’re in control!
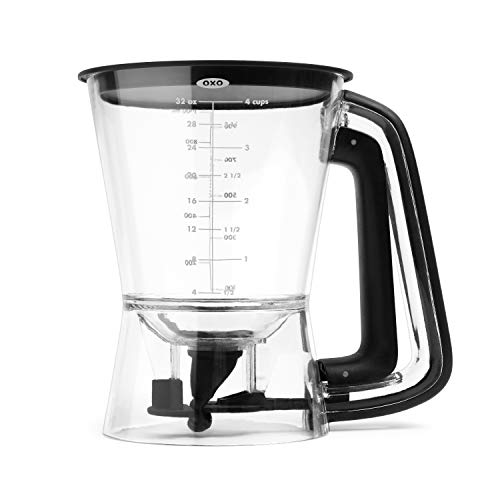
Pancake Batter Pourer
Breakfast just got easier with the help of mason jars and their pour spouts. Instead of struggling with a ladle or spoon, you can effortlessly pour pancake batter onto your griddle using a mason jar. The controlled flow of the pour spout ensures that you create perfectly round pancakes every time. Plus, the mess and cleanup are significantly reduced compared to traditional pouring methods. Enjoy a stack of fluffy pancakes without the hassle!
Homemade Syrup or Honey Dispenser
Tired of sticky syrup or honey bottles leaving a mess in your pantry or on your countertops? Mason jars with pour spouts are the solution you’ve been looking for. These jars not only provide a neat and tidy way to store your sweet condiments but also make it a breeze to dispense them. No more struggling with sticky bottles or having to transfer the contents into a separate container. Simply pour your desired amount of syrup or honey with precision and ease.
When it comes to creative uses for mason jars with pour spouts, the possibilities are endless. You can also use them as oil or vinegar dispensers for cooking, making it convenient to measure and pour the right amount without any mess. Additionally, these jars are perfect for storing homemade sauces, marinades, or even homemade beverages like infused water or lemonade.
By utilizing mason jars with pour spouts, you not only simplify your cooking and food storage processes but also add a touch of charm to your kitchen. The clear glass allows you to showcase your homemade creations, making them visually appealing as well.
Remember, mason jars with pour spouts are not limited to kitchen use only. They can also be repurposed as stylish soap dispensers in your bathroom or as unique vases for flowers. The versatility of these jars makes them a valuable addition to your home.
So, whether you’re dressing your salad, pouring pancake batter, or dispensing syrup or honey, mason jars with pour spouts are here to make your life easier and more enjoyable. Embrace their functionality and get creative with your uses – you won’t be disappointed!
Now that we’ve explored the creative uses for mason jars with pour spouts, let’s dive into selecting the right size jar for your specific needs.
Choosing the Right Size Mason Jar for Pour Spouts
Considering Usage Needs
When it comes to choosing the right size mason jar for pour spouts, it’s important to consider your specific usage needs. Are you planning to use the jar for storing and pouring liquids, or do you have a specific purpose in mind? Understanding how you intend to use the jar will help you determine the appropriate size.
Matching Pour Spout Size to Jar Opening
To ensure a proper fit and functionality, it’s essential to match the pour spout size to the jar opening. Mason jars come in various sizes, including pint, quart, and half-gallon options. Each jar size has a corresponding opening diameter, and you’ll want to choose a pour spout that fits snugly into the jar without any gaps or leaks.
Ensuring Proper Fit
To ensure a proper fit of the pour spout in the mason jar, it’s crucial to consider the jar’s threading. Mason jars typically have two types of threading: regular and wide-mouth. Regular-mouth jars have a smaller opening diameter and require pour spouts specifically designed for that size. On the other hand, wide-mouth jars have a larger opening diameter and necessitate pour spouts that match their dimensions.
When selecting a pour spout, make sure it is designed to fit the type of threading on your mason jar. This will ensure a secure and leak-proof attachment, preventing any spills or messes while pouring. Additionally, some pour spouts may come with adjustable features that allow them to fit both regular and wide-mouth jars, providing versatility and convenience.
To summarize, choosing the right size mason jar for pour spouts involves considering your usage needs, matching the pour spout size to the jar opening, and ensuring a proper fit by considering the jar’s threading. By taking these factors into account, you can select the perfect mason jar and pour spout combination that meets your specific requirements.
Here is a comparison table showcasing the different jar sizes and their corresponding pour spout sizes:
| Mason Jar Size | Jar Opening Diameter | Recommended Pour Spout Size |
|---|---|---|
| Pint | 2.75 inches | Regular-mouth pour spout |
| Quart | 3.38 inches | Regular-mouth pour spout |
| Half-Gallon | 4.88 inches | Wide-mouth pour spout |
Now that you have a better understanding of choosing the right size mason jar for pour spouts, let’s move on to exploring the benefits of using mason jars with pour spouts.