Discover how to paint bumble bee rocks using this . Get tips for intricate designs and explore creative ideas for using painted rocks as garden decorations, paperweights, and more.
Materials Needed for Bumble Bee Painted Rocks
Smooth Rocks
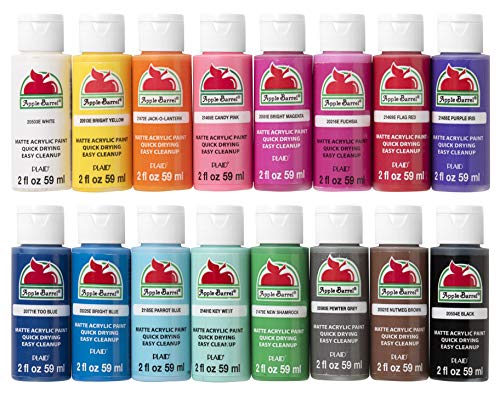
Acrylic Paint
Paintbrushes
Paint Palette or Plate
Water and Paper Towels
When it comes to creating beautiful bumble bee painted rocks, having the right materials is essential. Let’s take a closer look at each item you’ll need to bring your rock painting project to life.
Smooth Rocks
First and foremost, you’ll need smooth rocks as your canvas. These rocks can be found in various sizes and shapes, depending on your preference. Look for rocks that have a smooth surface, free from any rough edges or cracks. Smooth rocks provide a great base for your bumble bee design and allow the paint to adhere smoothly.
Acrylic Paint
Acrylic paint is the ideal choice for painting bumble bee rocks. This type of paint offers vibrant colors and excellent coverage, ensuring that your bumble bee design stands out. Acrylic paint is available in a wide range of colors, but for this project, you’ll primarily need yellow and black. Consider using metallic or glossy finishes to add a touch of shine to your painted rocks.
Paintbrushes
To bring your bumble bee rocks to life, you’ll need a selection of paintbrushes. It’s best to have a variety of brush sizes, including small, medium, and large brushes. The small brushes will be used for delicate details, such as the bee’s face, while the larger brushes are perfect for filling in the stripes and background. Opt for brushes with synthetic bristles, as they work well with acrylic paint and provide precise application.

Paint Palette or Plate
Having a paint palette or plate is essential for organizing your acrylic paint. This will allow you to mix colors, create gradients, and experiment with different shades. You can use a traditional artist’s palette or simply use a disposable plate as an alternative. Whatever you choose, make sure it’s easy to clean and provides enough space for your paint.
Water and Paper Towels
Water and paper towels are indispensable tools for any painting project. Keep a container of water nearby to clean your brushes between color changes. This will prevent colors from mixing and ensure that your bumble bee design remains vibrant. Additionally, have a stack of paper towels on hand to blot excess water from your brushes or to wipe away any mistakes.
By gathering these materials, you’ll be well-prepared to embark on your bumble bee rock painting adventure. Now that we have everything we need, let’s move on to the step-by-step guide to painting bumble bee rocks.

Step-by-Step Guide to Paint Bumble Bee Rocks
Clean and Prep Rocks
Before you begin painting your bumble bee rocks, it’s important to properly clean and prep them. Start by collecting smooth rocks of various sizes. You can find these at your local beach or purchase them from a craft store. Once you have your rocks, give them a good scrub using warm soapy water and a brush to remove any dirt or debris. Rinse them thoroughly and let them dry completely before moving on to the next step.
Paint Base Coat
Once your rocks are clean and dry, it’s time to paint the base coat. Choose a vibrant yellow acrylic paint and apply an even layer to the entire surface of each rock. This will serve as the foundation for your bumble bee design. Make sure to use a paintbrush that is suitable for the size of the rock you are working on, as this will help you achieve a smooth and even application.
Paint Yellow Stripes
After the base coat has dried, it’s time to add the characteristic yellow stripes to your bumble bee rocks. Using a thin paintbrush, carefully paint two or three evenly spaced horizontal stripes across each rock. You can vary the thickness and placement of the stripes to create a unique and playful look. Remember to let each layer of paint dry before adding new colors or details.

Paint Black Stripes
Once the yellow stripes have dried, it’s time to add the black stripes that will give your bumble bee rocks their distinctive pattern. Using a thin paintbrush, carefully paint thin black stripes in between the yellow stripes. These black stripes will help create the illusion of a striped bumble bee body. Take your time and be patient while painting these stripes, as precision is key to achieving a polished and professional look.
Paint Bumble Bee’s Face
Now that the body of your bumble bee rocks is complete, it’s time to paint their adorable faces. Using a small paintbrush and black acrylic paint, carefully paint two small circles in the upper half of each rock to represent the bumble bee’s eyes. Then, using white paint, add a small dot to each eye to create a highlight. Finally, use black paint to add a smiling mouth just below the eyes. This will bring your bumble bee rocks to life and give them a charming and whimsical appearance.
Add Details and Finishing Touches
To add the finishing touches to your bumble bee rocks, you can get creative and add some additional details. For example, you can use a small paintbrush and black paint to add tiny antennas to the top of each rock. You can also use different colors to paint flowers, leaves, or other elements around the bumble bee rocks to create a more vibrant and visually appealing scene. Let your imagination run wild and have fun experimenting with different patterns and designs.
Incorporating bursts of creativity and perplexity, painting bumble bee rocks can be a fun and engaging craft project for anyone. The step-by-step guide provided here will help you create beautiful and unique bumble bee rocks that can be used in various ways.
Remember, you can use these bumble bee rocks as garden decorations, placing them strategically among your flowers and plants to add a touch of whimsy and charm. They can also serve as paperweights, adding a playful element to your desk or workspace. Additionally, bumble bee rocks can be a great craft project for kids, allowing them to explore their creativity while creating their own little garden companions. These painted rocks can also make thoughtful gifts for bee enthusiasts or can be added to rock art collections.

To ensure the longevity of your bumble bee rocks, it’s recommended to seal them with a clear varnish or sealant. This will protect the paint from chipping or fading over time, allowing you to enjoy your vibrant creations for years to come.
So why not gather some smooth rocks, acrylic paint, paintbrushes, and other materials needed for this project, and start painting your own bumble bee rocks today? Let your imagination take flight as you create these adorable little creatures that will bring joy and a touch of nature to your surroundings. Happy painting!
Tips for Painting Bumble Bee Rocks
When it comes to painting bumble bee rocks, there are a few tips and tricks that can help you create beautiful and vibrant designs. Whether you’re a beginner or an experienced artist, these tips will ensure that your painted rocks turn out amazing.
Start with a Light Base Coat
Before diving into the intricate details of a bumble bee design, it’s important to start with a light base coat. This will provide a solid foundation for the colors to come. Choose a light shade of yellow or white acrylic paint and apply it evenly to the entire surface of the rock. Allow the base coat to dry completely before moving on to the next step.
Use Thin Brushes for Precise Details
When it comes to adding the intricate details of a bumble bee, using thin brushes is crucial. Thin brushes allow for more control and precision, making it easier to create clean lines and small patterns. Look for brushes with fine bristles that are suitable for detailed work. With these brushes, you can add the characteristic yellow and black stripes to your bumble bee rock with ease.
Let Each Layer Dry Before Adding New Colors
To create depth and dimension in your bumble bee design, it’s important to let each layer of paint dry before adding new colors. This allows the colors to stand out individually and prevents them from blending together. Patience is key when painting rocks, so be sure to wait until each layer is completely dry before moving on to the next one. This will ensure that your bumble bee rocks look vibrant and professional.
Experiment with Different Patterns and Designs
One of the joys of painting bumble bee rocks is the opportunity to experiment with different patterns and designs. While the classic yellow and black stripes are iconic, don’t be afraid to get creative and try out new ideas. You can add polka dots, flowers, or even other insects to your bumble bee rock. Let your imagination run wild and see what unique designs you can come up with.
Seal the Painted Rocks for Longevity
After putting in all the hard work to paint your bumble bee rocks, it’s important to seal them for longevity. Applying a sealant not only protects the paint from chipping or fading but also enhances the colors and gives the rocks a glossy finish. There are several sealants available in the market specifically designed for painted rocks. Follow the instructions on the sealant to ensure proper application and long-lasting results.
By following these , you can create stunning bumble bee rocks that will impress everyone who sees them. Remember to start with a light base coat, use thin brushes for precise details, let each layer dry before adding new colors, experiment with different patterns and designs, and seal the painted rocks for longevity. With a little practice and creativity, you’ll be able to paint bumble bee rocks that are both visually striking and fun to create.
Ideas for Using Bumble Bee Painted Rocks
Bumble bee painted rocks are not only a fun and creative craft project, but they also have a variety of practical uses. Whether you want to decorate your garden, add a touch of whimsy to your workspace, or create a unique gift for a bee enthusiast, these adorable rocks are sure to bring a smile to anyone’s face. In this section, we will explore some exciting ideas for using bumble bee painted rocks and how they can enhance different aspects of your life.
Garden Decorations
One of the most popular uses for bumble bee painted rocks is as garden decorations. These vibrant and cheerful little creatures can brighten up any outdoor space and add a playful touch to your garden. You can place them along garden pathways, tuck them into flower beds, or even create a bumble bee rock border around your vegetable garden. The possibilities are endless, and the best part is that they require no maintenance or watering!
To create a stunning bumble bee rock garden, you can arrange the rocks in a pattern, alternating between different sizes and poses to create a sense of movement. You can also combine them with other nature-inspired elements such as flowers, plants, and bird feeders for a truly whimsical and enchanting garden.
Paperweights
If you’re looking for a practical yet charming addition to your workspace or home office, bumble bee painted rocks make perfect paperweights. Their smooth surface and weighty presence will keep your papers securely in place while adding a touch of color and personality to your desk. Whether you’re a student, a professional, or simply someone who enjoys a tidy workspace, these little rock creatures will bring a smile to your face every time you sit down to work.
To use bumble bee painted rocks as paperweights, simply place them strategically on top of your papers or documents. You can arrange them in a row, create a stack, or scatter them around your desk for a more playful look. Not only will they serve a practical purpose, but they will also act as a conversation starter and a source of inspiration during your workday.
Kid’s Craft Projects
Bumble bee painted rocks are a fantastic craft project for kids of all ages. Whether you’re looking for a fun activity to do with your own children or planning a craft party for a group of kids, these rocks will provide hours of creative entertainment. They are easy to paint, require minimal materials, and can be customized to suit each child’s artistic vision.
To get started with a bumble bee rock painting project, gather a collection of smooth rocks, acrylic paints in vibrant yellow and black colors, paintbrushes, and a paint palette or plate. Set up a painting station with water and paper towels for easy cleanup. Encourage the kids to let their imagination run wild as they paint the base coat, add stripes, and create the bumble bee’s face. Once the rocks are dry, they can be proudly displayed or used in other creative projects, such as making a bumble bee rock garden or as part of a rock art collection.
Gifts for Bee Enthusiasts
If you have a friend or family member who is a bee enthusiast or simply loves nature-inspired decor, a bumble bee painted rock makes a thoughtful and unique gift. These hand-painted rocks are not only beautiful but also carry a symbolic message of the importance of bees in our ecosystem. They can serve as a reminder of the vital role bees play in pollination and the need to protect these incredible creatures.
To make the gift even more special, consider pairing the bumble bee painted rock with a book about bees or a jar of local honey. This thoughtful combination will not only bring joy to the recipient but also provide them with additional knowledge and appreciation for these fascinating insects. Whether it’s for a birthday, a holiday, or just to show someone you care, a bumble bee painted rock gift is sure to make a lasting impression.
Rock Art Collections
For those who enjoy collecting unique and eye-catching pieces of art, bumble bee painted rocks are a must-have addition to any rock art collection. These miniature masterpieces showcase the creativity and talent of the artist while capturing the whimsy and beauty of nature. Each bumble bee rock is a one-of-a-kind creation, making them highly sought after by rock art enthusiasts.
To start your own rock art collection, keep an eye out for bumble bee painted rocks at local craft fairs, art markets, or online platforms. You can also try your hand at creating your own bumble bee rocks and add them to your collection. Display them on a shelf, in a shadow box, or even create a dedicated wall gallery to showcase the unique charm of each painted rock. Each time you admire your collection, you’ll be transported to a world of creativity and the wonders of nature.
In conclusion, bumble bee painted rocks offer endless possibilities for creativity and practical use. Whether you choose to use them as garden decorations, paperweights, craft projects for kids, gifts for bee enthusiasts, or as part of a rock art collection, these delightful rocks will bring joy, beauty, and a touch of whimsy to your life. Let your imagination soar as you explore the many ways to incorporate bumble bee painted rocks into your world.