Want to learn how to draw honeycomb? Follow our step-by-step guide and get tips for creating realistic honeycomb art. Find inspiration for abstract and nature-inspired designs in different art styles.
Materials Needed for Drawing Honeycomb
When it comes to drawing honeycomb, there are a few essential materials that you will need to have on hand. These materials will help you create accurate and detailed honeycomb structures. Let’s take a look at each one:
Sketchbook or Drawing Paper
First and foremost, you will need a sketchbook or drawing paper. This is where you will bring your honeycomb design to life. Whether you prefer the tactile feel of a sketchbook or the smooth surface of drawing paper, having a dedicated space to work on your honeycomb drawings is crucial.
Pencil or Pen
Next, you will need a pencil or pen. This will be the tool you use to create the intricate lines and shapes of the honeycomb structure. A pencil is great for sketching and creating rough outlines, while a pen can provide more defined and permanent lines. Choose the one that you feel most comfortable with and experiment with different line weights to add depth and dimension to your drawings.
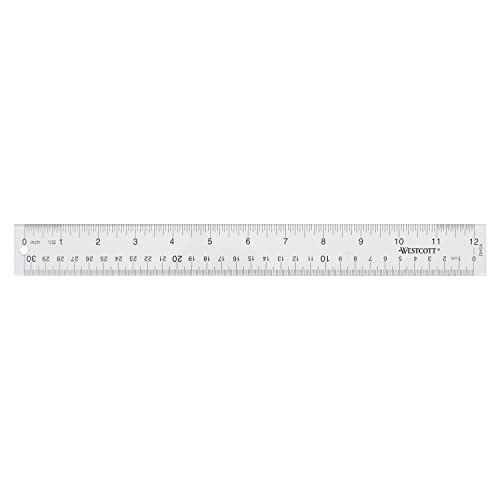
Ruler or Straight Edge
To ensure straight and precise lines, a ruler or straight edge is essential. This tool will help you create the straight sides of the hexagons in the honeycomb. It can also be used to measure and mark out the dimensions of your drawing. Opt for a ruler that is sturdy and has clearly marked measurements to ensure accuracy in your honeycomb design.

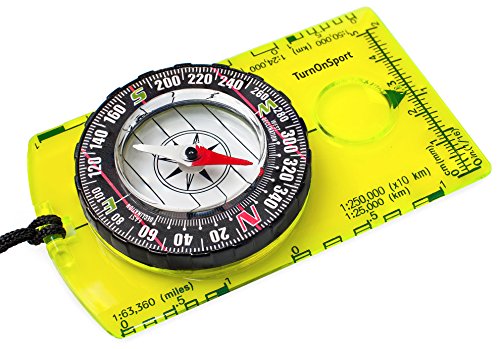
Compass or Circular Template
Lastly, you will need a compass or circular template. These tools are used to create the circular shapes within the honeycomb structure. By adjusting the width of the compass or selecting the appropriate circular template, you can easily create consistent and proportional circles for the cells of the honeycomb. This will add a level of realism to your drawings and make them visually appealing.
In summary, when it comes to drawing honeycomb, having the right materials is essential. A sketchbook or drawing paper provides the canvas for your design, while a pencil or pen allows you to bring your ideas to life. A ruler or straight edge ensures accuracy and straight lines, and a compass or circular template helps create the circular shapes within the honeycomb structure. With these materials in hand, you’ll be well-equipped to create stunning honeycomb drawings.
Understanding the Honeycomb Structure
Hexagon Basics
The honeycomb structure is made up of repeating hexagons, which are six-sided polygons. Hexagons are a common shape found in nature, from beehives to snowflakes. They are known for their strength and efficiency in maximizing space. When drawing honeycomb, understanding the basics of hexagons is crucial.
To draw a hexagon, start by drawing a circle. Then, divide the circle into six equal sections by drawing lines that intersect at the center. Connect the points where the lines intersect to form a hexagon. Remember to use a ruler or straight edge to ensure straight lines.
Identifying the Cells
Once you have a basic understanding of hexagons, you can start identifying the individual cells within the honeycomb structure. Each hexagon in the honeycomb represents a cell where bees store honey and raise their young.
To identify the cells, look for the repeating pattern of hexagons. In a traditional honeycomb, each hexagon shares a side with six other hexagons. This creates a strong and interconnected structure. The cells themselves are hexagonal prisms, with three pairs of parallel sides forming the walls of each cell.
Angles and Proportions
When drawing honeycomb, paying attention to angles and proportions is essential to create an accurate representation. The angles within each hexagon are all equal, measuring 120 degrees. This consistent angle gives honeycomb its iconic shape.
To ensure proper proportions, it’s important to maintain the same size for each hexagon. Using a ruler or compass can help you achieve this. Additionally, the distance between each hexagon should be uniform, creating a visually pleasing and balanced honeycomb structure.
Remember to use a compass or circular template to create the initial circle for each hexagon. This will help maintain consistency in size and shape throughout your drawing.
By understanding the basics of hexagons, identifying the cells, and paying attention to angles and proportions, you can successfully draw a honeycomb structure. Practice these techniques and experiment with different styles to create unique and visually appealing honeycomb designs.
| Hexagon Basics | Identifying the Cells | Angles and Proportions |
|---|---|---|
| Draw a circle. | Look for repeating pattern of hexagons. | Angles within each hexagon are 120 degrees. |
| Divide the circle into six equal sections. | Each hexagon shares a side with six other hexagons. | Maintain consistent size for each hexagon. |
| Connect the points where the lines intersect to form a hexagon. | Hexagonal prisms form the walls of each cell. | Use a compass or circular template for consistent size and shape. |
Remember, drawing honeycomb is a creative process, and there are no strict rules. Feel free to experiment with different techniques and styles to make your honeycomb drawings unique.
Step-by-Step Guide to Drawing Honeycomb
Drawing a honeycomb can seem like a daunting task, but with a step-by-step approach, it becomes much more manageable. In this section, we will break down the process into three main steps: drawing a single hexagon, repeating hexagons to form a grid, and adding depth and dimension.
Drawing a Single Hexagon
To begin creating a honeycomb, we first need to learn how to draw a single hexagon. Follow these steps to get started:

- Start by using a ruler or straight edge to draw a horizontal line. This will serve as the base of our hexagon.
- From one end of the line, draw two diagonal lines that meet at a point above the line. These lines should form an angle of 120 degrees.
- Repeat step 2 on the other end of the line, creating two more diagonal lines that meet at a point above the line.
- Connect the points where the diagonal lines meet the base line, forming the sides of the hexagon.
- Erase any unnecessary lines, leaving only the hexagon shape.
Congratulations! You have successfully drawn a single hexagon, which is the building block of a honeycomb pattern.
Repeating Hexagons to Form a Grid
Now that you know how to draw a single hexagon, let’s learn how to repeat it to create a grid-like pattern. Follow these steps:
- Start by drawing a single hexagon using the method described in the previous section.
- Next, draw another hexagon directly adjacent to the first one, ensuring that their sides are touching. This will be the second hexagon in our grid.
- Continue drawing hexagons adjacent to each other, forming a row of hexagons.
- Once you have completed the first row, start a new row directly below the first one. Align the hexagons so that they fit snugly between the hexagons in the row above.
- Repeat this process until you have created the desired size of the honeycomb grid.
By repeating the hexagon shape and aligning them accordingly, you can easily create a honeycomb pattern that extends as far as you’d like.
Adding Depth and Dimension
To make your honeycomb drawing more realistic and visually appealing, you can add depth and dimension. Here are some techniques to consider:
- Shading: Use a pencil or shading tool to add various shades of gray or color to the hexagons. Start by shading one side of each hexagon, creating a gradual transition from light to dark. This will give the illusion of depth.
- Highlights: Add highlights to the opposite side of the shaded area to create further contrast and enhance the three-dimensional effect. Use a white pencil or eraser to gently lighten certain areas.
- Creating Texture: To make the honeycomb look more realistic, add texture to the surface. You can achieve this by lightly drawing tiny lines or dots within each hexagon, mimicking the texture of a real honeycomb.
- Adding Bees or Honey: For a whimsical touch, consider incorporating bees or drizzling honey onto your honeycomb drawing. This can be done using colored pencils, markers, or even watercolors.
Remember, the key to adding depth and dimension is to experiment and find a technique that suits your style and preferences. Don’t be afraid to get creative and make your honeycomb drawing truly unique.

Tips and Techniques for Realistic Honeycomb
Drawing a realistic honeycomb requires attention to detail and the use of various techniques to achieve a lifelike effect. In this section, we will explore three key aspects: shading and highlights, creating texture, and adding bees or honey. By mastering these techniques, you can bring depth and realism to your honeycomb drawings.
Shading and Highlights
Shading and highlights play a crucial role in creating the illusion of depth and dimension in your honeycomb artwork. By understanding how light interacts with the honeycomb structure, you can effectively convey its three-dimensional nature.
To begin, observe the direction of the light source in your reference or imagination. This will determine where the shadows and highlights fall on the honeycomb cells. Use a range of shading techniques, such as cross-hatching or stippling, to create variations in value and texture. Experiment with different pencil pressures and strokes to achieve the desired effect.
When adding highlights, imagine where the light would hit the honeycomb cells most prominently. Typically, this occurs on the edges or raised areas of the hexagons. Use a white pencil or an eraser to gently lighten these areas, creating a luminous effect. Remember to blend the highlights seamlessly with the surrounding shading to maintain a realistic appearance.
Creating Texture
Texture is an essential element in bringing the honeycomb to life on paper. By incorporating texture, you can mimic the roughness and intricacy of the actual structure. There are several techniques you can employ to achieve this effect.
One approach is to use a stippling technique, where you create texture by applying small dots or dashes. Start by lightly sketching the hexagons of the honeycomb, then gradually build up the texture by adding more dots or dashes within each cell. Vary the density and size of the dots to create a realistic texture.
Another technique is to incorporate lines to simulate the ridges and edges of the honeycomb cells. Use a fine-tipped pen or pencil to carefully draw parallel lines along the sides of the hexagons. Experiment with different line weights and spacing to achieve the desired texture.
Additionally, consider using mixed media to enhance the texture of your honeycomb. For example, you can incorporate actual honey or beeswax into your artwork to add a tactile element. This not only creates a unique visual effect but also engages multiple senses, making your artwork truly immersive.
Adding Bees or Honey
To further enhance the realism and visual appeal of your honeycomb drawing, consider incorporating elements such as bees or honey. These additions can add a touch of whimsy or narrative to your artwork.
When drawing bees, start by studying their anatomy and proportions. Pay attention to the shape of their bodies, wings, and legs. Use a light pencil to sketch the basic form of the bee, then gradually add details and refine the drawing. Experiment with different poses and positions to create a dynamic composition.
When depicting honey, focus on capturing its golden, translucent quality. Start by lightly sketching the honey within the cells of the honeycomb. Use warm, amber tones to add depth and richness to the honey. Consider using techniques such as blending or layering to achieve a realistic honey-like appearance.
Remember, the key to incorporating bees or honey is to ensure they complement the overall composition of your honeycomb drawing. They should enhance the narrative or visual impact without overpowering the intricacy of the honeycomb structure itself.
Inspiration and Ideas for Honeycomb Art
Are you looking for inspiration to create your own honeycomb art? Look no further! In this section, we will explore different ideas and designs that will spark your creativity and help you create stunning honeycomb artwork. Whether you prefer abstract designs, nature-inspired art, or exploring honeycomb patterns in different art styles, we’ve got you covered.
Abstract Honeycomb Designs
Abstract art allows for endless possibilities and interpretations. When it comes to honeycomb designs, you can explore various abstract approaches to create unique and visually captivating artwork. Let your imagination run wild and experiment with different colors, shapes, and textures to bring your honeycomb art to life.
One way to create abstract honeycomb designs is by playing with geometric shapes. Use hexagons as the base and then experiment with different arrangements and sizes. You can overlap hexagons, rotate them, or even distort their shapes to create a sense of movement and depth. By using a variety of colors and shading techniques, you can add further dimension to your abstract honeycomb design.
Another approach to abstract honeycomb art is to incorporate mixed media. Combine traditional drawing or painting techniques with collage, stenciling, or even digital elements. This allows you to create unique textures and layers within your honeycomb artwork. Consider using different materials like tissue paper, fabric, or magazine cutouts to add depth and visual interest to your piece.
Nature-Inspired Honeycomb Art
Nature has always been a great source of inspiration for artists, and honeycombs are no exception. There is a natural beauty and symmetry to honeycomb structures that can be translated into stunning artwork. By incorporating elements from the natural world, you can create honeycomb art that celebrates the harmony and intricacy of nature.
One way to incorporate nature into your honeycomb art is by using organic shapes and patterns. Look to flowers, leaves, or even animal patterns for inspiration. Imagine how a honeycomb structure could intertwine with the petals of a flower or mimic the veins of a leaf. By combining these natural elements with the geometric shapes of the honeycomb, you can create a captivating fusion of nature and structure.
Consider using earthy tones and natural materials in your honeycomb artwork. Think of warm browns, golden yellows, and deep greens to evoke the natural colors found in honeycombs and their surroundings. You can also experiment with different textures to emulate the roughness of honeycomb or the softness of flower petals. By incorporating these natural elements, you can create honeycomb art that connects the viewer to the beauty of the natural world.
Honeycomb Patterns in Different Art Styles
Art is a vast and diverse world, and honeycomb patterns can be explored in different art styles, each offering a unique twist to your artwork. Let’s take a look at some popular art styles and how they can be combined with honeycomb patterns to create visually stunning pieces.
In the realm of pop art, you can play with vibrant colors and bold shapes to create eye-catching honeycomb patterns. Think of how the repetition of hexagons can be used to create a sense of rhythm and movement within your artwork. Consider using contrasting colors to make your honeycomb pattern pop and catch the viewer’s attention.
If you prefer a more minimalist approach, you can explore honeycomb patterns in the realm of contemporary art. Embrace simplicity and clean lines to create a visually striking honeycomb design. Focus on the interplay between negative and positive space, allowing the honeycomb pattern to become a meditative and calming element within your artwork.
For those who enjoy exploring the surreal and fantastical, honeycomb patterns can be incorporated into your artwork in the realm of surrealism. Combine the precision of the honeycomb structure with dreamlike elements to create a sense of wonder and intrigue. Imagine honeycomb patterns floating in the sky or merging with unexpected objects. Let your imagination run wild and create artwork that transports the viewer to a different reality.
In conclusion, honeycomb art offers endless possibilities for creativity and exploration. Whether you prefer abstract designs, nature-inspired artwork, or experimenting with different art styles, there is no limit to what you can create. Let the honeycomb structure inspire you and guide your artistic journey. Now, grab your sketchbook or drawing paper, your pencil or pen, and let’s dive into the world of honeycomb art!