Discover step-by-step instructions on how to make a bee hive, from choosing the right materials to maintaining and caring for your hive. Perfect for beginners in beekeeping.
Materials Needed to Build a Bee Hive
Building a bee hive requires a few essential materials to ensure the bees have a safe and comfortable home. Let’s take a closer look at the key components you’ll need to construct your bee hive.
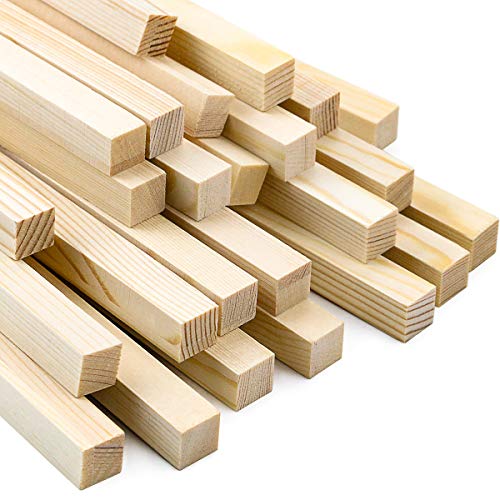
Wood
Wood is the primary material used to build a bee hive. It provides durability and insulation, creating a suitable environment for the bees. When selecting wood, it’s important to choose a type that is resistant to rot and decay, such as cedar or pine. These woods are known for their longevity and ability to withstand the elements.
To the hive, you’ll need various sizes of wood panels, including:
- Outer cover: This is the topmost part of the hive that protects it from the weather.
- Inner cover: Placed below the outer cover, it provides additional insulation and ventilation.
- Hive boxes: These are the main compartments where the bees will build their honeycomb.
- Bottom board: The foundation of the hive, providing stability and protection from pests.
Remember to choose untreated wood, as treated lumber can be harmful to bees. It’s also important to ensure the wood is smooth and free from splinters to avoid injuring the bees.

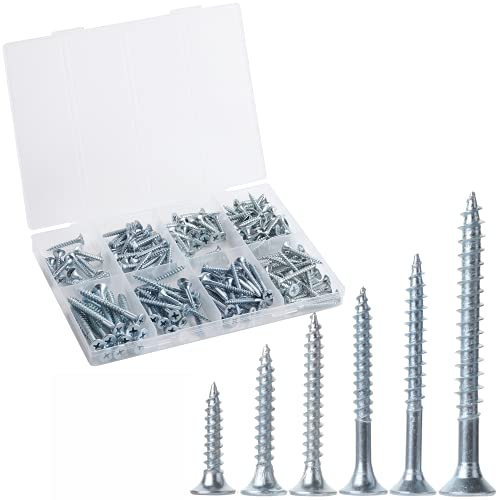
Nails and Screws
To assemble the bee hive, you’ll need nails and screws to securely join the wood panels together. Using the appropriate fasteners is crucial to ensure the hive remains sturdy and withstands the test of time. Stainless steel or galvanized nails and screws are recommended, as they are resistant to rust and corrosion.
When attaching the panels, make sure to align them properly and use the appropriate length and size of nails or screws. This will prevent any gaps or weak points in the hive structure. It’s important to handle the fasteners carefully to avoid damaging the wood or injuring yourself during the process.
Protective Gear
When working with bees, it’s essential to prioritize safety. Protective gear is necessary to shield yourself from bee stings and potential allergic reactions. Here are some essential items to consider:
- Beekeeping suit: A full-body suit made of lightweight, breathable fabric that covers you from head to toe. It typically includes a hat with a veil to protect your face and neck.
- Gloves: Choose gloves made specifically for beekeeping, preferably with long cuffs to cover your wrists.
- Beekeeping boots: These boots provide additional protection for your feet and ankles.
- Smoke canister: Used to calm the bees during hive inspections, reducing the risk of stings.
Investing in high-quality protective gear is crucial for your safety and the well-being of the bees. It’s important to wear the gear properly and follow safety guidelines to minimize the chances of any accidents or stings.
Hive Components
In addition to the wood, nails, screws, and protective gear, there are several other components that play a vital role in the construction of a bee hive. These include:

- Frames and foundation: Frames are wooden structures that hold the honeycomb and provide support for the bees. Foundation sheets are attached to the frames to guide the bees’ comb-building process.
- Ventilation: Proper ventilation is essential to regulate the temperature and humidity inside the hive. Ventilation holes or screens can be added to the hive boxes to ensure adequate airflow.
- Protective finish: Applying a protective finish to the wood helps to extend its lifespan and protect it from weathering. Beeswax or food-grade mineral oil are commonly used finishes that are safe for the bees.
By gathering all the necessary materials and components, you’ll be well-prepared to embark on the construction of your bee hive. Remember to choose high-quality materials, prioritize safety, and pay attention to detail during the assembly process. Creating a comfortable and secure home for your bees will set the foundation for a thriving hive.
Choosing the Right Location for Your Bee Hive
When it comes to beekeeping, choosing the right location for your bee hive is crucial for the success of your colony. Bees are highly sensitive creatures, and their environment plays a significant role in their overall well-being. In this section, we will discuss the important factors to consider when selecting the ideal spot for your bee hive.
Sunlight and Shade
One of the primary considerations when choosing a location for your bee hive is the amount of sunlight and shade it will receive. Bees thrive in areas that offer a good balance of both. Ideally, your hive should receive morning sunlight to help stimulate their activity levels and provide warmth. However, it is equally important to ensure that the hive is not exposed to direct sunlight for the entire day, as excessive heat can be detrimental to the colony. Providing some shade during the hottest parts of the day can help regulate the temperature inside the hive and prevent overheating.
Wind Protection
Another essential factor to consider is wind protection. Bees are delicate creatures, and strong winds can be harmful to them. When selecting a location for your hive, it is crucial to choose an area that is shielded from strong gusts of wind. Placing the hive near a windbreak, such as a fence or a row of trees, can provide the necessary protection. The windbreak should be positioned in a way that it does not obstruct the hive’s entrance or interfere with the bees’ flight path.
Accessibility
Accessibility is a key factor to keep in mind when setting up your bee hive. You want to ensure that both you and your bees have easy access to the hive for regular inspections and . The hive should be located in a spot that allows you to approach it comfortably without any obstructions or hazards. Additionally, consider the safety of others who may come into contact with the hive, such as neighbors or visitors. Placing the hive in an area away from high foot traffic or potential disturbances can help ensure a peaceful coexistence.
Water Source
Water is essential for the survival of bees, and having a nearby water source is vital for their well-being. When selecting a location for your hive, make sure there is a reliable water source within a reasonable distance. This could be a pond, a stream, a birdbath, or even a shallow dish filled with water. Bees use water for various purposes, including cooling the hive, diluting honey, and hydrating themselves. By providing them with easy access to water, you are helping to create a conducive environment for their growth and productivity.
In summary, choosing the right location for your bee hive is a critical decision that can significantly impact the health and productivity of your colony. Consider factors such as sunlight and shade, wind protection, accessibility, and water source when making your decision. By providing an optimal environment for your bees, you are setting them up for success and ensuring a thriving and sustainable beekeeping experience.
Building the Bee Hive Box
Now that you have selected the perfect location for your bee hive, it’s time to start building the hive itself. The bee hive box is where the bees will live and build their honeycombs. In this section, we will discuss the step-by-step process of constructing a bee hive box that will provide a comfortable and functional home for your bees.
Cutting the Wood Panels
The first step in building a bee hive box is to cut the wood panels to the appropriate size. You will need to use a saw or a circular saw to cut the panels according to the dimensions specified in your hive plans. It is essential to ensure that the panels are cut accurately and have smooth edges to prevent any gaps or rough surfaces that could compromise the integrity of the hive. Take your time and measure twice before making any cuts to ensure precision.
Assembling the Box
Once you have cut the wood panels, it’s time to assemble the bee hive box. Start by laying out the panels in the desired configuration, making sure that the joints align correctly. Apply wood glue to the edges of the panels and use nails or screws to secure them together. It is recommended to use galvanized nails or stainless steel screws to prevent rusting and ensure durability. Make sure to double-check the squareness of the box as you assemble it to ensure that all corners are perfectly aligned.
Adding Ventilation
Proper ventilation is crucial for the health of your bee colony. Bees generate heat inside the hive, and adequate airflow helps regulate the temperature and humidity levels. To provide ventilation in your bee hive box, you can create ventilation holes or slots in the box’s sides or bottom. These openings allow fresh air to circulate while preventing excessive moisture buildup. Be mindful of the size and placement of the ventilation holes to ensure that they do not compromise the hive’s structural integrity.
Applying Protective Finish
To protect the wood and increase the longevity of your bee hive box, it is essential to apply a protective finish. A high-quality exterior paint or wood stain can help shield the wood from the elements and prevent rotting. Choose a finish that is non-toxic and safe for bees, as they may come into contact with the hive’s exterior. Apply the finish following the manufacturer’s instructions, ensuring that all surfaces are adequately coated. Allow the finish to dry completely before moving on to the next step.
By following these steps, you will be able to construct a sturdy and functional bee hive box that will provide a comfortable home for your bees. Remember to pay attention to detail and prioritize the bees’ needs when building the hive. In the next section, we will discuss how to construct the bee hive frames, which are essential for supporting the honeycombs and maintaining the structure of the hive.
Building the Bee Hive Box
Cutting the Wood Panels
When it comes to building a bee hive box, one of the first steps is cutting the wood panels. The type of wood you choose is important, as it should be durable and resistant to weathering. Cedar or pine are commonly used for this purpose, as they are known for their longevity and ability to withstand the elements.
To begin, measure and mark the dimensions of the panels on your chosen wood. It’s important to be precise in your measurements to ensure a proper fit. Once you have marked the panels, you can use a circular saw or a table saw to carefully cut along the lines. Always remember to wear protective gear, such as safety glasses and gloves, when operating power tools.

Assembling the Box
After cutting the wood panels, the next step is to assemble the bee hive box. This involves joining the panels together to create a sturdy structure that will house the beehive.
Start by laying out the panels on a flat surface, making sure they are aligned correctly. You can use clamps or a helping hand to keep the panels in place while you work. Then, apply wood glue along the edges of the panels and use screws or nails to secure them together. Be sure to countersink the screws or nails to prevent them from protruding and causing any harm to the bees.
It’s important to ensure the box is square and level as you assemble it. This will help maintain the structural integrity of the hive and prevent any issues down the line. Take your time during this step to ensure everything is properly aligned and secure.
Adding Ventilation
Proper ventilation is essential for a healthy bee hive. Bees generate heat and moisture inside the hive, and without adequate ventilation, these factors can lead to problems such as mold, condensation, or even overheating.
To add ventilation to the box, you can create small ventilation holes or slots on the sides or top of the box. These openings will allow for air circulation and help regulate the temperature and humidity inside the hive. Be sure to position the ventilation holes in a way that prevents rainwater from entering the hive.
Additionally, you can consider adding a screened bottom board to the hive. This will provide additional ventilation and help control pests such as mites. The screen should have small enough openings to prevent bees from escaping while allowing for proper airflow.
Applying Protective Finish
To ensure the longevity of your bee hive box, it’s important to apply a protective finish. This will help protect the wood from weathering, moisture, and insect damage.
Before applying the finish, make sure the wood is clean and free of any dust or debris. You can use a brush or cloth to remove any loose particles. Then, choose a finish that is safe for bees and non-toxic. Beeswax or a water-based exterior finish are popular options.
Apply the finish evenly to all sides of the bee hive box, including the inside. This will provide maximum protection and help maintain the overall integrity of the hive. Allow the finish to dry completely before moving on to the next steps of hive construction.
Constructing the Bee Hive Frames
Measuring and Cutting Frame Pieces
When it comes to constructing bee hive frames, the first step is to ensure accurate measurements and precise cuts for the frame pieces. This is crucial for creating a sturdy and well-fitted frame that will support the honeycomb and provide a stable foundation for the bees.
To begin, gather the necessary materials, including a measuring tape, a saw, and the appropriate wood for the frames. It is important to use a durable and bee-friendly wood, such as pine or cedar, that can withstand the elements and maintain its structural integrity over time.
Start by measuring and marking the desired dimensions for the frame pieces. Standard frame sizes are usually around 19 inches by 9 inches, but you can adjust the measurements based on your specific needs and hive design. Take into consideration the size of your bee colony and the type of honeycomb you plan to use.
Once you have marked the measurements, carefully cut the wood using a saw. It is essential to make clean and straight cuts to ensure that the frame pieces fit together seamlessly. Take your time during this step to achieve accurate and precise cuts.
Assembling the Frame
After cutting the frame pieces, it’s time to assemble the frame. This is where the individual pieces come together to form a functional unit that will hold the honeycomb and provide structure for the hive.
Start by laying out the frame pieces on a flat surface. Take note of the top and bottom bars, as they are slightly different in size and shape. The top bars usually have a groove or a notch that will hold the foundation or the honeycomb.
To assemble the frame, apply wood glue to the joints where the pieces will connect. This will provide additional strength and stability to the frame. Once the glue is applied, carefully fit the pieces together, ensuring that they are aligned properly.
To secure the frame, you can use nails or screws. This will further reinforce the joints and prevent the frame from coming apart. Make sure to use appropriate-sized nails or screws that won’t split the wood or protrude through the other side.
Wiring the Frame
Wiring the frame is an important step to ensure that the honeycomb stays in place and doesn’t sag or collapse under the weight of the honey. The wires will provide additional support and stability to the frame, allowing the bees to build their comb securely.
To wire the frame, start by drilling small holes near the top and bottom bars on both sides of the frame. These holes will serve as anchor points for the wires. Make sure the holes are evenly spaced and aligned.
Next, cut a length of wire slightly longer than the frame. Thread one end of the wire through one of the holes and make a knot to secure it. Pull the wire taut across the frame to the corresponding hole on the opposite side, and thread it through. Make another knot to secure the wire.
Repeat this process for the remaining holes, creating a series of parallel wires across the frame. The number of wires will depend on the size of the frame and your preference. Generally, three to four wires are sufficient for stability.
Installing Foundation
The final step in constructing the bee hive frame is installing the foundation. The foundation serves as a guide for the bees to build their honeycomb and provides a consistent structure for them to work on.
There are two types of foundation commonly used: wax foundation and plastic foundation. Wax foundation is made of beeswax and provides a natural and familiar surface for the bees. Plastic foundation, on the other hand, is durable and easy to clean.
To install the foundation, place it on the grooves or notches on the top bars of the frame. Ensure that it fits snugly and is centered within the frame. Gently press it down to secure it in place.
The foundation should be installed with the cell pattern facing downwards, as this is the direction the bees will build their comb. This will provide them with a guideline to follow and maintain uniformity within the hive.
Once the foundation is in place, your bee hive frame is ready to be incorporated into the hive. Repeat the process for each frame you need, ensuring consistent measurements, assembly, wiring, and foundation installation.
Remember, constructing bee hive frames requires precision and attention to detail. By following these steps and using the appropriate , you can create sturdy and reliable frames that will support your bee colony and contribute to a successful hive.
Installing the Bee Hive Components
Installing the various components of a bee hive is an essential step in creating a suitable environment for your bees to thrive. From the bottom board to the outer cover, each component plays a crucial role in the overall functionality and protection of the hive. In this section, we will guide you through the installation process, step by step, so you can ensure your bees have a comfortable and secure home.
Adding the Bottom Board
The bottom board is the foundation of the bee hive and provides a solid base for the entire structure. It serves as the entrance and exit point for the bees and also helps with ventilation. When installing the bottom board, it is important to consider its position and orientation. You want to ensure that the entrance is facing away from strong winds and is easily accessible for the bees.
To add the bottom board, follow these steps:
- Start by placing the bottom board on a flat surface in the desired location for your hive.
- Make sure the entrance is facing the right direction, away from prevailing winds and obstacles.
- Secure the bottom board in place using screws or nails, ensuring it is stable and doesn’t wobble.
Placing the Bee Hive Box
Once the bottom board is securely in place, it’s time to position the bee hive box on top of it. The hive box is where the bees will build their comb, store honey, and raise their brood. Proper placement of the hive box is crucial for the bees’ productivity and overall health.
To place the bee hive box, follow these steps:
- Lift the hive box and carefully position it directly on top of the bottom board.
- Ensure that the corners of the hive box align with the corners of the bottom board for a snug fit.
- Check that the hive box is level and stable, as an uneven hive can cause issues with comb building and honey production.
Installing Frames and Foundation
Frames and foundation are essential components within the bee hive box. They provide support for the bees’ comb and guide them in building it in a structured manner. Installing frames and foundation correctly will help prevent comb collapse and allow for easier hive inspections.
To install frames and foundation, follow these steps:
- Take each frame and gently insert it into the hive box, ensuring they are evenly spaced for optimal comb building.
- Attach the frames to the hive box using nails or screws, securing them in place.
- Once the frames are in place, slide the foundation into each frame, providing the bees with a sturdy surface to build their comb upon.
Adding the Inner Cover and Outer Cover
The inner cover and outer cover are the final components of the bee hive installation process. These covers provide insulation, protection from the elements, and allow for ventilation within the hive. Installing them correctly will ensure the bees’ comfort and safety.
To add the inner cover and outer cover, follow these steps:
- Place the inner cover on top of the hive box, ensuring that it sits evenly and covers the frames.
- The inner cover usually has an entrance hole for ventilation purposes. Make sure this hole is aligned with the entrance on the bottom board.
- Finally, place the outer cover on top of the inner cover, ensuring a snug fit to protect the hive from rain and other external factors.
Congratulations! You have successfully installed the bee hive components. Your bees now have a secure and comfortable home. Remember to regularly inspect and maintain your hive to keep your bees healthy and productive.
In the next section, we will discuss the essential tasks involved in maintaining and caring for your bee hive, including hive inspections, cleaning, feeding, and pest and disease management. Stay tuned for more valuable information on how to ensure the well-being of your buzzing friends.
Maintaining and Caring for Your Bee Hive
Regular Hive Inspections
Regular hive inspections are crucial for the health and well-being of your bee colony. By conducting these inspections, you can ensure that your bees are thriving and address any potential issues before they become major problems. So, how often should you inspect your hive? Well, it depends on various factors such as the time of year, weather conditions, and the overall health of your bees.
During the peak season, when bees are most active, it’s recommended to conduct inspections every one to two weeks. This allows you to monitor the population, check for signs of disease or pests, and ensure that the queen is laying eggs properly. In the colder months, inspections can be less frequent, typically once a month.
When conducting a hive inspection, it’s important to approach the hive with caution and wear appropriate protective gear to avoid getting stung. Start by gently smoking the entrance of the hive to calm the bees. Then, slowly remove the hive components, starting with the outer cover and working your way down to the frames.
As you inspect each frame, look for signs of a healthy hive. This includes a good population of bees, brood (developing bees), and a pattern of eggs laid by the queen. Pay attention to the condition of the comb, looking for any signs of damage or disease. Additionally, check for the presence of pests such as Varroa mites or hive beetles.
During the inspection, take note of any abnormalities or concerns. This could include unusual behavior, such as increased aggression or reduced activity, as well as signs of disease, such as deformed wings or larvae that are discolored or dying. If you notice anything concerning, it’s important to take action immediately to prevent further damage to your hive.
Hive Cleaning and Sanitization
Keeping your hive clean and sanitized is essential for the overall health of your bee colony. A clean hive helps prevent the spread of diseases and pests, and provides a hygienic environment for your bees to thrive.
Regular hive cleaning should be done at least once a year, typically during the late winter or early spring when the bee population is at its lowest. Start by removing all the hive components, including the frames and boxes. Brush off any debris or dead bees, and scrape away excess propolis or wax buildup.
Next, it’s time to sanitize the hive components. One effective method is to use a solution of bleach and water. Mix one part bleach with nine parts water, and thoroughly scrub all the surfaces of the hive components. This will help kill any remaining pathogens or pests.
After sanitizing, allow the hive components to air dry completely before reassembling the hive. It’s important to note that while bleach is effective for sanitizing, it should be rinsed off thoroughly to avoid any harmful residue that could harm your bees.
In addition to annual cleaning, it’s also a good idea to regularly monitor the hive for signs of pests or disease. If you notice any issues, such as an infestation of Varroa mites or signs of foulbrood, it’s important to take immediate action to prevent further spread.
Feeding Bees
Feeding bees is an important aspect of beekeeping, especially during times when natural nectar sources are limited. By providing supplemental food, you can ensure that your bees have the necessary nutrients to survive and thrive.
There are several types of feed that you can offer to your bees, including sugar syrup and pollen substitute. Sugar syrup is made by dissolving sugar in water, and it serves as a replacement for nectar. Pollen substitute, on the other hand, provides the essential proteins that bees need for brood rearing.
Feeding bees can be done using various methods, such as using feeders placed inside the hive or external feeders placed near the hive entrance. The choice of feeder depends on your specific setup and preferences.
When feeding bees, it’s important to monitor the amount of food they are consuming. Bees can quickly deplete their food sources, especially during times of high activity. Regularly check the feeders and refill them as needed to ensure that your bees have an adequate supply.
Pest and Disease Management
Pests and diseases can pose a significant threat to the health of your bee colony. Therefore, it’s important to implement effective pest and disease management strategies to keep your bees safe.
One common pest that beekeepers encounter is the Varroa mite. These tiny parasites attach themselves to bees and can weaken the colony over time. Regular monitoring and treatment for Varroa mites is crucial to prevent infestations from becoming severe.
Another common disease is American foulbrood, a bacterial infection that affects bee larvae. If left untreated, this disease can devastate a hive. Regular hive inspections and vigilant monitoring for signs of foulbrood are essential for early detection and prompt treatment.
When managing pests and diseases, it’s important to use methods that are safe for both your bees and the environment. Integrated Pest Management (IPM) techniques, such as using organic treatments and practicing good hive hygiene, can help minimize the use of chemical pesticides.
In conclusion, maintaining and caring for your bee hive requires regular inspections, proper hive cleaning, feeding when necessary, and effective pest and disease management. By following these practices, you can ensure the health and longevity of your bee colony, enabling them to thrive and produce delicious honey for years to come.