Interested in candle making? Learn how to make a candle mold using silicone, choose the right mold, prepare it, melt and pour the wax, and troubleshoot common issues with this step-by-step guide for beginners.
Materials Needed for Making a Candle Mold
When it comes to making a candle mold, there are several materials that you will need to ensure a successful and enjoyable candle-making experience. In this section, we will take a closer look at each of these materials and their importance in the candle-making process.
Silicone Mold
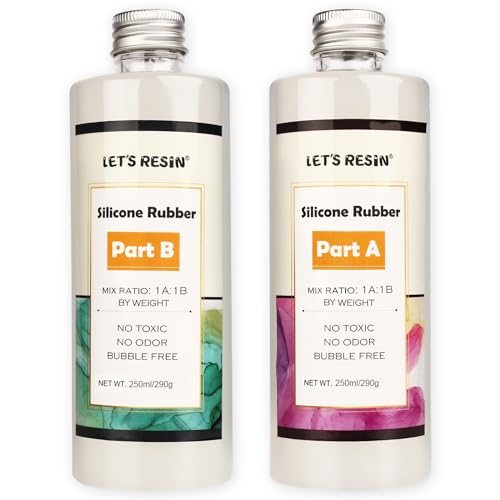
One of the most crucial materials needed for making a candle mold is a silicone mold. Silicone molds are preferred by many candle makers due to their flexibility and durability. These molds are available in various sizes and shapes, allowing you to create candles of different designs and styles. They are also reusable, making them a cost-effective option in the long run.
Release Agent
To ensure that your candle mold releases the candle easily once it has hardened, a release agent is necessary. A release agent is a substance that is applied to the inside of the mold before pouring the melted wax. It creates a barrier between the mold and the wax, preventing any sticking or difficulty in removing the candle once it is ready. There are various types of release agents available, such as silicone spray or liquid soap, which can be used depending on personal preference.
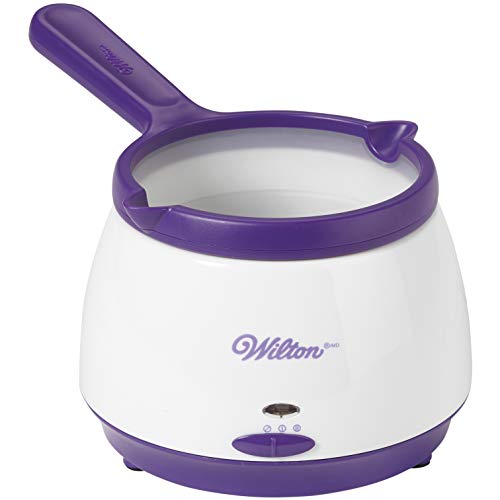
Melting Pot or Double Boiler
To melt the wax for your candle, you will need a melting pot or a double boiler. A melting pot is specifically designed for candle making and allows for easy and controlled melting of the wax. Alternatively, a double boiler can be used, which consists of a smaller pot placed inside a larger pot filled with water. The indirect heat from the boiling water helps to melt the wax without the risk of overheating or burning.

Thermometer
A thermometer is an essential tool for candle making as it helps you monitor the temperature of the melted wax. Maintaining the correct temperature is crucial for achieving the desired consistency and quality of your candles. Different types of waxes have different melting points, so it is important to use a thermometer to ensure the wax is heated to the appropriate temperature for pouring.
Candle Wick
No candle can be complete without a wick. The candle wick is responsible for creating a flame and providing a steady burn. When choosing a wick, consider the size of your mold and the type of wax you are using. The wick should be long enough to reach the bottom of the mold and extend slightly above the surface of the poured wax.
Wick Holder
A wick holder is a small metal or plastic device that helps to keep the wick centered in the mold while pouring the wax. It ensures that the wick remains in the right position and prevents it from moving or floating around during the pouring process. Wick holders come in various sizes and shapes, so choose one that matches the diameter of your mold and fits securely.
Stirring Utensil
Lastly, you will need a stirring utensil to mix the wax and any additives or fragrance oils. A wooden or silicone spoon is commonly used for this purpose as it does not react with the wax and is easy to clean. Stirring the wax helps to distribute any added scents or colors evenly and ensures a consistent blend throughout the candle.
In summary, the materials needed for making a candle mold include a silicone mold, release agent, melting pot or double boiler, thermometer, candle wick, wick holder, and a stirring utensil. Each of these materials plays a vital role in the candle-making process, from creating the mold to pouring the wax. By having these materials on hand, you will be well-prepared to embark on your candle-making journey.

Choosing the Right Silicone Mold
When it comes to making candles, choosing the right silicone mold is essential. The mold you select will determine the size, shape, and overall design of your finished candle. There are several factors to consider when deciding on the perfect silicone mold for your candle-making project.
Size and Shape Considerations
One of the first things to consider when choosing a silicone mold is the size and shape you desire for your candle. Are you looking to create a small, delicate candle or a larger, more substantial one? The size of the mold will directly affect the size of your finished candle. Additionally, think about the shape you want your candle to have. Do you prefer a traditional pillar shape, or are you interested in experimenting with unique and intricate designs? The size and shape of your mold will ultimately dictate the appearance of your final product.
Flexibility and Durability
Another important consideration is the flexibility and durability of the silicone mold. A flexible mold is easier to work with as it allows for easy removal of the candle once it has hardened. This flexibility ensures that your candle will maintain its shape without any damage. Additionally, a durable mold will last for multiple uses, saving you money in the long run. Look for molds that are made from high-quality silicone to ensure both flexibility and durability.
Mold Design and Details
The design and details of the mold can greatly enhance the overall look of your candle. Consider molds that have intricate patterns or unique shapes that will add visual interest to your finished product. Some molds even have additional details, such as floral motifs or textured surfaces, that can create a beautiful and unique candle. The design and details of the mold provide an opportunity to showcase your creativity and make your candle stand out.
Suitable for Candle Making
Lastly, it is crucial to choose a silicone mold that is specifically designed for candle making. Candle-making molds are made with materials that can withstand high temperatures and are resistant to the chemicals found in candle wax. Using a mold that is not intended for candle making may result in a mold that warps or breaks when exposed to heat or wax. Ensure that the mold you select is explicitly labeled as suitable for candle making to avoid any issues during the candle-making process.

Preparing the Silicone Mold
Preparing the silicone mold is an essential step in candle making. It ensures that your candles will come out smoothly and without any imperfections. In this section, we will discuss three important aspects of preparing the silicone mold: cleaning the mold, applying the release agent, and securing the wick holder.
Cleaning the Mold
Before using a silicone mold for candle making, it is crucial to clean it properly. Cleaning the mold ensures that there are no dust particles, residue, or any other substances that may affect the quality of your candles. Here are some steps you can follow to clean your silicone mold effectively:
- Inspect the mold: Before cleaning, carefully examine the mold for any visible dirt or debris. If you notice any, gently remove it using a soft brush or cloth.
- Wash with mild soap and water: Fill a basin or sink with warm water and add a few drops of mild dish soap. Submerge the silicone mold in the soapy water and use a soft sponge or cloth to gently scrub the mold’s surface. Pay extra attention to any crevices or intricate details.
- Rinse thoroughly: After cleaning, rinse the mold under running water to remove any soap residue. Make sure to rinse every part of the mold, including the corners and edges.
- Dry completely: Once rinsed, pat the mold dry with a clean towel or let it air dry completely. Ensure that there is no moisture left before proceeding to the next step.
Applying the Release Agent
Applying a release agent to the silicone mold is crucial to ensure easy removal of the finished candle. The release agent creates a barrier between the mold and the wax, preventing the candle from sticking to the mold. Follow these steps to apply the release agent properly:
- Choose a suitable release agent: There are various types of release agents available for candle making, such as silicone sprays, vegetable oil, or specialized mold release agents. Choose the one that is recommended for your specific type of mold.
- Spray or apply the release agent: If you are using a silicone spray, hold the can approximately 6-8 inches away from the mold and spray a thin, even layer over the entire interior surface. If you are using vegetable oil or a mold release agent, apply a small amount to a clean cloth or sponge and evenly spread it over the mold’s surface. Make sure to cover all areas, including the sides and corners.
- Remove excess release agent: After applying the release agent, gently wipe off any excess with a clean cloth or paper towel. Leaving excess release agent may interfere with the quality of your candle.
Securing the Wick Holder
To ensure that the wick stays centered and upright during the pouring process, it is essential to secure a wick holder in the silicone mold. Here’s how you can do it effectively:
- Choose a suitable wick holder: Wick holders come in various shapes and sizes, so select one that fits your mold’s dimensions. Most wick holders are made of metal and have a base to hold the wick in place.
- Position the wick holder: Place the wick holder in the center of the mold, ensuring that it stands straight and touches the bottom of the mold. The wick holder should be tall enough to extend above the mold’s rim.
- Secure the wick: Once the wick holder is in position, thread the wick through the center hole of the wick holder. Pull the wick taut, leaving a small amount of excess wick at the top. This excess will be trimmed later.
- Stabilize the wick holder: To prevent the wick holder from moving during the pouring process, you can use adhesive putty or tape to secure it to the mold’s sides. This will ensure that the wick remains centered as the wax is poured.
By following these steps to prepare the silicone mold, you are setting yourself up for a successful candle-making experience. Cleaning the mold, applying the release agent, and securing the wick holder are crucial in ensuring that your candles come out smoothly and have a professional finish. Now that you have prepared the mold, it’s time to move on to the next step: melting and pouring the wax.
Melting and Pouring the Wax
Melting the Wax
Melting the wax is the first step in the candle-making process. It’s important to melt the wax properly to ensure a smooth and even burn. There are a few methods you can use to melt the wax, depending on the quantity you need and the equipment you have available.
One popular method is to use a melting pot or a double boiler. A melting pot is specifically designed for melting wax and can be purchased at craft stores or online. It has a spout for easy pouring and a handle to safely hold the pot. If you don’t have a melting pot, a double boiler can be used as an alternative. Simply fill a pot with water and place a heat-resistant container on top, making sure it doesn’t touch the water. The heat from the boiling water will melt the wax in the container.
Regardless of the method you choose, it’s important to melt the wax slowly and at a low temperature. This helps to prevent the wax from overheating and potentially causing a fire hazard. It’s recommended to heat the wax to a temperature between 160°F and 180°F (71°C and 82°C). Using a thermometer will help you monitor the temperature accurately.
Adding Fragrance or Color (Optional)
Once the wax is melted, you have the option to add fragrance or color to your candle. This step is completely optional, but it can add a personalized touch to your creation. There are various fragrance oils and candle dyes available in the market that are specifically designed for candle making.
To add fragrance to your candle, you can use a fragrance oil that is specifically formulated for candle making. These oils are typically highly concentrated, so a little goes a long way. Start by adding a small amount of fragrance oil to the melted wax and stir it well to ensure it is evenly distributed. You can always add more fragrance oil if you desire a stronger scent, but be cautious not to add too much as it can affect the burning properties of the candle.
If you want to add color to your candle, candle dyes are the best option. These dyes come in various colors and can be mixed to create custom shades. Similar to fragrance oils, start by adding a small amount of dye to the melted wax and stir it well. Keep in mind that some dyes may require a higher temperature to fully dissolve, so refer to the instructions provided by the manufacturer.
Monitoring the Wax Temperature
Throughout the melting and pouring process, it is crucial to monitor the temperature of the wax. Wax has a specific temperature range in which it is safe and optimal for pouring into the mold. If the wax is too hot, it may cause the mold to warp or melt, resulting in an uneven or distorted candle. On the other hand, if the wax is too cool, it may not adhere properly to the mold, leading to separation or air pockets.
Using a thermometer specifically designed for candle making, regularly check the temperature of the wax. As mentioned earlier, the ideal pouring temperature for most waxes is between 160°F and 180°F (71°C and 82°C). It’s important to stir the wax gently while monitoring the temperature to ensure even heat distribution.
If the wax exceeds the recommended temperature, remove it from the heat source and allow it to cool slightly before pouring. On the contrary, if the wax starts to cool down, you can gently reheat it using the double boiler method or the melting pot. Remember to never leave the melting wax unattended and always follow safety precautions when working with heat sources.
By closely monitoring the wax temperature, you can ensure a successful pouring process and achieve beautifully crafted candles. The next step is to carefully pour the melted wax into the prepared mold, which we will discuss in the following section.
(Note: The information provided in this section is based on general guidelines for melting and pouring wax. It’s important to refer to the specific instructions provided by the manufacturer of the wax and any additional additives you may be using.)
Pouring the Wax into the Mold
Positioning the Wick
When it comes to pouring the wax into the mold, proper positioning of the wick is essential. The wick acts as the lifeline of your candle, providing the necessary flame to create a beautiful and soothing glow. Before pouring the wax, make sure the wick is centered in the mold. This can be done by securing it with a wick holder, ensuring it stays in place throughout the pouring process. By positioning the wick correctly, you’ll ensure an even burn and a well-formed candle.
Pouring the Wax Slowly and Steadily
Pouring the wax slowly and steadily is crucial for achieving a professional-looking candle. If you pour the wax too quickly, it may cause splashing or create air bubbles, resulting in an uneven surface or imperfections in your candle. To avoid this, take your time and pour the wax in a controlled manner. By doing so, you allow the wax to settle evenly in the mold, resulting in a smooth and flawless finish.
Removing Air Bubbles
Air bubbles can be a common occurrence when pouring wax into a mold. While they may seem harmless, they can cause imperfections in your final candle. To remove air bubbles, gently tap the sides of the mold with a stirring utensil or a small mallet. This will help the bubbles rise to the surface and pop. Additionally, you can use a toothpick or a skewer to carefully poke any stubborn air bubbles that remain. By taking the time to remove air bubbles, you’ll ensure a high-quality candle with a smooth and even surface.
To summarize, pouring the wax into the mold requires careful attention to detail. By positioning the wick correctly, pouring the wax slowly and steadily, and removing any air bubbles, you’ll create a candle that is visually appealing and burns evenly. So, take your time, enjoy the process, and let your creativity shine through as you pour the wax into your chosen mold.
Cooling and Unmolding the Candle
When it comes to candle making, the process doesn’t end once you’ve poured the wax into the mold. Proper cooling and unmolding techniques are essential to ensure a successful and well-formed candle. In this section, we will explore the important steps to take during the cooling and unmolding process, including allowing sufficient cooling time, removing the candle from the mold, and trimming the wick.
Allowing Sufficient Cooling Time
After pouring the wax into the mold, it is crucial to allow the candle enough time to cool and harden properly. The cooling time can vary depending on factors such as the type of wax used and the size of the candle. As a general guideline, it is recommended to let the candle cool for at least 24 hours.
During this cooling period, it is important to find a cool and undisturbed area to place the mold. Avoid exposing the candle to direct sunlight or drafts, as this can cause uneven cooling and potential deformities. Patience is key during this stage, as rushing the cooling process may result in a poorly formed candle.
Removing the Candle from the Mold
Once the candle has completely cooled, it is time to remove it from the mold. This step requires caution and precision to ensure that the candle doesn’t get damaged in the process. Before attempting to remove the candle, inspect the mold to ensure that the wax has fully hardened.
To safely remove the candle, gently flex the mold to release the vacuum seal. If you’re using a silicone mold, this should be relatively easy. However, if you’re working with a more rigid material, like metal or plastic, you may need to apply more pressure or use a release agent to help loosen the candle.
Once the candle is free from the mold, take a moment to admire your creation. You may notice some imperfections or rough edges, which leads us to the next step.
Trimming the Wick
Before your candle is ready for use, it’s important to trim the wick to the appropriate length. A long wick can cause uneven burning and excessive smoke, while a short wick may result in a weak flame. The optimal wick length is typically around ¼ to ½ inch.
To trim the wick, you can use a pair of sharp scissors, wick trimmers, or even nail clippers. Make sure to trim the wick when the candle is completely cooled to avoid any accidental damage or melting.
Trimming the wick not only helps to create a more aesthetically pleasing candle but also ensures a safer and more efficient burn. Remember to dispose of the trimmed wick properly and keep it away from the candle’s surface.
- Interested in learning more about candle making? Check out our other guides:
-
Materials Needed for Making a Candle Mold
-
Silicone Mold
-
Release Agent
-
Melting Pot or Double Boiler
-
Thermometer
-
Candle Wick
-
Wick Holder
-
Stirring Utensil
-
-
Choosing the Right Silicone Mold
-
Size and Shape Considerations
-
Flexibility and Durability
-
Mold Design and Details
-
Suitable for Candle Making
-
-
Preparing the Silicone Mold
-
Cleaning the Mold
-
Applying the Release Agent
-
Securing the Wick Holder
-
-
Melting and Pouring the Wax
-
Melting the Wax
-
Adding Fragrance or Color (Optional)
-
Monitoring the Wax Temperature
-
-
Pouring the Wax into the Mold
-
Positioning the Wick
-
Pouring the Wax Slowly and Steadily
-
Removing Air Bubbles
-
-
Finishing Touches and Troubleshooting
-
Polishing the Candle Surface
-
Fixing Imperfections or Uneven Surfaces
-
Common Issues and Solutions
-
-
Finishing Touches and Troubleshooting
Candle making is a delightful craft that allows you to create beautiful and fragrant candles for your home or to give as gifts. Once you have gone through the process of preparing the silicone mold, melting and pouring the wax, and allowing it to cool, you are ready for the finishing touches. This is where you put the final polish on your creation and address any imperfections or issues that may have arisen along the way. In this section, we will explore some important steps to take in order to achieve a professional-looking candle.
Polishing the Candle Surface
After unmolding your candle, you may notice that the surface is not as smooth or polished as you would like. To achieve that glossy finish, you can employ a simple technique called candle surface polishing. This involves using a soft cloth or a piece of nylon stocking to gently rub the surface of the candle in circular motions. The friction generated by this process helps to melt and smooth out any imperfections, leaving behind a lustrous and flawless finish.
Fixing Imperfections or Uneven Surfaces
Sometimes, despite our best efforts, imperfections or uneven surfaces can occur during the candle-making process. Whether it’s a small dent, a bubble, or an uneven edge, these flaws can be easily remedied. One effective method is to use a heat gun or a hairdryer on its lowest setting to gently warm the affected area. As the wax softens, you can use a clean cloth or your fingertips to reshape and smooth out the imperfection. Be careful not to overheat the wax, as it may cause the candle to warp or lose its shape.
Another technique to fix imperfections is by melting a small amount of wax and carefully pouring it onto the flawed area. Use a stirring utensil to spread the wax evenly and blend it with the surrounding surface. This method works best for minor imperfections and can effectively conceal any blemishes.
Common Issues and Solutions
While candle making can be a rewarding experience, it is not without its challenges. Here are some common issues that may arise during the process, along with their respective solutions:
- Sinking or Dipping Wick: If you notice that your wick is sinking or dipping into the wax after the candle has cooled, it may be due to the wax contracting as it solidifies. To fix this, simply melt a small amount of additional wax and pour it into the sunken area, allowing it to level out with the rest of the candle’s surface.
- Frosting: Frosting refers to the white, cloudy appearance that can develop on the surface of a candle. This is a natural occurrence caused by the wax cooling too quickly. To minimize frosting, you can try placing the mold in a warm water bath for a few seconds before pouring the wax. Additionally, using a higher-quality wax or adding a small amount of stearin can help reduce the likelihood of frosting.
- Tunneling: Tunneling occurs when the wax burns unevenly, leaving a hole in the middle of the candle while the outer edges remain untouched. This is often caused by a wick that is too small or by not allowing the candle to burn for a sufficient amount of time during its initial use. To prevent tunneling, ensure that you use an appropriate-sized wick for your candle and allow it to burn long enough during each use to create an even melt pool that reaches the edges of the candle.
By being aware of these common issues and their solutions, you can troubleshoot and address any problems that may arise during the candle-making process. This will help you achieve the best possible outcome and create candles that are both visually appealing and functional.
In conclusion, the finishing touches and troubleshooting steps are essential in the candle-making process. By polishing the surface of the candle, fixing imperfections or uneven surfaces, and addressing common issues, you can elevate the appearance and quality of your candles. Remember to approach these tasks with patience and care, as they require attention to detail. With practice and experience, you will become proficient in creating candles that are not only aesthetically pleasing but also bring warmth and fragrance to any space.