Want to know how to make seed bombs? Follow this to create your own vibrant garden. Learn how to choose the right seeds, prepare the clay mixture, and shape the bombs for easy planting. Start your gardening journey now.
Materials Needed for Making Seed Bombs
When it comes to making seed bombs, you’ll need a few key materials to get started. These materials will help you create the perfect mixture that will hold your seeds together and protect them until they’re ready to sprout. Let’s take a closer look at each material:
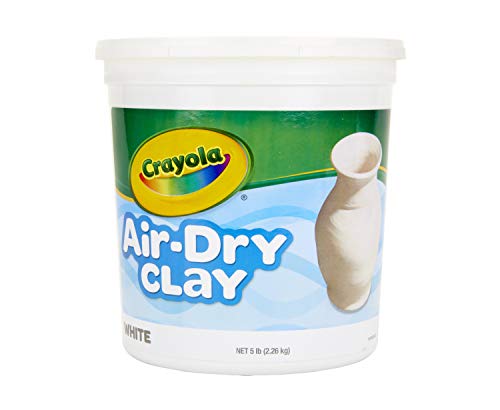
Clay
Clay is the main ingredient in seed bombs, as it acts as a binding agent that holds everything together. It provides the structure and stability needed for the seeds to germinate and grow. You can find clay at your local craft store or online. There are different types of clay available, but for seed bombs, it’s best to use natural clay without any added chemicals or additives. This ensures that your seed bombs are safe for the environment.
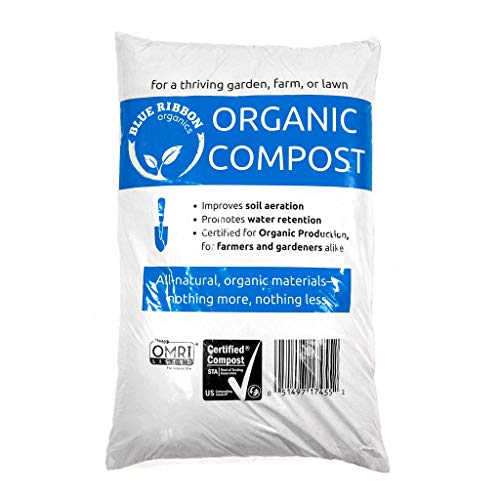
Compost
Compost is another essential material for making seed bombs. It provides the necessary nutrients for the seeds to thrive and grow into healthy plants. Compost is made from organic matter such as food scraps, yard waste, and other biodegradable materials. You can create your own compost at home by collecting kitchen scraps and yard trimmings, or you can purchase pre-made compost from a gardening store. Make sure the compost is well-rotted and free from any chemicals or pesticides.

Seeds
Of course, you can’t make seed bombs without seeds! The type of seeds you choose will depend on your preferences and the purpose of your seed bombs. If you want to attract native wildflowers, choose seeds of flowers that are native to your region. These seeds are adapted to the local climate and soil conditions, making them more likely to thrive. If you’re interested in attracting beneficial insects such as bees or butterflies, select seeds that are known to attract these creatures. Finally, if you want to grow herbs or vegetables, choose seeds of your favorite herbs or vegetables that are suitable for outdoor planting.
Water
Water is the final ingredient needed to create the perfect seed bomb mixture. It helps to moisten the clay and compost, making it easier to mix them together. The amount of water you’ll need will vary depending on the consistency of your clay and compost. You want the mixture to be moist but not overly wet. Add water gradually and mix well until you achieve a dough-like consistency that can be easily shaped into seed bombs.
To summarize, the materials needed for making seed bombs include clay, compost, seeds, and water. These ingredients work together to create a mixture that will protect and nourish the seeds until they’re ready to sprout. Now that you have a better understanding of the materials, let’s move on to the next step: choosing the right seeds for your seed bombs.
Choosing the Right Seeds for Seed Bombs
Choosing the right seeds for your seed bombs is crucial to their success. You want to select seeds that are well-suited to your local climate and soil conditions. Here are some options to consider:
Native Wildflower Seeds
Native wildflower seeds are a popular choice for seed bombs. These seeds are from plants that are indigenous to your region, meaning they naturally occur in the local ecosystem. By planting native wildflowers, you can help restore and maintain biodiversity in your area. Native wildflowers also provide habitat and food for local pollinators, such as bees and butterflies. Some common native wildflower seeds to consider include Black-eyed Susan, California Poppy, and Purple Coneflower.
Beneficial Insect Attracting Seeds
If you’re interested in attracting beneficial insects to your garden, consider using seed bombs with seeds that are known to attract these creatures. Bees, butterflies, and other pollinators play a crucial role in the ecosystem by helping plants reproduce. By planting flowers that attract them, you can create a welcoming environment for these important insects. Some popular beneficial insect attracting seeds include Sunflowers, Lavender, and Milkweed.
Herb or Vegetable Seeds
If you’re more interested in growing herbs or vegetables, seed bombs can still be a great option. You can create seed bombs with seeds of your favorite herbs or vegetables and plant them directly in your garden. This method eliminates the need for traditional seed starting indoors and allows the seeds to germinate and grow in their natural environment. Some common herb and vegetable seeds to consider include Basil, Parsley, Tomatoes, and Lettuce.
Remember, when choosing seeds for your seed bombs, it’s important to consider their specific growing requirements. Some seeds may require full sun, while others may prefer partial shade. Make sure to read the seed packets or do some research to ensure that the seeds you choose are compatible with your garden’s conditions.
Now that you have an idea of the different types of seeds you can use, let’s move on to the next step: preparing the clay mixture.
To create the perfect seed bombs, gather the following materials:
– Clay
– Compost
– Seeds
– Water
Choosing the Right Seeds for Seed Bombs
When it comes to making seed bombs, selecting the right seeds is crucial for the success of your project. By choosing the appropriate seeds, you can ensure that your seed bombs will yield beautiful and beneficial plants. Let’s explore the different types of seeds that are suitable for seed bombs.
Native Wildflower Seeds
Native wildflower seeds are an excellent choice for seed bombs. These seeds are derived from plants that are naturally found in a specific region or ecosystem. By using native wildflower seeds, you can help preserve the biodiversity of your area and support the local ecosystem.
Native wildflowers are adapted to the local climate, soil, and wildlife, making them more resistant to pests and diseases. They also provide essential food and habitat for local pollinators like bees, butterflies, and birds. By including native wildflower seeds in your seed bombs, you can create a vibrant and sustainable environment that promotes biodiversity and supports the local wildlife.
Beneficial Insect Attracting Seeds
Another type of seeds that are suitable for seed bombs are beneficial insect attracting seeds. These seeds are specifically chosen to attract beneficial insects such as ladybugs, lacewings, and hoverflies. These insects are natural predators of common garden pests like aphids and caterpillars, helping to keep your garden pest-free without the need for harmful pesticides.
Beneficial insect attracting seeds often include plants like dill, fennel, yarrow, and marigold. These plants not only attract beneficial insects but also add beauty and diversity to your garden. By incorporating these seeds into your seed bombs, you can create a balanced ecosystem that supports natural pest control and enhances the overall health of your garden.
Herb or Vegetable Seeds
If you’re looking to create seed bombs that not only beautify your surroundings but also provide fresh herbs or vegetables, consider using herb or vegetable seeds. These seeds will not only add color and visual interest to your seed bombs but also offer a practical and edible benefit.
Herb seeds like basil, parsley, and cilantro are perfect for seed bombs that can be used in kitchen gardens or small pots on windowsills. They are easy to grow and can be harvested for fresh flavor in your culinary creations. Vegetable seeds such as lettuce, radish, and carrots are also great choices, especially if you have limited space and want to grow your own food.
Including herb or vegetable seeds in your seed bombs not only adds functionality but also encourages people to engage with nature and grow their own food, even in urban environments.
Incorporating a variety of seeds in your seed bombs can provide an array of benefits, from supporting local biodiversity to attracting beneficial insects or growing fresh herbs and vegetables. By carefully selecting the seeds you include, you can create seed bombs that not only beautify the environment but also contribute to a healthier and more sustainable ecosystem.
(Note: For a more detailed list of specific seeds suitable for each category, please refer to the “Choosing the Right Seeds for Seed Bombs” section in the reference provided.)

Preparing the Clay Mixture
Preparing the clay mixture is an essential step in making seed bombs. It involves breaking up the clay, mixing it with compost, and adding water to create a workable consistency. Let’s dive into each of these sub-steps to understand how to prepare the clay mixture effectively.
Breaking Up the Clay
To begin, you’ll need clay that is suitable for making seed bombs. The clay should be in a dry, solid form, which means it may need to be broken up before use. Breaking up the clay helps to create a smoother mixture and ensures that it is evenly distributed throughout the seed bomb.
One way to break up the clay is by using a hammer or mallet. Place the clay in a sturdy bag or wrap it in a cloth to prevent it from scattering. Gently tap the clay with the hammer or mallet, applying just enough force to break it into smaller pieces. Be careful not to hit it too hard, as this may create dust or cause the clay to become too fine.
Another method is to soak the clay in water for a few hours or overnight. This helps to soften the clay, making it easier to break apart. Once the clay has soaked, gently break it up with your hands or a gardening tool until it reaches a manageable consistency.
Mixing Clay with Compost
After breaking up the clay, it’s time to mix it with compost. Compost adds organic matter and nutrients to the seed bomb, providing a healthy environment for seed germination and plant growth. It also helps to improve the structure of the clay mixture and aids in retaining moisture.
To mix the clay with compost, start by preparing the compost. If you don’t have compost readily available, you can purchase it from a garden center or make your own by composting kitchen scraps and yard waste.
Next, combine the broken clay pieces with the compost in a large container or mixing bowl. Use your hands or a gardening tool to thoroughly blend the two ingredients together. The goal is to achieve a homogenous mixture where the clay and compost are evenly distributed.
The ratio of clay to compost may vary depending on the specific seed bomb recipe you’re following or your desired consistency. As a general guideline, aim for a mixture that is about 70% clay and 30% compost. However, feel free to adjust these proportions based on your preferences and the characteristics of the soil in your area.
Adding Water to the Clay Mixture
Once the clay and compost are well-mixed, it’s time to add water to create a workable clay mixture. Water is crucial for binding the ingredients together and forming the seed bomb. However, it’s essential to add the right amount of water to avoid a mixture that is too dry or too wet.
Start by adding a small amount of water to the clay and compost mixture. Use your hands or a gardening tool to knead and mix the ingredients while gradually incorporating more water. The goal is to achieve a consistency that is pliable and moldable, similar to that of modeling clay.
Be cautious not to add too much water at once, as this can make the mixture overly sticky and difficult to work with. It’s better to add water gradually until you reach the desired consistency. If the mixture becomes too wet, you can add more clay or compost to balance it out.
Remember, the moisture content of the clay mixture is crucial for successful seed bomb formation. If the mixture is too dry, the seed bomb may crumble and disintegrate before the seeds have a chance to germinate. On the other hand, if the mixture is too wet, it may not hold its shape or dry properly.
By breaking up the clay, mixing it with compost, and adding water, you’ll create a well-prepared clay mixture that is ready for the next steps of making seed bombs. The quality of the clay mixture greatly influences the success of your seed bombs, so take your time to ensure a balanced and workable consistency.
Now that we have prepared the clay mixture, let’s move on to the next step of making seed bombs: adding seeds to the clay mixture.
Adding Seeds to the Clay Mixture
Sprinkling Seeds on the Mixture
When it comes to adding seeds to the clay mixture, there are a couple of different methods you can use. One popular method is to simply sprinkle the seeds on top of the mixture. This allows for a more random distribution of the seeds and can result in a beautiful, natural-looking seed bomb.
To sprinkle the seeds, start by preparing your clay mixture according to the instructions outlined in the previous section. Once your mixture is ready, take a small handful and crumble it up into smaller pieces. Then, using your fingers, gently sprinkle the seeds on top of the crumbled clay.
Make sure to distribute the seeds evenly across the entire surface of the clay. You can do this by moving your hand back and forth in a sweeping motion, allowing the seeds to fall onto the clay. Be careful not to use too many seeds, as this can make it difficult for them to grow properly.
Mixing Seeds Into the Clay
Another method for adding seeds to the clay mixture is to mix them directly into the clay. This method allows for more control over the placement of the seeds and can be especially useful if you want to create specific patterns or designs with your seed bombs.
To mix the seeds into the clay, start by preparing your clay mixture as outlined in the previous section. Once your mixture is ready, take a small handful and flatten it out into a thin disc shape. Then, sprinkle a small amount of seeds onto the surface of the clay disc.
Next, fold the edges of the clay disc inward, covering the seeds. Gently knead and press the clay to distribute the seeds evenly throughout the mixture. Continue this process until the seeds are well incorporated into the clay.
Mixing the seeds into the clay ensures that they are evenly distributed and surrounded by the protective clay coating. This coating helps to protect the seeds from pests and harsh environmental conditions, increasing their chances of germination and successful growth.
By incorporating the seeds into the clay, you are essentially creating a protective casing for them. This casing not only helps to keep the seeds safe, but it also provides them with the nutrients and moisture they need to thrive.
Overall, both sprinkling seeds on the mixture and mixing seeds into the clay are effective methods for adding seeds to your seed bombs. The method you choose will ultimately depend on your personal preferences and the specific design or pattern you want to achieve.
Remember to be mindful of the types of seeds you select for your seed bombs. Native wildflower seeds are a popular choice, as they are well-suited to the local climate and can attract beneficial insects. Additionally, herb or vegetable seeds can also be used if you want to create seed bombs that yield edible plants.
Now that you know how to add seeds to the clay mixture, it’s time to move on to the next step: shaping the seed bombs.
Shaping the Seed Bombs
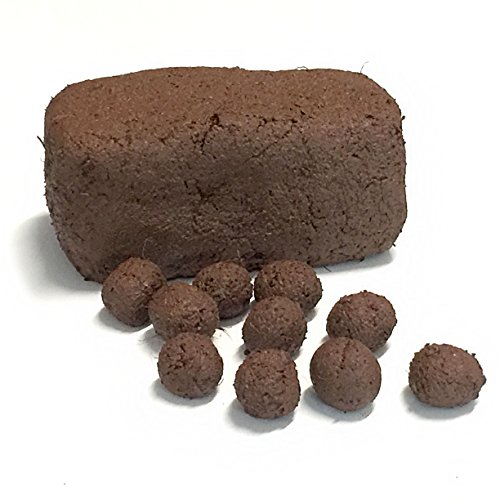
Rolling the Clay Mixture into Balls
Creating seed bombs is a fun and easy way to help promote biodiversity and beautify your surroundings. One of the key steps in making seed bombs is shaping the clay mixture into balls. This process allows the seeds to be protected and dispersed effectively. Here’s how you can roll the clay mixture into balls:
- Start by preparing the clay mixture according to the instructions mentioned in the previous section. The clay acts as a binding agent, holding the seeds and compost together.
- Once you have a well-mixed clay mixture, take a small portion of it and roll it between your palms. The size of the balls can vary depending on your preference, but it’s generally recommended to create seed bombs that are around the size of a golf ball.
- As you roll the clay mixture, you may notice that it can be quite sticky. If you find it difficult to handle, you can lightly wet your palms with water to prevent the clay from sticking to your skin.
- While rolling the clay mixture into balls, make sure to press firmly to ensure that the seeds are embedded within the clay. This will help protect the seeds and provide them with the necessary nutrients from the compost.
- Continue rolling the clay mixture into balls until you have used up all the mixture. If you’re making a large batch of seed bombs, it can be helpful to work in small batches, so the clay doesn’t dry out before you finish shaping them.
- Once you have shaped all the seed bombs, place them on a surface that is lined with parchment paper or a non-stick mat. This will prevent them from sticking and allow them to dry properly.
Pressing the Clay Mixture into Molds
Another option for shaping seed bombs is to use molds. Using molds can be a great way to create seed bombs with unique shapes or designs. Here’s how you can press the clay mixture into molds:
- Start by preparing the clay mixture as mentioned in the previous sections. The clay should have a pliable consistency that allows it to be easily pressed into the molds.
- Choose the molds you want to use for shaping your seed bombs. You can find a variety of molds in different shapes and sizes, such as flower shapes, animal shapes, or even simple geometric shapes.
- Take a small amount of the clay mixture and press it into the mold, making sure to fill it completely. Use your fingers or a small tool to press the clay firmly into the mold, ensuring that it is evenly distributed.
- Once the mold is filled with the clay mixture, gently tap it on a hard surface to release any air bubbles and to ensure that the clay is tightly packed.
- Carefully remove the seed bomb from the mold by gently pushing it out from the back. If the clay mixture is sticking to the mold, you can lightly dust it with some dry soil, compost, or cornstarch to help with the release.
- Place the shaped seed bombs on a surface lined with parchment paper or a non-stick mat to dry. Allow them to dry completely before storing or planting them.
Using molds can add a creative touch to your seed bombs and make them more visually appealing. It’s important to note that if you choose to use molds, make sure they are made of materials that are safe for the environment and won’t harm the plants or wildlife when the seed bombs are planted.
Remember, whether you choose to roll the clay mixture into balls or press it into molds, the ultimate goal is to create seed bombs that are well-formed and hold the seeds securely. This will ensure successful germination and growth when they are planted. So, let your creativity flow and enjoy the process of shaping your seed bombs!
Drying and Curing Seed Bombs
Air Drying Seed Bombs
When it comes to drying and curing seed bombs, there are a few methods you can use. One popular option is air drying, which is a simple and effective way to ensure that your seed bombs are ready for planting.
To air dry your seed bombs, you’ll need a well-ventilated area where they can sit undisturbed. This could be a windowsill, a covered porch, or even a dry spot in your garden. The key is to choose a location where the seed bombs won’t be exposed to excessive moisture or direct sunlight.
Once you’ve found the perfect spot, place your seed bombs in a single layer, making sure they are not touching each other. This will allow for proper airflow and prevent them from sticking together.
Now, all you have to do is wait. Depending on the size and composition of your seed bombs, it can take anywhere from a few days to a couple of weeks for them to fully dry. Keep an eye on them during this time and make sure they are not becoming moldy or overly dry.
Curing Seed Bombs in the Sun
Another method for drying and curing seed bombs is to use the power of the sun. This method can be particularly effective if you live in a sunny climate or during the warmer months of the year.
To cure your seed bombs in the sun, you’ll need a sunny spot that gets at least six hours of direct sunlight each day. This could be a sunny windowsill, a patio table, or even a patch of bare ground in your garden.
Similar to air drying, make sure to place your seed bombs in a single layer, ensuring that they have enough space between them for proper airflow. This will allow the sun’s rays to penetrate and dry the seed bombs evenly.
Keep in mind that curing seed bombs in the sun can be a faster process compared to air drying. Depending on the weather conditions, it may only take a few days for your seed bombs to be fully cured. However, be cautious not to leave them out for too long, as excessive exposure to sunlight can cause the seeds to become damaged or ineffective.
During the curing process, it’s important to check on your seed bombs regularly. If you notice any signs of mold or excessive dryness, it’s best to move them to a different location or adjust the amount of sunlight they receive.
Remember, whether you choose to air dry or cure your seed bombs in the sun, the ultimate goal is to ensure that they are completely dry before storing or planting them. This will help to preserve the viability of the seeds and increase the chances of successful germination.
Now that your seed bombs are dry and ready, it’s time to move on to the next step: storing and planting them.
Storing and Planting Seed Bombs
Storing Seed Bombs for Later Use
Seed bombs are a convenient and fun way to spread wildflowers and other plants in your garden or outdoor spaces. If you have made more seed bombs than you can use immediately, it’s important to store them properly so they remain effective for future use.
To store seed bombs, follow these simple steps:
- Step 1: Dry the Seed Bombs – Before storing the seed bombs, make sure they are completely dry. This will prevent them from becoming moldy or rotting. You can air dry them by placing them on a tray or drying rack in a cool, dry place for about a week. Alternatively, you can use a food dehydrator set at a low temperature to speed up the drying process.
- Step 2: Store in a Dry Container – Once the seed bombs are dry, store them in an airtight container to protect them from moisture and humidity. A glass jar with a tight-fitting lid or a plastic container with a sealing mechanism works well. Make sure the container is clean and dry before placing the seed bombs inside.
- Step 3: Label and Date – To keep track of the seed bombs and their expiration dates, it’s a good idea to label the container with the type of seeds used and the date they were made. This will help you know which ones to use first and ensure you are planting fresh seed bombs.
- Step 4: Store in a Cool Location – To maintain the viability of the seeds, store the container of seed bombs in a cool location away from direct sunlight. Excess heat can reduce the germination rate of the seeds. A pantry, basement, or garage shelf are all suitable storage locations.
By following these steps, you can store your seed bombs for several months, ensuring that they remain viable and ready to use whenever you’re ready to spread some natural beauty.
Planting Seed Bombs in the Garden or Outdoors
Once you have prepared your seed bombs and are ready to add some color and life to your garden or outdoor spaces, it’s time to plant them. Planting seed bombs is a simple and enjoyable process that anyone can do. Here’s how you can do it:
- Step 1: Choose the Planting Location – Select an area in your garden or outdoor space where you want the wildflowers or other plants to grow. Make sure the location receives adequate sunlight and has well-drained soil. It’s also a good idea to remove any weeds or grass from the area before planting.
- Step 2: Prepare the Soil – Before planting the seed bombs, loosen the soil in the planting area. This will help the seeds make good contact with the soil and improve germination. Use a garden fork or a small hand tool to break up any compacted soil.
- Step 3: Plant the Seed Bombs – Take a seed bomb and gently press it into the prepared soil. Make sure it is in direct contact with the soil to facilitate germination. If you have multiple seed bombs, space them out evenly to ensure even distribution of plants.
- Step 4: Water and Maintain – After the seed bombs, water the area thoroughly. This will provide the necessary moisture for germination. Keep the soil consistently moist until the seeds sprout and establish themselves. Once the plants are established, follow regular watering and maintenance practices to ensure their healthy growth.
- Step 5: Enjoy the Blooms – With time and proper care, the seed bombs will sprout and grow into beautiful flowers or other plants. Sit back and enjoy the vibrant colors and buzzing activity they bring to your garden or outdoor spaces.
Planting seed bombs is a fantastic way to contribute to the environment and attract pollinators such as bees and butterflies. Whether you’re a seasoned gardener or a beginner, this simple and eco-friendly method will bring joy and beauty to your surroundings.
Remember, nature works on its own schedule, so be patient and allow the seeds to germinate and grow at their own pace. Before you know it, your garden will be bursting with life and color, all thanks to the humble seed bomb.