Looking to make whipped honey at home? Follow our to create delicious and creamy whipped honey with optional flavorings. Find out the key ingredients, equipment needed, and expert tips for success.
Ingredients for Whipped Honey
Honey
When it comes to making whipped honey, the main ingredient you’ll need is, of course, honey. Honey is a natural sweetener that is beloved by many for its rich flavor and numerous health benefits. It is made by bees from the nectar of flowers and has been used as a sweetener for centuries.
Honey is not only delicious but also packed with antioxidants, enzymes, and minerals. It has antimicrobial properties and can soothe a sore throat or cough. Whether you’re using honey as a topping for your toast or as a sweetener in your tea, it adds a delightful taste to any dish.
When selecting honey for making whipped honey, it’s important to choose a high-quality, pure honey. Look for honey that is raw and unfiltered, as this will have the most natural flavor and beneficial properties. You can find a wide variety of honey options, such as wildflower honey, clover honey, or even specialty honey like manuka honey.
Optional Flavorings
If you want to take your whipped honey to the next level, you can experiment with optional flavorings. These flavorings can add a unique twist to your whipped honey and make it even more delicious. Here are a few popular options:
- Cinnamon: Adding a dash of cinnamon to your whipped honey can give it a warm and spicy flavor.
- Vanilla Extract: A splash of vanilla extract can add a subtle and sweet aroma to your whipped honey.
- Lemon Zest: If you’re looking for a refreshing twist, try adding some lemon zest to your whipped honey for a citrusy kick.
These are just a few examples, but the possibilities are endless. Feel free to get creative and experiment with different flavor combinations to find the perfect whipped honey that suits your taste buds.
Equipment Needed for Whipped Honey
Electric Mixer
An electric mixer is an essential tool for making whipped honey. It helps in achieving the smooth and creamy texture that makes whipped honey so delightful. With its powerful motor and various speed settings, an electric mixer ensures that the honey is whipped to perfection, incorporating air into it and giving it a light and fluffy consistency. Whether you prefer a handheld mixer or a stand mixer, both can work effectively for making whipped honey.
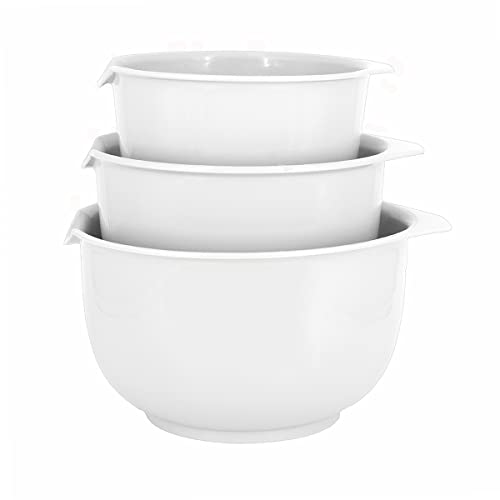
Mixing Bowl
A mixing bowl is another important piece of equipment needed for making whipped honey. It provides a spacious and sturdy container to hold the honey and other ingredients during the whipping process. Opt for a bowl with high sides to prevent any splattering while mixing. Stainless steel or glass bowls are ideal choices as they are non-reactive and easy to clean. It’s also helpful to have a bowl with a non-slip base to ensure stability while using the electric mixer.
Using an electric mixer and a mixing bowl together creates the perfect combination for making whipped honey. The mixer does the hard work of whisking and incorporating air into the honey, while the mixing bowl provides a convenient and spacious container for the process.
Now that you have the necessary equipment, let’s move on to the steps involved in making whipped honey.
Steps to Make Whipped Honey
Step 1: Measure the Honey
Start by measuring the desired amount of honey for whipping. You can choose to make a small batch or a larger one, depending on your needs. Use a measuring cup or spoon to accurately measure the honey. It’s important to note that the honey should be at room temperature for easier whipping.
Step 2: Optional Flavorings
If you want to add some extra flavor to your whipped honey, this is the step to do it. You can experiment with various optional flavorings such as vanilla extract, cinnamon, lemon zest, or even herbs like lavender. Add a small amount of the chosen flavoring to the measured honey and mix it gently until well combined.
Step 3: Whip the Honey
Now it’s time to whip the honey using the electric mixer and mixing bowl. Place the measured honey in the mixing bowl and set the electric mixer to a low speed initially. Gradually increase the speed to medium-high and whip the honey for about 5-7 minutes or until it becomes light and fluffy. Keep an eye on the consistency, making sure not to over-whip the honey as it may become too stiff.
Step 4: Store the Whipped Honey
Once the honey has been whipped to your desired consistency, transfer it to a clean and airtight container for storage. Ensure that the container is sealed tightly to maintain the freshness and prevent any moisture or air from entering. Store the whipped honey at room temperature in a cool and dry place. It can last for several weeks, but it’s so delicious that it usually gets consumed quickly!
Now that you know the steps involved in making whipped honey, let’s dive into some useful tips that can enhance your whipped honey-making experience.

Tips for Making Whipped Honey
Use Room Temperature Honey
To achieve the best results when making whipped honey, it’s essential to use honey that is at room temperature. Cold honey can be difficult to whip and may not incorporate air properly, resulting in a dense texture. So, make sure to let your honey sit at room temperature for a while before starting the whipping process.
Experiment with Flavor Combinations
One of the great things about making whipped honey is that you can get creative with flavors. Don’t be afraid to experiment with different combinations of optional flavorings. Mix and match to find your favorite blends. The possibilities are endless, and you might discover a unique flavor combination that becomes your signature whipped honey.
Store Whipped Honey in a Sealed Container
To maintain the freshness and prevent the whipped honey from drying out, it’s important to store it in a sealed container. Choose a container that is airtight and has a secure lid. This will help in preserving the light and fluffy texture of the whipped honey for a longer period. Additionally, storing it in a cool and dry place away from direct sunlight will ensure the best quality and taste.
By following these tips, you can enhance your whipped honey-making skills and create a delightful treat that will impress your family and friends.
Frequently Asked Questions about Whipped Honey
Can I Use Raw Honey?
Yes, you can use raw honey to make whipped honey. Raw honey is a great choice as it contains natural enzymes and antioxidants that provide additional health benefits. However, keep in mind that the consistency and texture of whipped honey made with raw honey may differ slightly compared to processed honey. Raw honey tends to have a thicker consistency, which can result in a denser whipped honey.

How Long Does Whipped Honey Last?
When stored properly in a sealed container at room temperature, whipped honey can last for several weeks. However, it is important to check for any signs of spoilage such as mold or an off smell before consuming. If you notice any changes in color, texture, or taste, it’s best to discard the whipped honey to ensure your safety.
Can I Use a Hand Mixer Instead of an Electric Mixer?
Yes, you can use a hand mixer instead of an electric mixer to make whipped honey. While an electric mixer provides convenience and handles larger quantities more efficiently, a hand mixer can also get the job done. It may require a bit more effort and time, but with patience and consistent whipping, you can achieve the desired light and fluffy texture using a hand mixer.
Now that you have all the information you need, it’s time to gather your equipment, select your favorite flavorings, and start making your own delicious whipped honey. Enjoy the process and indulge in the creamy and heavenly taste of homemade whipped honey!
Steps to Make Whipped Honey
Step 1: Measure the Honey
To begin making whipped honey, you will need to measure the amount of honey you want to use. This step is crucial in ensuring that you have the right proportions for your recipe. Whether you are making a small batch or a large one, it’s important to accurately measure the honey to achieve the desired consistency and flavor.
Step 2: Optional Flavorings
Once you have measured the honey, you can add optional flavorings to enhance the taste of your whipped honey. This step allows you to get creative and experiment with different flavors. Some popular options include adding a splash of vanilla extract, a sprinkle of cinnamon, or a squeeze of lemon juice. The choice of flavorings is entirely up to you and your personal preferences.

Step 3: Whip the Honey
Now comes the fun part – whipping the honey! To do this, you will need an electric mixer. Place the measured honey and any optional flavorings in a mixing bowl. Start the mixer on low speed to incorporate the ingredients together. Gradually increase the speed to medium-high and continue whipping until the honey becomes light and fluffy. This process usually takes around 5-7 minutes, but it may vary depending on the type and consistency of the honey.
Step 4: Store the Whipped Honey
Once the honey has reached the desired whipped consistency, it’s time to store it properly. Transfer the whipped honey into a sealed container to maintain its freshness and prevent it from crystallizing. Airtight jars or containers with lids work best for storing whipped honey. Make sure to label the container with the date of preparation to keep track of its shelf life.
To maximize the shelf life of your whipped honey, it is recommended to store it in a cool and dry place away from direct sunlight. Proper storage will help maintain its texture and flavor for a longer period. Whipped honey can typically be stored for several weeks to a few months, depending on the ingredients used and the storage conditions.
Remember to enjoy your homemade whipped honey as a delicious spread on toast, pancakes, or waffles. It also makes a great addition to tea or as a sweetener in various recipes. Get creative with it and explore different ways to incorporate whipped honey into your culinary adventures!
Tips for Making Whipped Honey
Use Room Temperature Honey
When making whipped honey, it’s important to use honey that is at room temperature. Cold honey can be difficult to whip and may not achieve the desired fluffy texture. Allow the honey to sit at room temperature for a short while before starting the whipping process.
Experiment with Flavor Combinations
Don’t be afraid to experiment with different flavor combinations when making whipped honey. The possibilities are endless! Try adding a pinch of cocoa powder for a chocolatey twist, or sprinkle in some crushed lavender buds for a floral aroma. Let your taste buds guide you and have fun exploring unique flavors.
Store Whipped Honey in a Sealed Container
To keep your whipped honey fresh and prevent it from drying out or absorbing unwanted odors, store it in a sealed container. This will help maintain its creamy texture and preserve the flavors. Mason jars or food-grade plastic containers with tight-fitting lids are ideal for storing whipped honey.
Remember to label the container with the date of preparation and consume the whipped honey within the recommended storage period. This will ensure the best quality and flavor.
Frequently Asked Questions about Whipped Honey
Can I Use Raw Honey?
Yes, you can use raw honey to make whipped honey. In fact, using high-quality raw honey can enhance the flavor and nutritional value of your whipped honey. Raw honey is known for its natural enzymes, antioxidants, and antibacterial properties. Just make sure to follow the steps mentioned above and store the whipped honey properly to maintain its freshness.
How Long Does Whipped Honey Last?
When stored properly in a sealed container, whipped honey can last for several weeks to a few months. However, it is important to note that the shelf life may vary depending on the ingredients used and the storage conditions. It is always best to check for any signs of spoilage such as mold or an off smell before consuming whipped honey that has been stored for an extended period.
Can I Use a Hand Mixer Instead of an Electric Mixer?
Yes, you can use a hand mixer instead of an electric mixer to whip honey. While an electric mixer provides more power and convenience, a hand mixer can still achieve the desired whipped consistency. Simply follow the same steps mentioned earlier but be prepared for a longer mixing time. The key is to keep mixing until the honey becomes light and fluffy, regardless of the type of mixer you use.
Tips for Making Whipped Honey
Use Room Temperature Honey
When it comes to making whipped honey, using room temperature honey is key. Cold honey tends to be thicker and harder to whip, while room temperature honey is softer and more malleable. This makes it easier to achieve that smooth and creamy consistency that we all love in whipped honey.
To ensure that your honey is at the right temperature, simply let it sit at room temperature for a while before you begin the whipping process. This will allow it to soften up and become easier to work with. Trust me, it’s worth the wait!
Experiment with Flavor Combinations
One of the great things about making whipped honey is that you can get creative with flavor combinations. While honey on its own is delicious, adding different flavors can take it to a whole new level. From fruity and floral notes to warm and spicy undertones, the possibilities are endless.
To experiment with flavor combinations, you can add various ingredients to your whipped honey. Some popular options include vanilla extract, cinnamon, lavender, lemon zest, and even chili powder for a spicy kick. Don’t be afraid to mix and match different flavors to find your perfect combination. It’s all about finding what tickles your taste buds!
Store Whipped Honey in a Sealed Container
Once you’ve whipped up a batch of delicious honey goodness, it’s important to store it properly to maintain its freshness and flavor. The best way to do this is by storing your whipped honey in a sealed container.
A sealed container helps to keep out moisture and air, which can cause your whipped honey to lose its light and fluffy texture. Additionally, it helps to prevent any unwanted flavors or odors from seeping into your honey.
You can use a variety of containers for storing whipped honey, such as glass jars or plastic containers with tight-fitting lids. Make sure to choose a container that is clean and dry before transferring your whipped honey into it.
To further extend the shelf life of your whipped honey, you can also store it in the refrigerator. This will help to keep it fresh for longer, especially during warmer months when honey tends to become more liquid.
Frequently Asked Questions about Whipped Honey
Whipped honey is a delightful treat that can be enjoyed in many ways. Below, we have compiled answers to some of the most commonly asked questions about whipped honey to help you understand this sweet creation better.
Can I Use Raw Honey?
Absolutely! In fact, using raw honey is highly recommended when making whipped honey. Raw honey is unprocessed and retains all its natural flavors and health benefits. It has a rich texture and unique taste that can enhance the overall experience of whipped honey. So, go ahead and use raw honey to create a truly exceptional whipped honey.
How Long Does Whipped Honey Last?
Whipped honey has a good shelf life, thanks to its high sugar content. When stored properly, it can last for several months. To ensure the longevity of your whipped honey, store it in a sealed container in a cool and dry place. Avoid exposing it to direct sunlight or extreme temperatures, as this can affect its quality. If you notice any changes in color, texture, or taste, it’s best to discard it.
Can I Use a Hand Mixer Instead of an Electric Mixer?
While an electric mixer is the most efficient tool for making whipped honey, a hand mixer can also be used. The key is to have a mixer that can whip air into the honey to achieve the desired light and fluffy texture. A hand mixer may require a bit more effort and time compared to an electric mixer, but it can still yield satisfactory results. Just make sure to use a sturdy and reliable hand mixer that can handle the task effectively.
To summarize, raw honey is the perfect choice for making whipped honey, as it retains its natural flavors. When stored properly, whipped honey can last for several months. While an electric mixer is ideal, a hand mixer can also be used to achieve the desired texture. Now that we’ve answered these frequently asked questions, let’s dive into the exciting world of whipped honey and explore its ingredients, equipment needed, steps to make it, and some useful .