Learn how to draw a cute and simple bee with this step-by-step guide. Get the materials needed, follow the instructions, and add your own creative touches to bring your bee to life. Perfect for beginners!
Materials Needed for Drawing a Bee
Paper
To start drawing a bee, you will need a sheet of paper. It is best to use a blank sheet of paper that is smooth and sturdy, as this will allow you to draw with ease and prevent any smudging or tearing. A standard letter-sized paper or sketchbook will work perfectly for this project.
Pencil
A good quality pencil is essential for drawing the basic shape of a bee. It is recommended to use a medium or soft graphite pencil, as these are easier to work with and create smooth lines. Make sure your pencil is sharpened to a fine point so that you can achieve precise details in your bee drawing.
Eraser
An eraser is a must-have tool for any artist, and drawing a bee is no exception. It allows you to correct any mistakes or unwanted lines in your drawing. Choose a soft eraser that doesn’t leave smudges or marks on the paper. This will help you make your bee drawing look clean and polished.
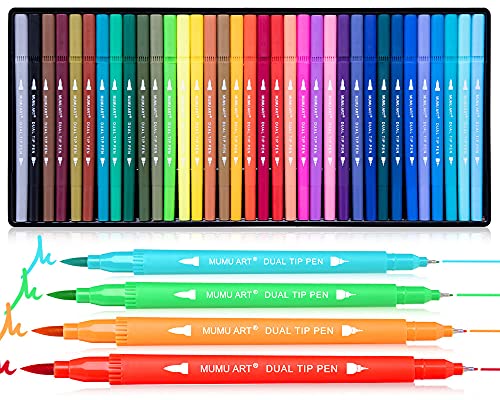
Colored Markers
To add vibrant colors to your bee drawing, you will need a set of colored markers. Opt for markers that have a fine tip, as this will allow you to add intricate details to your bee’s body and wings. Choose colors that resemble those of a real bee, such as yellow, black, and white. These markers will bring your bee drawing to life and make it visually appealing.

Using these materials, you will be well-equipped to create a stunning bee drawing. Now, let’s move on to the next section to learn how to draw the basic shape of a bee.
Drawing the Basic Shape of a Bee
Drawing a bee may seem challenging at first, but with a few simple steps, you’ll be able to create a buzzing masterpiece in no time. The first step in drawing a bee is to establish its basic shape. This will serve as a foundation for adding details and bringing your bee to life.
Drawing a Circle for the Head
To begin, start by drawing a circle on your paper. This circle will serve as the head of your bee. It doesn’t need to be a perfect circle, as bees have a slightly elongated shape. Remember to keep your lines light and sketchy at this stage, as you will be refining them later.
Adding an Oval for the Body
Next, extend a slightly larger oval shape from the bottom of the head circle. This oval will form the body of your bee. Bees have a plump and rounded body, so make sure to capture their unique shape. Connect the head and body smoothly, ensuring a natural flow between the two shapes.

Sketching Guidelines for Positioning Features
Now that you have the basic shapes of the head and body, it’s time to add some guidelines to help position the bee’s features. Draw a vertical line through the center of the head and body. This will act as a reference point for the symmetry of the bee. Then, lightly sketch a horizontal line across the head circle. This line will help you accurately place the eyes and antennae later on.
As you continue to sketch, keep in mind that bees have six legs and two pairs of wings. These features will be added in the later steps, but it’s helpful to have a general idea of their placement. Don’t worry about getting the positioning perfect at this stage; these guidelines will be your reference as you add more details.
Remember, drawing is all about practice and experimentation. Don’t be afraid to make mistakes or try different approaches. The more you practice, the more confident you’ll become in capturing the essence of a bee’s shape.
Now that you have the basic shape of a bee established, it’s time to move on to the next step – adding details to bring your bee to life.
Adding Details to the Bee
Drawing Eyes and Antennae
When it comes to adding details to your bee drawing, the eyes and antennae are essential features to focus on. These are what give the bee its distinct and recognizable appearance.

To draw the eyes, start by sketching two small circles on the head of the bee. These will serve as the basic shape of the eyes. Within each circle, add a smaller circle to represent the pupil. This will give the eyes a more realistic look. Don’t worry if your circles are not perfectly round; bees’ eyes can vary in shape and size.
Next, draw the antennae. Bees have long, thin antennae that are important for sensing their environment. To draw them, start by drawing two curved lines extending from the top of the head. These lines should curve slightly outward and then taper off at the ends. Add small lines along the length of the antennae to represent the segments.
Creating Wings
The wings of a bee are another important detail to include in your drawing. They give the bee a sense of movement and bring it to life.
To create the wings, start by drawing two elongated teardrop shapes on either side of the bee’s body. These shapes should be slightly curved and overlap the body. Add some smaller lines within the wings to represent the veins. This will give them a more realistic and textured look.
Remember that bees’ wings are translucent, so you can add some lighter shades of color or shading to give them depth and dimension. This will make the wings appear more delicate and ethereal.
Adding Stripes to the Body
One of the most recognizable features of a bee is its striped body. Adding these stripes will make your drawing instantly recognizable as a bee.
To add the stripes, start by drawing horizontal lines across the oval shape of the bee’s body. These lines should be evenly spaced and extend from one side of the body to the other. Bees typically have three segments to their body, so you can divide the oval into three sections and add the stripes accordingly.
Once you have the horizontal lines in place, add smaller vertical lines connecting them. These vertical lines should follow the curve of the body and create a striped pattern. You can use a darker or lighter shade of the body color for the stripes, depending on your preference.
Remember to keep the stripes consistent in size and spacing to maintain a balanced and realistic look. This will help bring your bee drawing to life and make it visually appealing.
Incorporate these details into your bee drawing to make it truly stand out. The eyes and antennae will give your bee a sense of personality, while the wings and stripes will add movement and realism. By paying attention to these small but important details, you’ll create a bee drawing that is both visually engaging and accurate.

Now that you have completed this step, you can move on to the next section to learn how to color your bee and add the final touches to your drawing.
Coloring the Bee
Choosing Bee-like Colors
When it comes to coloring your bee drawing, it’s important to choose colors that mimic the vibrant and distinctive hues of a real bee. Bees are known for their striking black and yellow stripes, which serve as a warning to other animals that they are equipped with a powerful sting. To capture the essence of a bee, opt for shades of yellow and black that closely resemble their natural coloring.
Coloring the Head and Body
To bring your bee to life, start by coloring the head and body. Begin with the head, which is usually a solid shade of black. Use your pencil or colored marker to fill in the entire area, making sure to stay within the lines you sketched earlier. This will create a strong contrast with the rest of the bee’s body.
Next, move on to the body of the bee. Bees typically have yellow or orange bodies with black stripes. Use your chosen colors to fill in the appropriate areas, following the guidelines you sketched earlier. You can opt for a solid color for the body or add some variation by shading certain areas. This will add depth and dimension to your drawing, making it more realistic.
Adding Shading and Highlights
To make your bee drawing truly stand out, it’s important to add shading and highlights. Shading helps create the illusion of depth and volume, while highlights add a touch of brightness and shine. These techniques will make your bee look more three-dimensional and realistic.
Start by identifying the light source in your drawing. This will determine where the highlights and shadows should fall. Typically, the light source comes from above, so the top parts of the bee will be brighter while the bottom parts will be darker.
Using a slightly darker shade of your chosen color, add shadows to the areas where the body overlaps or where there are creases and folds. This will create the illusion of depth and make your bee appear more lifelike. Blend the shadows gently with your pencil or colored marker to create a smooth transition between the different shades.
Next, add highlights to the areas that would catch the most light, such as the top of the head and the upper part of the body. Use a lighter shade of your chosen color or even a white pencil or marker to create these highlights. Be careful not to overdo it – a few strategically placed highlights will go a long way in enhancing the realism of your drawing.
Final Thoughts
Coloring a bee drawing can be a fun and creative process. By choosing bee-like colors, coloring the head and body accurately, and adding shading and highlights, you can bring your bee drawing to life and make it truly captivating. Remember to have fun with the process and let your creativity shine through. Sign and date your drawing to mark its completion and showcase your artistic journey. Now, let’s move on to the final touches and finishing steps to complete your bee drawing.
Final Touches and Finishing the Drawing
Erasing Guidelines and Unwanted Lines
When it comes to finalizing your bee drawing, one of the first steps is to erase any guidelines or unwanted lines that may still be visible. These guidelines were initially drawn to help you position the features of the bee accurately, but now it’s time to remove them so that your drawing looks clean and polished.
Using a good quality eraser, gently go over the guidelines and any other stray lines that you no longer need. Be careful not to erase any important parts of the bee, such as the body or the wings. Take your time and erase in a smooth motion to avoid smudging or damaging the paper.
Refining Details and Enhancing Features
Once the unwanted lines have been erased, it’s time to refine the details of your bee drawing and enhance its features. This is where you can add more depth and dimension to your artwork, making it come to life on the paper.
Start by focusing on the head of the bee. Pay attention to the shape and size of the eyes, and carefully draw them in. You can make them big and expressive or small and delicate, depending on the look you want to achieve. Don’t forget to add the tiny antennae on top of the head, which give the bee its distinctive appearance.
Moving on to the body, you can add more texture and definition by sketching in some lines to represent the bee’s stripes. These lines should follow the contour of the oval shape you drew earlier. Use your pencil lightly and add the lines gradually, making them thicker or thinner as needed.
To make the wings stand out, you can use a technique called cross-hatching. This involves drawing a series of short lines that intersect each other, creating a pattern of shading. Start by lightly sketching the outline of the wings, and then fill them in with these cross-hatch lines. This will give the wings a sense of transparency and depth.
Signing and Dating the Drawing
Now that your bee drawing is complete, it’s time to put your finishing touches on it. One way to add a personal touch is to sign and date your artwork. This not only shows that you created the drawing, but it also gives it a sense of authenticity and value.
Choose a corner of the paper where you want to place your signature. You can use your initials, your full name, or even a unique symbol that represents you as an artist. Write your signature neatly and clearly, using a pen or a fine-tip marker that contrasts with the colors you used in the drawing.
Next to your signature, write the date when you completed the drawing. This will serve as a reminder of the time and effort you put into creating this piece of art. It also allows you to track your progress as an artist and see how your skills evolve over time.
In conclusion, the final touches and finishing steps of your bee drawing are essential to bring it to its full potential. By erasing guidelines and unwanted lines, refining details and enhancing features, and signing and dating the drawing, you add a professional and personal touch to your artwork. Remember to take your time and enjoy the process, as these final steps can truly make your bee drawing shine.