Discover the step-by-step process of harvesting honey from beehives. From preparing for the harvest to filtering and storing the honey, this guide covers it all for beekeepers.
Preparing for Honey Harvesting
Checking Honey Supers
Before you begin the honey harvesting process, it is important to check your honey supers. These are the boxes that are placed on top of the beehive frames to allow bees to store excess honey. Checking the honey supers will give you an idea of how much honey your bees have produced and if they are ready for harvest.
To check the honey supers, you will need to carefully remove the outer cover of the beehive. Take a moment to observe the activity around the hive. Are there many bees flying in and out? This is a good sign that the honey supers may be full.
Next, you will need to remove the inner cover. This will give you access to the honey supers. Take a close look at each frame and observe if the honeycomb cells are filled with honey. Are the cells capped with beeswax? Capped cells indicate that the honey is ready for harvest.
Gathering Necessary Equipment
Before you begin the honey harvesting process, it is essential to gather all the necessary equipment. Having the right tools at hand will make the process smoother and more efficient.

Here are some of the essential equipment you will need:
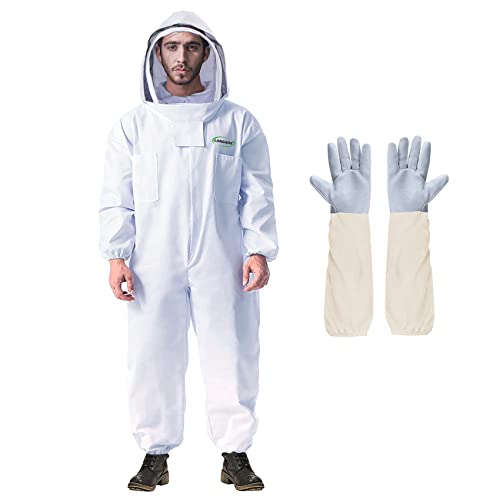
- Beekeeping suit or protective clothing: This will protect you from bee stings and ensure your safety during the honey harvest.
- Beekeeping gloves: These will protect your hands from bee stings and help you handle the frames and supers with ease.
- Smoker: A bee smoker is used to calm the bees before you work on the hive. It emits cool smoke that helps to relax the bees and make them less aggressive.
- Hive tool: This tool is used to pry open the beehive and separate the frames. It is essential for inspecting the honey supers and removing them from the hive.
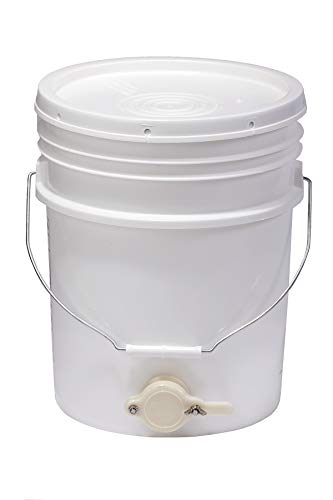
- Honey bucket or container: You will need a clean and food-grade bucket or container to collect the harvested honey.
Ensure that all your equipment is clean and in good condition before you start the honey harvesting process. This will help maintain the quality of the honey and prevent any contamination.
Ensuring Safety Measures
Safety should always be a top priority when it comes to and honey harvesting. Bees can become defensive and sting if they feel threatened. Here are some safety measures you should follow:
- Wear protective clothing: Always wear a beekeeping suit or protective clothing that covers your entire body, including a veil to protect your face. This will minimize the risk of bee stings.
- Use a smoker: Before working on the hive, light the smoker and allow it to produce cool smoke. This will help calm the bees and reduce their aggression.
- Work during the right time: Choose a time to when the bees are less active, such as early morning or late evening. Bees are more likely to be calm during these times.
- Be gentle and slow: When handling the frames and supers, be gentle and avoid sudden movements. Slow, deliberate actions will help keep the bees calm and reduce the risk of stings.
By following these safety measures, you can ensure a smooth and safe honey harvesting process for both you and your bees. Remember, a calm and relaxed approach will lead to a more successful harvest.
Now that you have checked the honey supers, gathered your equipment, and ensured safety measures, you are ready to move on to the next step: determining the right time to harvest honey.
Determining the Right Time to Harvest Honey
When it comes to harvesting honey, timing is everything. You want to ensure that the honey is mature enough to be harvested, but not too ripe that it becomes overly thick and difficult to extract. In this section, we will discuss three key factors to consider when determining the right time to harvest honey: monitoring beehive activity, checking honeycomb cap status, and assessing honey moisture levels.
Monitoring Beehive Activity
One of the first indicators that the honey is ready for harvest is the activity level of the beehive. As a beekeeper, you will become familiar with the usual bustling and busy behavior of your bees. However, when the honey flow is at its peak, the hive will exhibit an even greater level of activity. Bees will be coming and going at a rapid pace, carrying nectar and pollen into the hive.
To monitor beehive activity, take some time to observe the entrance of the hive. Are there numerous bees entering and exiting? Do they appear to be carrying heavy loads? These are signs that the honey flow is strong, and it may be a good time to consider harvesting.
Checking Honeycomb Cap Status
Another way to determine if the honey is ready for harvest is by examining the status of the honeycomb caps. Honeycomb caps are made by the bees to seal the cells containing mature honey. When the honey is fully ripened, the bees will cap the cells with a thin layer of beeswax.
To check the honeycomb cap status, gently lift the outer cover of the hive and remove a few frames from the honey supers. Look closely at the cells. If the caps are a uniform color and tightly sealed, it indicates that the honey is mature and ready for harvest. On the other hand, if you notice uncapped cells or cells with partially capped honey, it may be a sign that the honey is not yet fully ripened.

Assessing Honey Moisture Levels
The moisture content of honey is an important factor to consider before harvesting. Honey with a high moisture content can ferment, leading to spoilage and a lower quality product. It is crucial to ensure that the honey has reached the appropriate moisture level before extracting.
To assess the honey moisture levels, beekeepers use a tool called a refractometer. This device measures the refractive index of the honey, which correlates to its moisture content. The ideal moisture level for honey is typically around 17-18%. If the honey exceeds this range, it is recommended to leave it in the hive for further drying.
Regularly monitoring the moisture levels of your honey will help you determine when it has reached the optimal moisture content for harvesting. This will ensure that you obtain a high-quality honey product that will store well and have a longer shelf life.
In summary, determining the right time to harvest honey requires careful observation and assessment. By monitoring beehive activity, checking honeycomb cap status, and assessing honey moisture levels, you can confidently decide when the honey is ready for extraction. Remember to pay attention to the signs and cues from your bees, as they are excellent indicators of the honey flow. Happy harvesting!
Unordered List:
- Observe the activity level of the beehive, looking for increased bee traffic and heavy loads being carried.
- Check the honeycomb caps for uniform color and tight seals, indicating fully ripened honey.
- Use a refractometer to assess the honey moisture levels and ensure it falls within the ideal range of 17-18%.
Extracting Honey from Honeycomb
Removing Honey Supers
When it comes to harvesting honey, one of the first steps is to remove the honey supers from the beehive. Honey supers are the boxes that are added on top of the brood boxes to give the bees extra space to store honey. These supers are where the majority of the honey is stored, making them the primary focus of the extraction process.
To remove the honey supers, it is important to approach the task with care and consideration for the bees. You want to minimize disruption to the hive and avoid causing any unnecessary stress or harm to the bees. Before starting, it is essential to put on protective gear, including a beekeeping suit, gloves, and a veil, to ensure your safety and prevent any bee stings.
Once you are properly attired, gently smoke the beehive to calm the bees. Smoke acts as a signal to the bees that there may be a potential threat, causing them to gorge on honey and become less defensive. This allows you to work more comfortably and reduces the likelihood of agitation.
Next, carefully lift each honey super off the beehive, being mindful of the weight and the presence of bees. It is crucial to handle the supers with care to avoid crushing any bees or damaging the honeycomb. This is where having the right equipment, such as a hive tool or bee brush, can be beneficial. These tools help separate the supers from the hive and brush off any bees that may be clinging to them.

Once you have removed the honey supers from the beehive, it is important to keep them covered to prevent any opportunistic bees from trying to steal the honey. Bees have an incredible sense of smell and are attracted to the scent of honey. To deter them, consider placing a bee escape board between the brood boxes and honey supers a day or two before the extraction. This device allows the bees to exit the supers but prevents them from re-entering, making it easier for you to remove the supers without disturbing the bees.
Uncapping Honeycomb Cells
After the honey supers have been successfully removed from the beehive, the next step in the honey extraction process is to uncap the honeycomb cells. The cells are capped with a layer of beeswax, which seals in the honey and protects it from outside elements. Uncapping the cells allows the honey to be released for extraction.
There are several methods for uncapping honeycomb cells, and the choice of method often depends on personal preference and the available equipment. One common method is to use a hot knife or uncapping fork. These tools are heated and then used to gently scrape off the wax caps from the cells. The heat helps to melt the wax, making it easier to remove.
Another method is to use an electric uncapping knife. These knives have a heated blade that quickly and efficiently removes the wax caps. The heat from the knife melts the wax, and the uncapped cells can then be easily accessed for honey extraction.
For beekeepers who prefer a more traditional approach, an uncapping plane can be used. This tool is similar to a woodworking plane and is used to shave off the wax caps from the cells. It requires a bit more manual effort but can be a satisfying and effective way to uncap the cells.
Regardless of the method chosen, it is important to work slowly and carefully when uncapping the honeycomb cells. The goal is to remove the wax caps without damaging the honeycomb or disturbing the honey inside. Take your time and pay attention to the angle and pressure applied to ensure a clean and even uncapping.
Using an Extractor to Spin out Honey
Once the honeycomb cells have been uncapped, it’s time to extract the honey from the honeycomb itself. This is where an extractor comes into play. An extractor is a specialized piece of equipment used to spin or centrifuge the honey out of the honeycomb, leaving the empty comb intact for the bees to reuse.
There are different types of extractors available, including manual and electric options. Manual extractors require you to manually spin or turn a handle to generate the centrifugal force necessary to extract the honey. Electric extractors, on the other hand, use a motor to spin the frames inside the extractor, making the process faster and less physically demanding.
To use an extractor, begin by placing the uncapped frames into the extractor basket. Make sure to balance the load evenly to prevent any wobbling or imbalance during the spinning process. Once the frames are secure, close the lid or cover of the extractor and start the spinning motion. The centrifugal force generated by the spinning causes the honey to be flung out of the cells and collect at the bottom of the extractor.
To collect the extracted honey, place a container or bucket underneath the honey gate or spigot located at the bottom of the extractor. Open the gate or spigot, allowing the honey to flow into the container. It is a truly rewarding experience to watch the golden liquid cascade into the container, knowing that it came directly from your bees.
Once the honey has been extracted, it is important to strain it to remove any impurities such as wax or bee parts. This can be done by pouring the honey through a fine mesh or cheesecloth into a separate container. The strained honey can then be transferred to storage containers or jars for further processing and consumption.
By removing the honey supers, uncapping the honeycomb cells, and using an extractor to spin out the honey, beekeepers can successfully harvest their honey while minimizing disruption to the bees and preserving the integrity of the honeycomb. The process requires patience, attention to detail, and the right equipment, but the reward is a sweet and delicious product that is the result of the hard work of both the bees and the beekeeper.
Filtering and Storing Harvested Honey
Harvesting honey from your beehive is an exciting and rewarding experience. Once you have successfully extracted the honey from the honeycomb, the next step is to filter and store the harvested honey properly. This ensures that your honey remains pure, free from impurities, and maintains its delicious taste for a long time. In this section, we will discuss the important steps involved in filtering honey for impurities, choosing the right storage containers, and properly sealing honey jars.
Filtering Honey for Impurities
Filtering honey is a crucial step in the honey harvesting process. It helps remove any impurities such as wax particles, bee parts, and debris that may have made their way into the honey during extraction. To filter your honey effectively, follow these simple steps:
- Prepare your filtering equipment: You will need a honey strainer or a fine-mesh sieve, a clean bucket or container to collect the filtered honey, and cheesecloth or a nylon straining bag.
- Set up your filtering system: Place the honey strainer or fine-mesh sieve over the clean bucket or container. Line the strainer with cheesecloth or use a nylon straining bag, ensuring it covers the entire surface area of the strainer.
- Pour the honey into the strainer: Slowly pour the harvested honey into the strainer, allowing it to pass through the cheesecloth or straining bag. The strainer will catch any impurities, while the filtered honey will flow into the container.
- Let gravity do its work: Allow the honey to filter naturally through the cheesecloth or straining bag. Avoid pressing or squeezing the honey, as it may result in a cloudy appearance.
- Remove any remaining impurities: After the initial filtration, check the filtered honey for any remaining impurities. If you notice any, you can repeat the filtering process using a fresh cheesecloth or straining bag.
Filtering honey ensures that it is crystal clear and free from any unwanted particles. The filtered honey can now be transferred to the appropriate storage containers.
Choosing the Right Storage Containers
Selecting the right storage containers for your harvested honey is essential to maintain its quality and freshness. Here are some factors to consider when choosing the perfect containers:
- Material: Opt for food-grade containers made of glass or food-safe plastic. These materials are non-reactive and will not alter the taste or quality of your honey.
- Size: Consider the quantity of honey you have harvested. Choose containers that can accommodate your honey without leaving too much headspace. This reduces the risk of oxidation and preserves the honey’s flavor.
- Sealability: Look for containers with airtight lids or caps. This prevents air and moisture from entering the containers, keeping your honey fresh and preventing crystallization.
- Visibility: Transparent or translucent containers allow you to see the honey’s color and monitor any changes over time. This can be helpful for assessing the honey’s quality.
- Labeling: Ensure the containers have enough space for labeling. Properly labeling your honey jars with the harvest date and other relevant information will help you keep track of the honey’s freshness.
Remember, it is best to use new containers specifically designated for honey storage to avoid any potential contamination. Clean and sanitize the containers before transferring the filtered honey.
Properly Sealing Honey Jars
Properly sealing your honey jars is crucial to prevent moisture absorption and maintain the honey’s freshness. Follow these steps to ensure a secure seal:
- Clean the jar rims: Before sealing, make sure the jar rims are clean and free from any honey residue. Use a clean cloth or paper towel to wipe away any drips or spills.
- Apply airtight seals: Place a new, clean lid on top of the jar and screw it on firmly. Some lids may require additional pressure to create a tight seal. Check for any signs of air leakage by pressing down on the center of the lid; it should not move or make a popping sound.
- Consider using wax seals: For added protection and a decorative touch, you can apply melted beeswax over the jar’s lid. This creates an extra layer of protection against moisture and helps maintain the honey’s flavor.
- Store jars in a cool, dark place: To preserve the quality of your honey, store the sealed jars in a cool and dark location, away from direct sunlight and heat sources. This helps prevent honey from crystallizing and maintains its natural properties.
Properly sealed honey jars will keep your honey fresh and flavorful for an extended period. Remember to check the seals periodically and discard any jars with compromised seals or signs of spoilage.
(Note: The above content is for reference purposes only. Please refer to the complete guide for a comprehensive understanding of honey harvesting.)
Cleaning Up and Maintaining Beehive
Maintaining a clean and well-maintained beehive is crucial for the health and productivity of your bees. Regular cleaning and maintenance ensure that excess wax and debris are removed, beehive components are properly reassembled, and pest infestations are prevented. In this section, we will discuss the importance of clearing excess wax and debris, reassembling beehive components, and implementing measures to prevent pest infestations.
Clearing Excess Wax and Debris
Clearing excess wax and debris from your beehive is an essential task that should be performed regularly. Excess wax can hinder the movement of bees within the hive and may even lead to overcrowding. Additionally, debris such as dead bees, pollen, and dirt can accumulate and create an unhealthy environment for your bees. By clearing out these unwanted materials, you ensure a clean and hygienic space for your bees to thrive.
To clear excess wax and debris, follow these simple steps:
- (1) Gently remove the beehive cover and set it aside.
- (2) Use a hive tool to carefully scrape off any excess wax from the top bars of the frames. Be cautious not to damage the frames or disturb the bees.
- (3) Inspect each frame for debris and gently brush it off using a soft-bristled brush or bee brush.
- (4) If you notice any moldy or damaged frames, remove them and replace them with new ones.
- (5) Once you have cleared the excess wax and debris from the frames, place them back into the hive in their original order.
- (6) Finally, cover the hive with the beehive cover, ensuring it is securely in place.
Regularly clearing excess wax and debris not only promotes a healthy and clean environment for your bees but also allows for better air circulation and reduces the risk of diseases and pests.
Reassembling Beehive Components
After clearing excess wax and debris, it is important to properly reassemble the beehive components. This ensures that the hive is structurally sound and provides a secure home for your bees. Reassembling the beehive components involves putting the hive back together in the correct order and ensuring that each component fits snugly.
Follow these steps to reassemble the beehive components:
- (1) Start by placing the bottom board on a level surface. This serves as the foundation for your hive.
- (2) Next, add the brood boxes or honey supers on top of the bottom board. These boxes will house the frames and provide space for the bees to store honey or raise brood.
- (3) Carefully insert the frames into the boxes, ensuring that they are properly aligned and spaced. This allows the bees to move freely between the frames.
- (4) Place the inner cover on top of the boxes. The inner cover acts as a barrier between the boxes and the outer cover, providing insulation and ventilation.
- (5) Finally, place the outer cover on top of the inner cover. The outer cover protects the hive from the elements and helps maintain a stable temperature.
By reassembling the beehive components correctly, you provide a stable and secure environment for your bees. This promotes optimal brood development, honey production, and overall hive health.
Preventing Pest Infestations
Pest infestations can have devastating effects on beehives. Common pests such as varroa mites, wax moths, and small hive beetles can weaken the hive, spread diseases, and even cause colony collapse. Implementing preventive measures is essential to protect your beehive from these harmful pests.
Here are some effective ways to prevent pest infestations:
- (1) Regularly monitor your beehive for signs of pests. This includes inspecting the frames, bottom board, and hive components for any indications of pest activity.
- (2) Use sticky traps or screened bottom boards to trap and monitor varroa mites. Regularly check and replace these traps as needed.
- (3) Keep your beehive clean and free from excess wax and debris, as pests are attracted to these materials.
- (4) Store unused beehive components in a dry and secure location to prevent infestations during storage.
- (5) Consider using natural pest control methods such as essential oils or powdered sugar treatments, which can help deter pests without harming your bees.
- (6) Educate yourself about common pests and their life cycles, as this knowledge will help you identify and address infestations promptly.
By implementing these preventive measures, you can significantly reduce the risk of pest infestations and ensure the long-term health and productivity of your beehive.
In conclusion, cleaning up and maintaining your beehive is a vital aspect of beekeeping. By clearing excess wax and debris, reassembling beehive components correctly, and implementing preventive measures against pests, you provide a clean, secure, and healthy environment for your bees. Remember to perform these tasks regularly to ensure the continuous well-being and success of your hive.