Looking to put together a bookshelf? Follow our step-by-step guide to gather tools, read instructions, and assemble the frame for a sturdy bookshelf. Get organized and create the perfect storage solution for your books.
How to Put Together a Bookshelf
Gathering the Necessary Tools and Materials
Putting together a bookshelf can be a rewarding and practical project. Before you dive in, it’s important to gather all the necessary tools and materials to ensure a smooth assembly process. Here’s a list of items you’ll need:
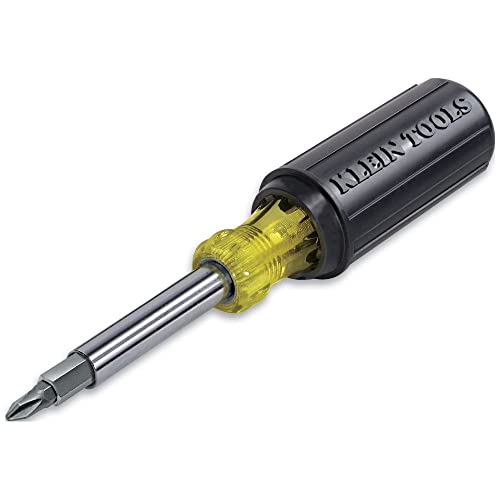
- Screwdriver – A screwdriver will be essential for tightening screws and securing the bookshelf.
- Hammer – You may need a hammer to gently tap certain parts into place.
- Level – A level will help you ensure the bookshelf is straight and properly aligned.
- Measuring tape – Measuring tape will come in handy to ensure accurate positioning of shelves and other components.
- Pencil – Having a pencil on hand will allow you to mark any measurements or adjustments needed.
- Assembly instructions – The instruction manual that comes with the bookshelf will be your guide throughout the assembly process.
- Hardware – Check the instruction manual for a list of included hardware such as screws, brackets, and dowels. Make sure you have all the necessary pieces before starting.
Reading and Understanding the Instructions
Once you have all the tools and materials ready, it’s time to read and understand the instructions provided. Take a moment to thoroughly review the manual before starting the assembly process. This will give you a clear idea of the steps involved and any specific requirements for your bookshelf. Pay close attention to any diagrams or illustrations that may accompany the instructions.
Understanding the instructions is crucial to ensure a successful assembly. If any parts of the instructions are unclear, don’t hesitate to consult the manufacturer’s website or customer support for clarification. It’s better to fully understand the process before proceeding to avoid any mistakes or frustrations later on.
Organizing the Parts and Hardware
Before diving into the assembly, take the time to organize all the parts and hardware. Lay them out in a clear and logical manner, making it easy to find what you need as you progress through the steps. Consider using small containers or zip-lock bags to keep screws, brackets, and other small pieces organized and easily accessible.

By organizing the parts and hardware beforehand, you’ll save time and avoid potential confusion during the assembly process. It’s also a good opportunity to double-check that you have all the necessary components.
Assembling the Frame
With the tools, materials, and instructions ready, it’s time to start assembling the frame of the bookshelf. Begin by identifying the different pieces that make up the frame, such as the side panels, top, and bottom. Follow the instructions step-by-step, using the provided hardware to connect the frame components securely.
As you assemble the frame, make sure to tighten all screws properly to ensure stability. Use a level to check that the frame is straight and adjust if necessary. Taking the time to properly assemble the frame will lay a solid foundation for the rest of the bookshelf.
Attaching the Shelves
Once the frame is complete, it’s time to attach the shelves. Refer to the instructions to determine the correct placement and spacing of the shelves. Use the provided hardware, such as shelf brackets or pegs, to securely attach the shelves to the frame.
Take care to align the shelves properly and ensure they are level. This will not only make the bookshelf look more aesthetically pleasing but also provide stability and prevent any books or items from sliding off.

Securing the Bookshelf to the Wall (if applicable)
If your bookshelf is designed to be secured to the wall, it’s important to follow the instructions provided to ensure proper installation. Locate the designated points for attaching the bookshelf to the wall and use appropriate hardware, such as wall anchors or brackets, to secure it.
Securing the bookshelf to the wall adds an extra layer of stability, especially if you plan to load it with heavy books. It also helps prevent accidents, especially if you have children or pets in the house. Properly securing the bookshelf will give you peace of mind knowing it won’t tip over easily.
Finishing Touches and Adjustments
Once the main assembly is complete, take a step back and assess the bookshelf. Check for any loose screws or wobbly parts and tighten them if necessary. Use a level to ensure the bookshelf is still straight and adjust as needed.
This is also an opportunity to add any finishing touches, such as wood polish or paint, to enhance the appearance of the bookshelf. Follow the manufacturer’s recommendations for any additional care or maintenance required.
How to Put Together a Puzzle
Putting together a puzzle can be a fun and relaxing activity that exercises your brain and sharpens your problem-solving skills. Whether you’re a beginner or an experienced puzzler, following a systematic approach can help you tackle even the most challenging puzzles. In this guide, we’ll take you through each step of the puzzle assembly process, from preparing the workspace to completing the final piece. So, let’s dive in and start putting those pieces together!
Preparing the Workspace
Before you begin assembling your puzzle, it’s important to set up a workspace that is comfortable and conducive to your puzzle-solving process. Find a flat surface, such as a table or a puzzle board, where you can spread out the puzzle without any obstructions. Make sure the area is well-lit, as good lighting will help you easily distinguish between different puzzle pieces.
To protect the surface underneath the puzzle, you may want to consider using a puzzle mat or a large piece of felt. These materials not only prevent the puzzle from sliding around but also make it easier to transport the puzzle if needed. Additionally, having a designated space for your puzzle ensures that you can leave it undisturbed when you need to take a break or work on it over several sessions.
Sorting and Organizing the Pieces
One of the key strategies in successfully completing a puzzle is sorting and organizing the pieces. This step may seem time-consuming, but it will save you a lot of frustration and time in the long run. Start by pouring all the puzzle pieces onto your workspace and take a moment to appreciate the challenge ahead.
To make the sorting process more manageable, you can create different categories based on colors, patterns, or edge pieces. Look for pieces with straight edges, as these will likely be the border pieces. Separate them from the rest and form the puzzle’s outer frame. This will provide a clear structure and help you visualize the final image.
Next, focus on grouping the remaining pieces based on similar colors or patterns. You can use small bowls, muffin tins, or even labeled ziplock bags to keep the pieces organized. By doing this, you’ll be able to easily locate specific pieces when you need them, saving valuable time and preventing frustration.

Starting with the Border Pieces
With the border pieces sorted and organized, it’s time to start assembling the puzzle. Begin by connecting the border pieces to form the frame of the puzzle. This step will give you a clear boundary to work within and create a solid foundation for the rest of the puzzle.
Look for pieces with straight edges and corners that match the shape of the frame. As you find matching pieces, gently connect them, ensuring that they fit snugly together. Don’t worry if some pieces don’t fit perfectly right away; you can always adjust them as you progress further into the puzzle.
Once the border is complete, take a moment to appreciate your progress. Seeing the outline of the puzzle come together can be incredibly motivating and exciting. Now, it’s time to move on to the next stage of the puzzle assembly.
Working on the Center Area
With the border in place, shift your focus to the center area of the puzzle. This is where the real challenge begins, as you’ll be dealing with a variety of colors, patterns, and shapes. Start by identifying distinct objects or sections within the puzzle image that can serve as anchor points.
Look for elements that stand out, such as faces, buildings, or objects with unique colors or patterns. Begin assembling these sections separately, using the reference image on the puzzle box or instruction manual as a guide. As you connect the pieces, you’ll start to see these individual sections come to life.

Working on the center area requires patience and attention to detail. Take your time and don’t be afraid to experiment. Sometimes, a piece may seem like it fits in one spot, but it might actually belong elsewhere. Trust your instincts and try different combinations until you find the right fit.
Connecting Related Pieces
As you progress through the puzzle, you’ll encounter pieces that are not part of the border or the distinct sections you’ve already assembled. These pieces may seem disconnected or unrelated at first, but don’t let that discourage you. This is where the real puzzle-solving skills come into play.
Look for pieces that have similar colors, patterns, or shapes to the sections you’ve already completed. These related pieces will serve as bridges between different areas of the puzzle. As you connect them, you’ll start to see the image come together more cohesively.
Remember, puzzle solving is all about trial and error. Don’t be afraid to try different combinations or set aside pieces that don’t seem to fit anywhere at the moment. Sometimes, you may need to revisit these pieces later on when more of the puzzle has been assembled.
Filling in the Remaining Sections
As you continue connecting related pieces, you’ll eventually reach a point where most of the puzzle has been assembled, except for a few remaining sections. This is the time to focus on those areas that still have missing pieces.
Refer back to the reference image or the instruction manual to get a clearer idea of what these sections should look like. Pay attention to the colors, patterns, and shapes of the missing pieces, and search for them within your sorted and organized pile. With patience and perseverance, you’ll be able to fill in these remaining gaps and bring the puzzle to completion.
Checking for Missing Pieces and Completing the Puzzle
As you near the end of the puzzle assembly process, it’s essential to thoroughly check for any missing pieces. Carefully inspect your workspace, the surrounding area, and even the puzzle box to ensure that no pieces have been misplaced or lost. Sometimes, pieces can hide in unexpected places or stick to other objects, so be diligent in your search.
If you do find any missing pieces, don’t panic. Most puzzle manufacturers have a customer service department that can assist you in obtaining replacement pieces. Reach out to them with the details of your puzzle, and they will guide you through the process of obtaining the missing pieces, allowing you to complete the puzzle without any compromises.
Once you’ve confirmed that all pieces are accounted for, take a moment to admire your completed puzzle. Revel in the sense of accomplishment that comes from bringing together hundreds or thousands of individual pieces to create a beautiful image.
How to Put Together a Bike
Preparing the Workspace and Tools
Setting up a proper workspace and gathering the necessary tools is the first step to successfully putting together a bike. Before you begin, find a spacious area where you can lay out all the parts and have enough room to work comfortably. Make sure you have the following tools handy:
- Allen wrench set
- Adjustable wrench or spanner
- Screwdrivers (both flathead and Phillips)
- Pliers
- Bike grease or lubricant
- Bike pump
- Bike stand or sturdy support
Having these tools within reach will save you time and make the assembly process smoother.
Attaching the Handlebars
The handlebars are an essential part of a bike, as they provide steering control. To attach the handlebars, start by loosening the stem bolt on the front fork using an Allen wrench. Carefully slide the handlebar into the stem, ensuring it is centered and aligned with the front wheel. Tighten the stem bolt securely to hold the handlebars in place. Double-check that the handlebars are straight and aligned with the front wheel before proceeding.
Installing the Front Wheel
Installing the front wheel is the next step in putting together your bike. Begin by inserting the axle of the wheel into the front fork dropouts. Make sure the wheel is centered and aligned with the frame. Tighten the axle nuts or quick-release skewer, depending on your bike’s design, using an adjustable wrench or spanner. Ensure the wheel spins freely and that it is securely attached to the fork.
Mounting the Pedals
Mounting the pedals is crucial for your bike’s functionality. Start by identifying the left and right pedals. The left pedal is typically indicated by an “L” or a small marking on the axle. The right pedal is usually indicated by an “R” or a small marking as well. Apply a small amount of grease to the pedal threads to facilitate smooth installation.
Using a pedal wrench or an adjustable wrench, begin by screwing the right pedal into the right crank arm in a clockwise direction. Make sure it is tightened securely. Repeat the process for the left pedal, screwing it into the left crank arm in a counterclockwise direction. Ensure both pedals are tightened and aligned properly to prevent any wobbling or instability.
Attaching the Seat and Seatpost
The seat and seatpost assembly is essential for providing comfort and proper riding position. Start by inserting the seatpost into the seat tube on the bike frame. Use a lubricant if necessary to ease insertion. Adjust the seatpost height according to your preference and tighten the seatpost clamp securely.
Next, position the seat onto the seatpost and align it with the desired angle. Tighten the seat clamp bolts to secure the seat in place. Ensure that the seat is aligned properly and tightened securely, as an improperly secured seat can lead to discomfort and potential accidents while riding.
Adjusting the Brakes and Gears
Properly adjusting the brakes and gears is crucial for your bike’s safety and performance. Start by checking the brake pads to ensure they are aligned with the rim of the wheel. Adjust the brake calipers if necessary to achieve proper alignment. Test the brakes by squeezing the brake levers to ensure they engage smoothly and effectively.
Next, move on to adjusting the gears. Begin by shifting the chain onto the smallest chainring in the front and the smallest cog in the rear. Use the barrel adjuster located on the derailleur or the shifters to fine-tune the gear shifting. Make sure the chain moves smoothly between the gears without any skipping or chain rub.
Checking and Adjusting the Tire Pressure
Before taking your bike for a ride, it’s essential to check and adjust the tire pressure. Use a bike pump equipped with a pressure gauge to inflate the tires to the recommended pressure specified by the tire manufacturer. Proper tire pressure ensures optimal performance and prevents flats.
To check the tire pressure, press the gauge onto the valve stem and read the pressure measurement. If the pressure is below the recommended range, inflate the tires gradually while periodically checking the pressure. Avoid overinflating the tires, as this can lead to a harsh and uncomfortable ride.
In Conclusion,
Putting together a bike requires careful attention to detail and a systematic approach. By following these steps, you can successfully assemble your bike and ensure its safety and functionality. Always refer to the manufacturer’s instructions for specific guidelines and consult a professional if you encounter any difficulties. Now that you have completed the assembly process, it’s time to take your newly built bike out for a spin and enjoy the freedom of cycling. Happy riding!
How to Put Together a Lego Set
When it comes to putting together a Lego set, it’s important to approach the task with organization and patience. Building with Legos can be a fun and rewarding experience, but it can also be frustrating if you don’t have a plan in place. In this guide, we’ll take you through each step of the process, from sorting and organizing the Lego pieces to adding the finishing touches. So let’s dive in and start building!
Sorting and Organizing the Lego Pieces
One of the first things you’ll want to do before starting to build your Lego set is to sort and organize the Lego pieces. This will make the building process much smoother and more efficient. Begin by emptying all the pieces onto a clean, flat surface. Take a moment to appreciate the variety of shapes, sizes, and colors that you have in front of you. Now, it’s time to get organized.
Start by grouping similar pieces together. Separate the bricks from the plates, the flat pieces from the angled ones, and the small pieces from the large ones. You can even go a step further and sort them by color if you’re feeling particularly organized. Use small containers or trays to keep the different types of pieces separate. This will make it easier to find the specific pieces you need as you build.
Reading the Instruction Manual
Once you have your Lego pieces sorted and organized, it’s time to consult the instruction manual. This is your guide to building the set correctly and efficiently. Take a moment to read through the instructions from start to finish, familiarizing yourself with the steps and the different symbols used in the manual.
The instruction manual will typically have step-by-step illustrations that show you how to put the pieces together. It’s important to follow these instructions carefully to ensure that your Lego set turns out just as it should. If you’re unsure about a particular step, take a moment to study the illustration and read the accompanying text. This will help you understand how the pieces fit together and how they contribute to the overall structure of the set.
Starting with the Base and Foundation
Now that you have a clear understanding of the instructions, it’s time to start building the Lego set. Begin by locating the pieces for the base and foundation of the set. These are usually the larger, more stable pieces that provide a solid structure for the rest of the set.
Carefully follow the instructions to attach these pieces together, making sure they are firmly connected. This will serve as the starting point for building the rest of the set. Take your time to align the pieces correctly and ensure that they are securely in place.
Building the Main Structure
With the base and foundation in place, it’s time to move on to building the main structure of the Lego set. This is where the set starts to take shape and become recognizable. Follow the instructions step by step, adding each piece to the structure as directed.
As you build, pay attention to the connections between the pieces. Lego sets are designed to fit together snugly, so make sure each piece is securely attached to the ones around it. Take breaks to admire your progress and appreciate how the set is coming together.
Attaching Additional Components
Once the main structure is complete, it’s time to add the additional components that make the set unique. These may include accessories, decorations, or moving parts. Refer to the instruction manual to locate the pieces needed for each component and follow the step-by-step instructions to attach them to the main structure.
As you work on adding these components, take note of how they contribute to the overall design and functionality of the set. Lego sets often have clever mechanisms and interactive features, so make sure to test them out as you go along. It’s all part of the fun!
Adding Details and Decorations
Now that the main structure and additional components are in place, it’s time to add the finishing touches to your Lego set. This is where you can let your creativity shine and personalize the set to your liking. Use the smaller, more detailed pieces to add decorations, patterns, or any extra features that are included in the set.
Take your time with this step and pay attention to the small details. Every piece you add will contribute to the overall look and feel of the set. Step back and admire your work as you bring the set to life with these final touches.
Reviewing and Adjusting the Completed Set
Once you’ve finished building your Lego set, take a moment to review your work and make any necessary adjustments. Check that all the pieces are securely attached and that the set is stable. If you notice any loose pieces or areas that need reinforcement, go back and make the necessary adjustments.
Now is also a good time to compare your completed set with the picture on the box or in the instruction manual. Make sure your set matches the intended design and that you haven’t missed any steps along the way. This final review will ensure that your Lego set is complete and ready to be displayed or played with.
How to Put Together a Computer
Building your own computer can be a rewarding and fulfilling experience. Not only do you get to customize your machine to meet your specific needs, but you also gain a deeper understanding of how the various components work together. In this guide, we will take you through the step-by-step process of assembling your computer from scratch. Let’s dive in!
Gathering the Necessary Components and Tools
Before you begin assembling your computer, it’s essential to gather all the necessary components and tools. Here is a checklist of what you’ll need:
- CPU (Central Processing Unit)
- Motherboard
- RAM (Random Access Memory)
- Storage Devices (Hard Drive or SSD)
- Power Supply Unit (PSU)
- Graphics Card (optional)
- Cables and Wires
- Screwdriver
- Thermal Paste
- Anti-static wrist strap (optional)
Make sure you have all the components listed above before you proceed. Double-check that you have the correct specifications for each component to ensure compatibility.
Preparing the Workspace and Grounding Yourself
Creating a suitable workspace is crucial for a smooth and safe computer assembly process. Find a clean, well-lit area with enough space to spread out your components and tools. Clear any clutter or potential hazards that could interfere with your work.
Before you handle any computer parts, it’s essential to ground yourself to prevent static electricity from damaging sensitive components. You can use an anti-static wrist strap or touch a grounded metal object to discharge any static charge.
Installing the Power Supply
The power supply unit (PSU) is responsible for supplying power to all the components in your computer. Begin by placing the PSU in the designated area at the top or bottom of the case, depending on its design.
Next, align the screw holes of the PSU with the corresponding holes in the case. Use the provided screws to secure the PSU firmly in place. Ensure that the fan faces the desired direction for proper airflow.
Mounting the Motherboard
The motherboard serves as the central hub that connects all the components of your computer. Start by aligning the screw holes on the motherboard with the standoffs in the case. Standoffs are small metal pegs that elevate the motherboard and prevent it from touching the case directly.
Once aligned, use the provided screws to secure the motherboard to the standoffs. Ensure that all screws are tight but not overly tightened, as this could damage the motherboard.
Connecting the Processor, RAM, and Storage Devices
Now that the motherboard is securely mounted, it’s time to install the processor, RAM, and storage devices.
Begin by locating the CPU socket on the motherboard. Lift the retention arm and carefully place the CPU into the socket, ensuring that it aligns with the notches. Gently lower the retention arm to secure the CPU in place.
Next, locate the RAM slots on the motherboard. Press down firmly on both ends of the RAM stick until it clicks into place. Repeat this step for each RAM stick you have.
For storage devices, consult the motherboard manual to identify the appropriate SATA ports. Connect the SATA cables to the storage devices and the motherboard, ensuring a secure connection.
Installing the Graphics Card
If you plan on using a dedicated graphics card, now is the time to install it. Locate the PCIe x16 slot on the motherboard and remove the corresponding expansion slot cover on the case.
Gently align the graphics card with the PCIe slot and firmly push it down until it is fully seated. Secure the graphics card to the case using the screws provided.
Connecting and Organizing Cables and Wires
With the major components in place, it’s time to connect and organize the cables and wires. Refer to the motherboard manual to identify the appropriate connectors for each cable.
Start by connecting the main power cables from the PSU to the motherboard. These usually include the 24-pin ATX power connector and the 8-pin CPU power connector. Ensure a secure connection by firmly pushing the connectors into their respective ports.
Next, connect the SATA data cables from the storage devices to the motherboard. Use cable ties or zip ties to bundle and organize the cables neatly, improving airflow and aesthetics.
Finally, connect any additional cables required for peripherals such as USB ports, audio jacks, and fans. Ensure that all connections are secure and properly routed to avoid any interference.
Congratulations! You have successfully assembled your computer from scratch. Take a moment to double-check all connections and make any necessary adjustments. Now, it’s time to power on your computer and install the operating system. Refer to the next section for further instructions on how to complete your computer setup.
In conclusion, assembling a computer may seem like a daunting task, but by following these step-by-step instructions and having the necessary components and tools, you can confidently build your own computer. Enjoy the satisfaction of knowing that you have created a machine tailored to your needs and gain a deeper understanding of its inner workings. Happy computing!